Content
Snipcart
-
Get API key
-
Get Generated HTML code to embed to WordPress theme
-
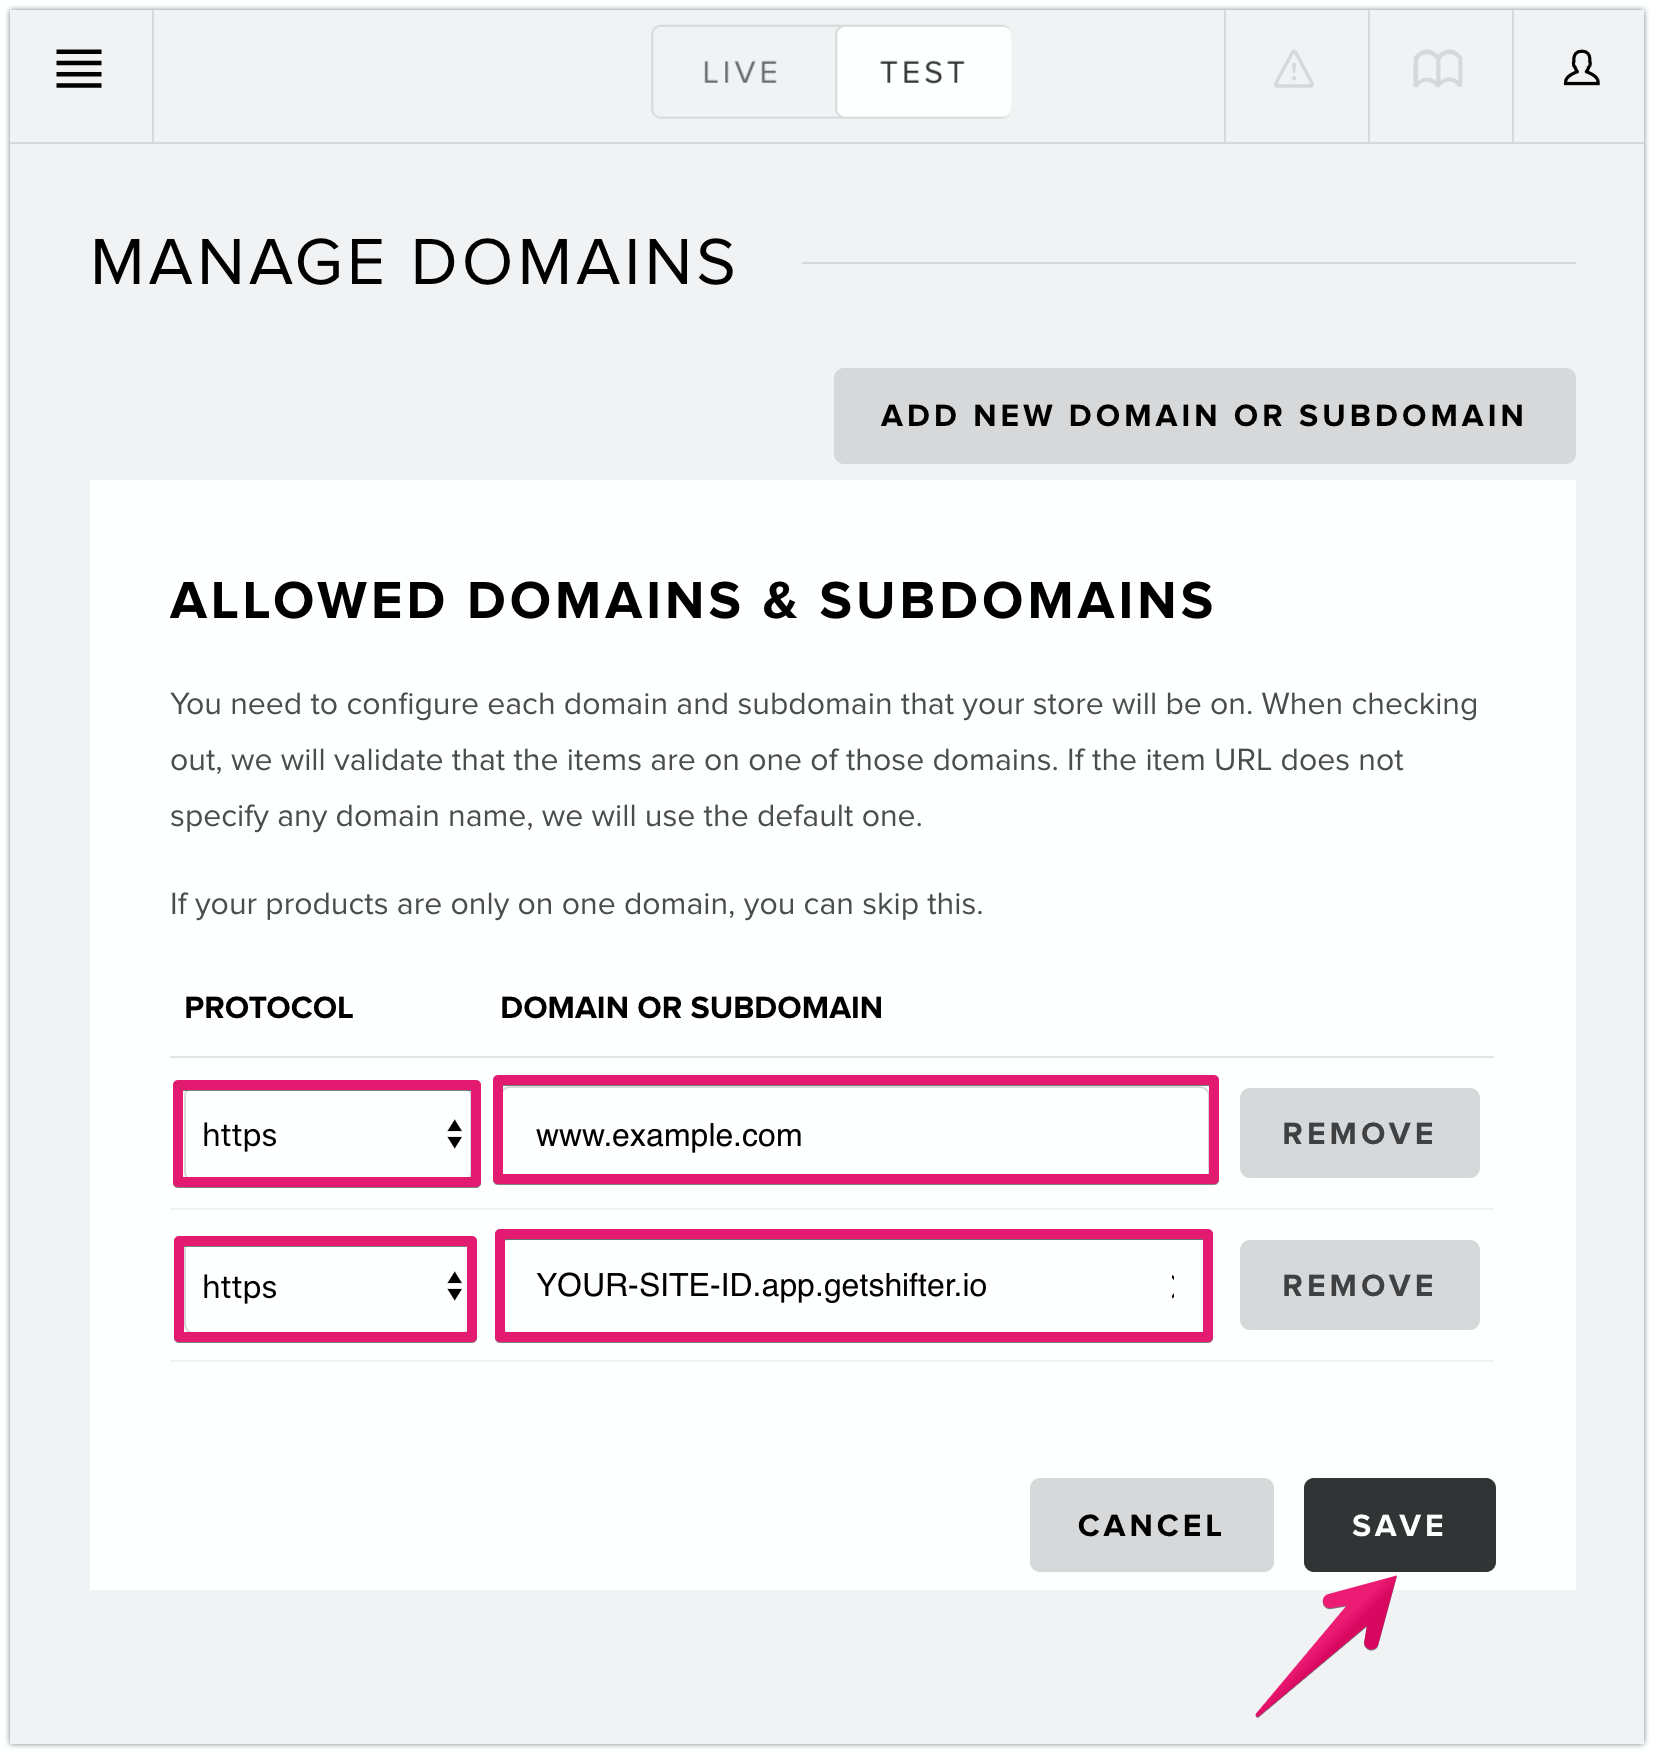
Whitelist your domain name and Shifter’s domain (
SITE-ID.static.getshifter.net,getshifter.io)
WordPress
-
Install and setup Advanced Custom Field plugin
-
Install and setup Custom Post UI plugin
-
Modifying theme files (e.g.
header.php,single-snipcart_product.php,archive-snipcart_product.php)
Also refer to
-
Snipcart’s official support document : WordPress Integration: An Easier Way to Manage Products
-
Scotch’s tutorial: Full E-Commerce Integration of Snipcart with WordPress
Phase 1: Setting up Snipcart account
We should do are:
-
Sign up
-
Get API key and HTML code to WordPress integration
Sign up to Snipcart
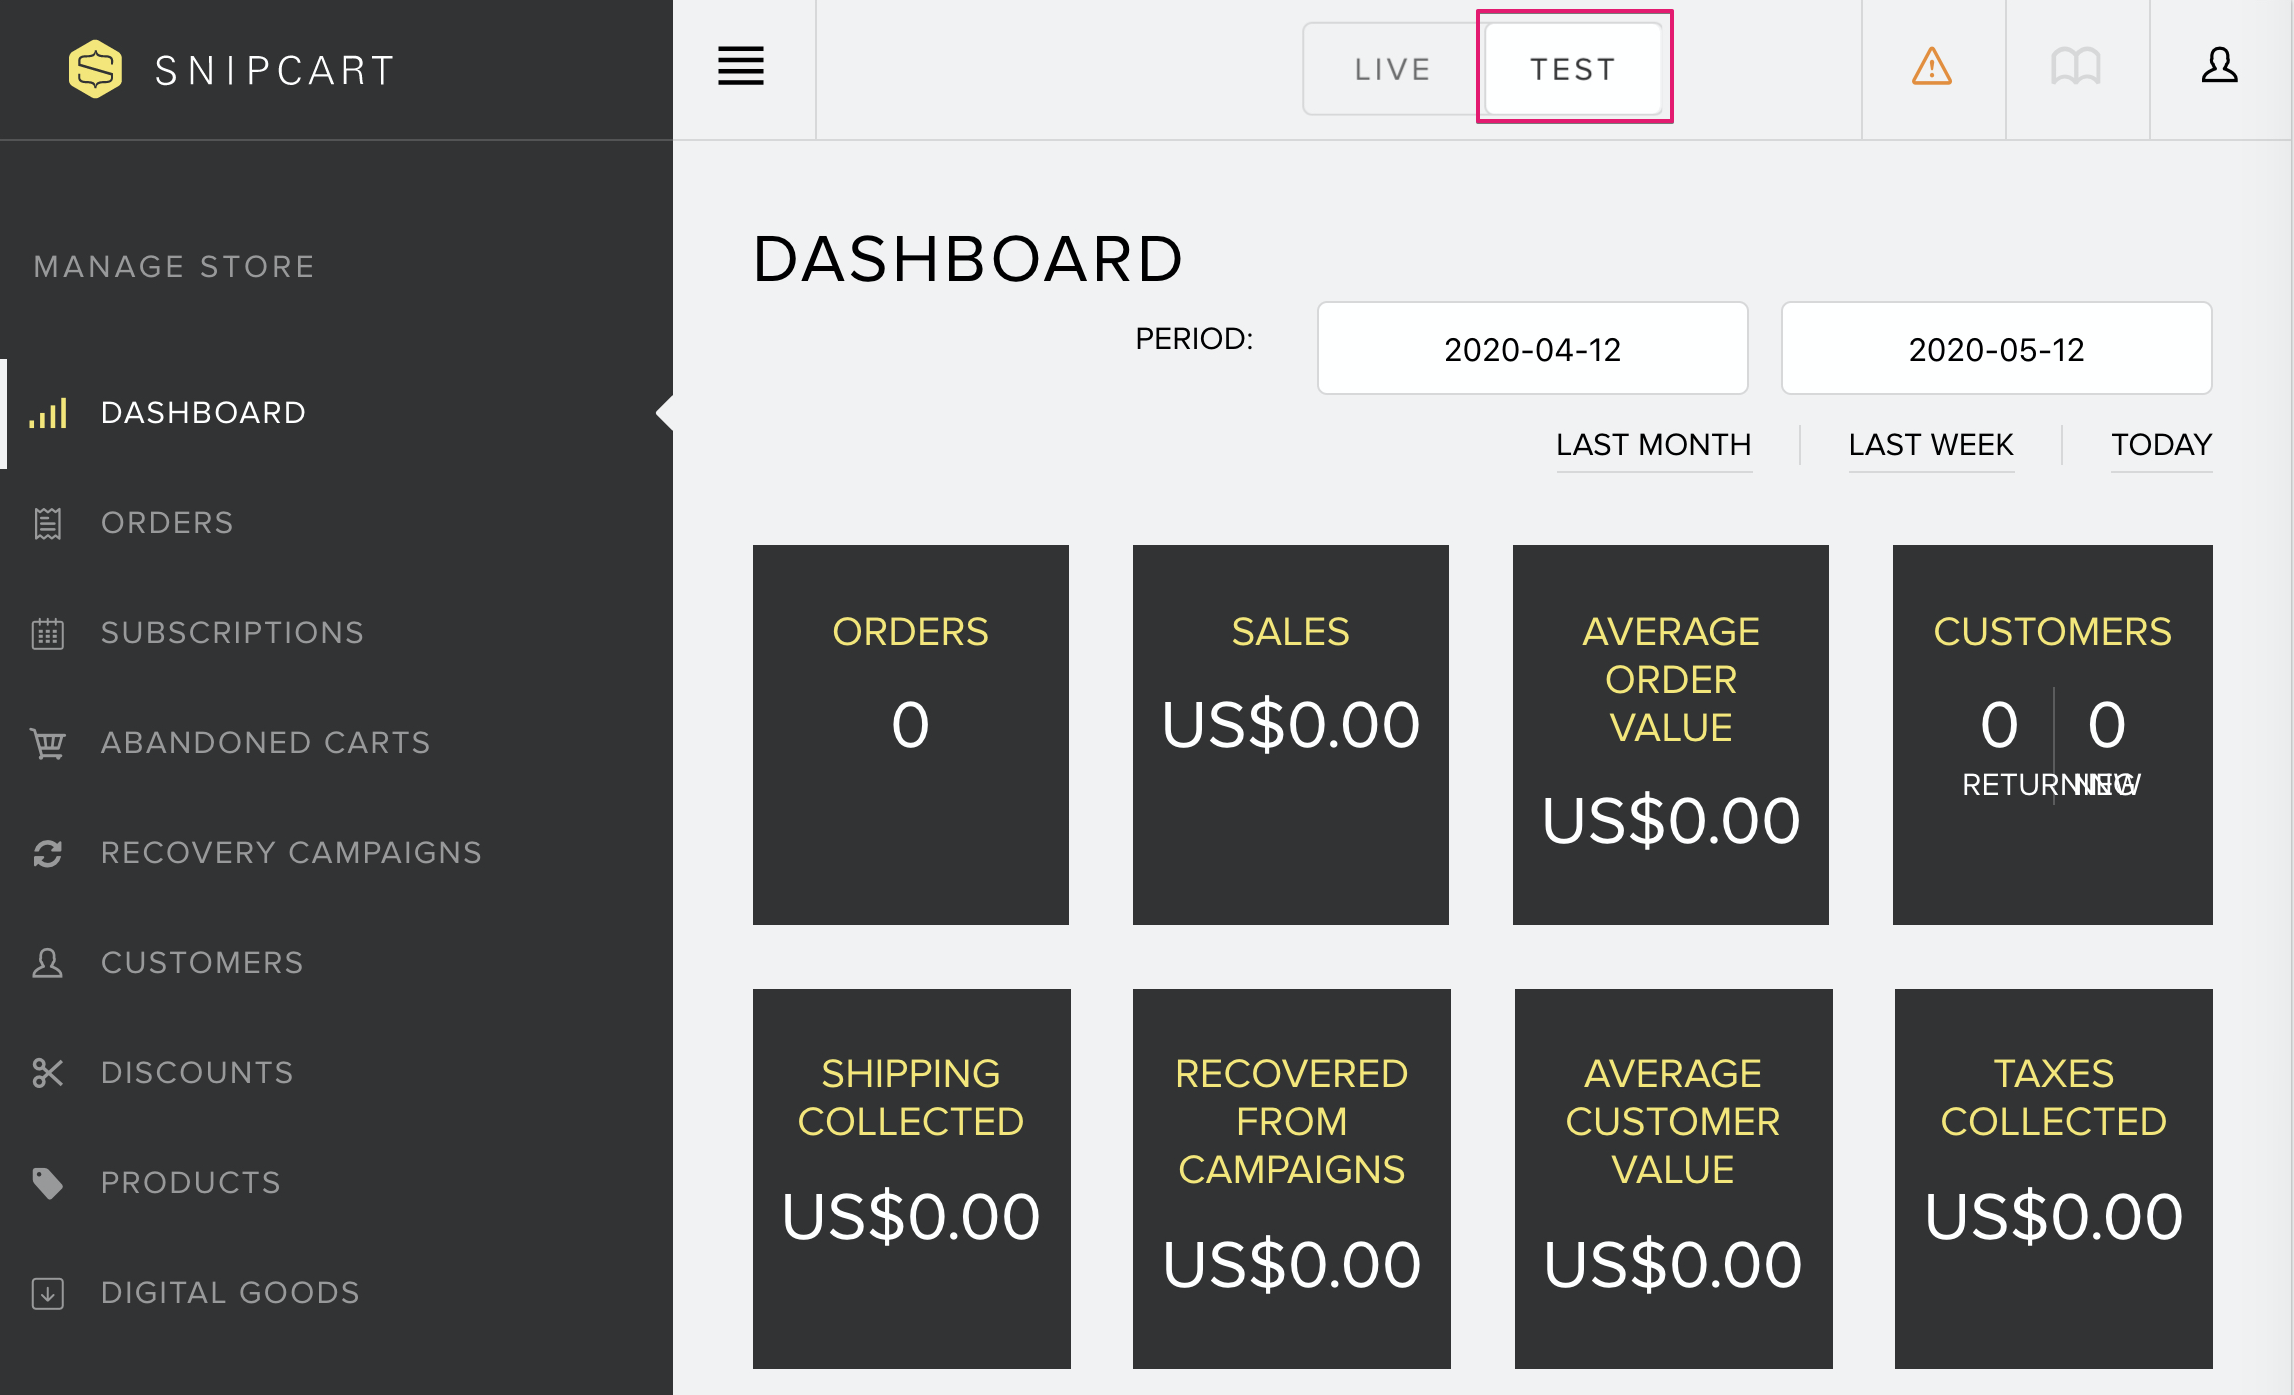
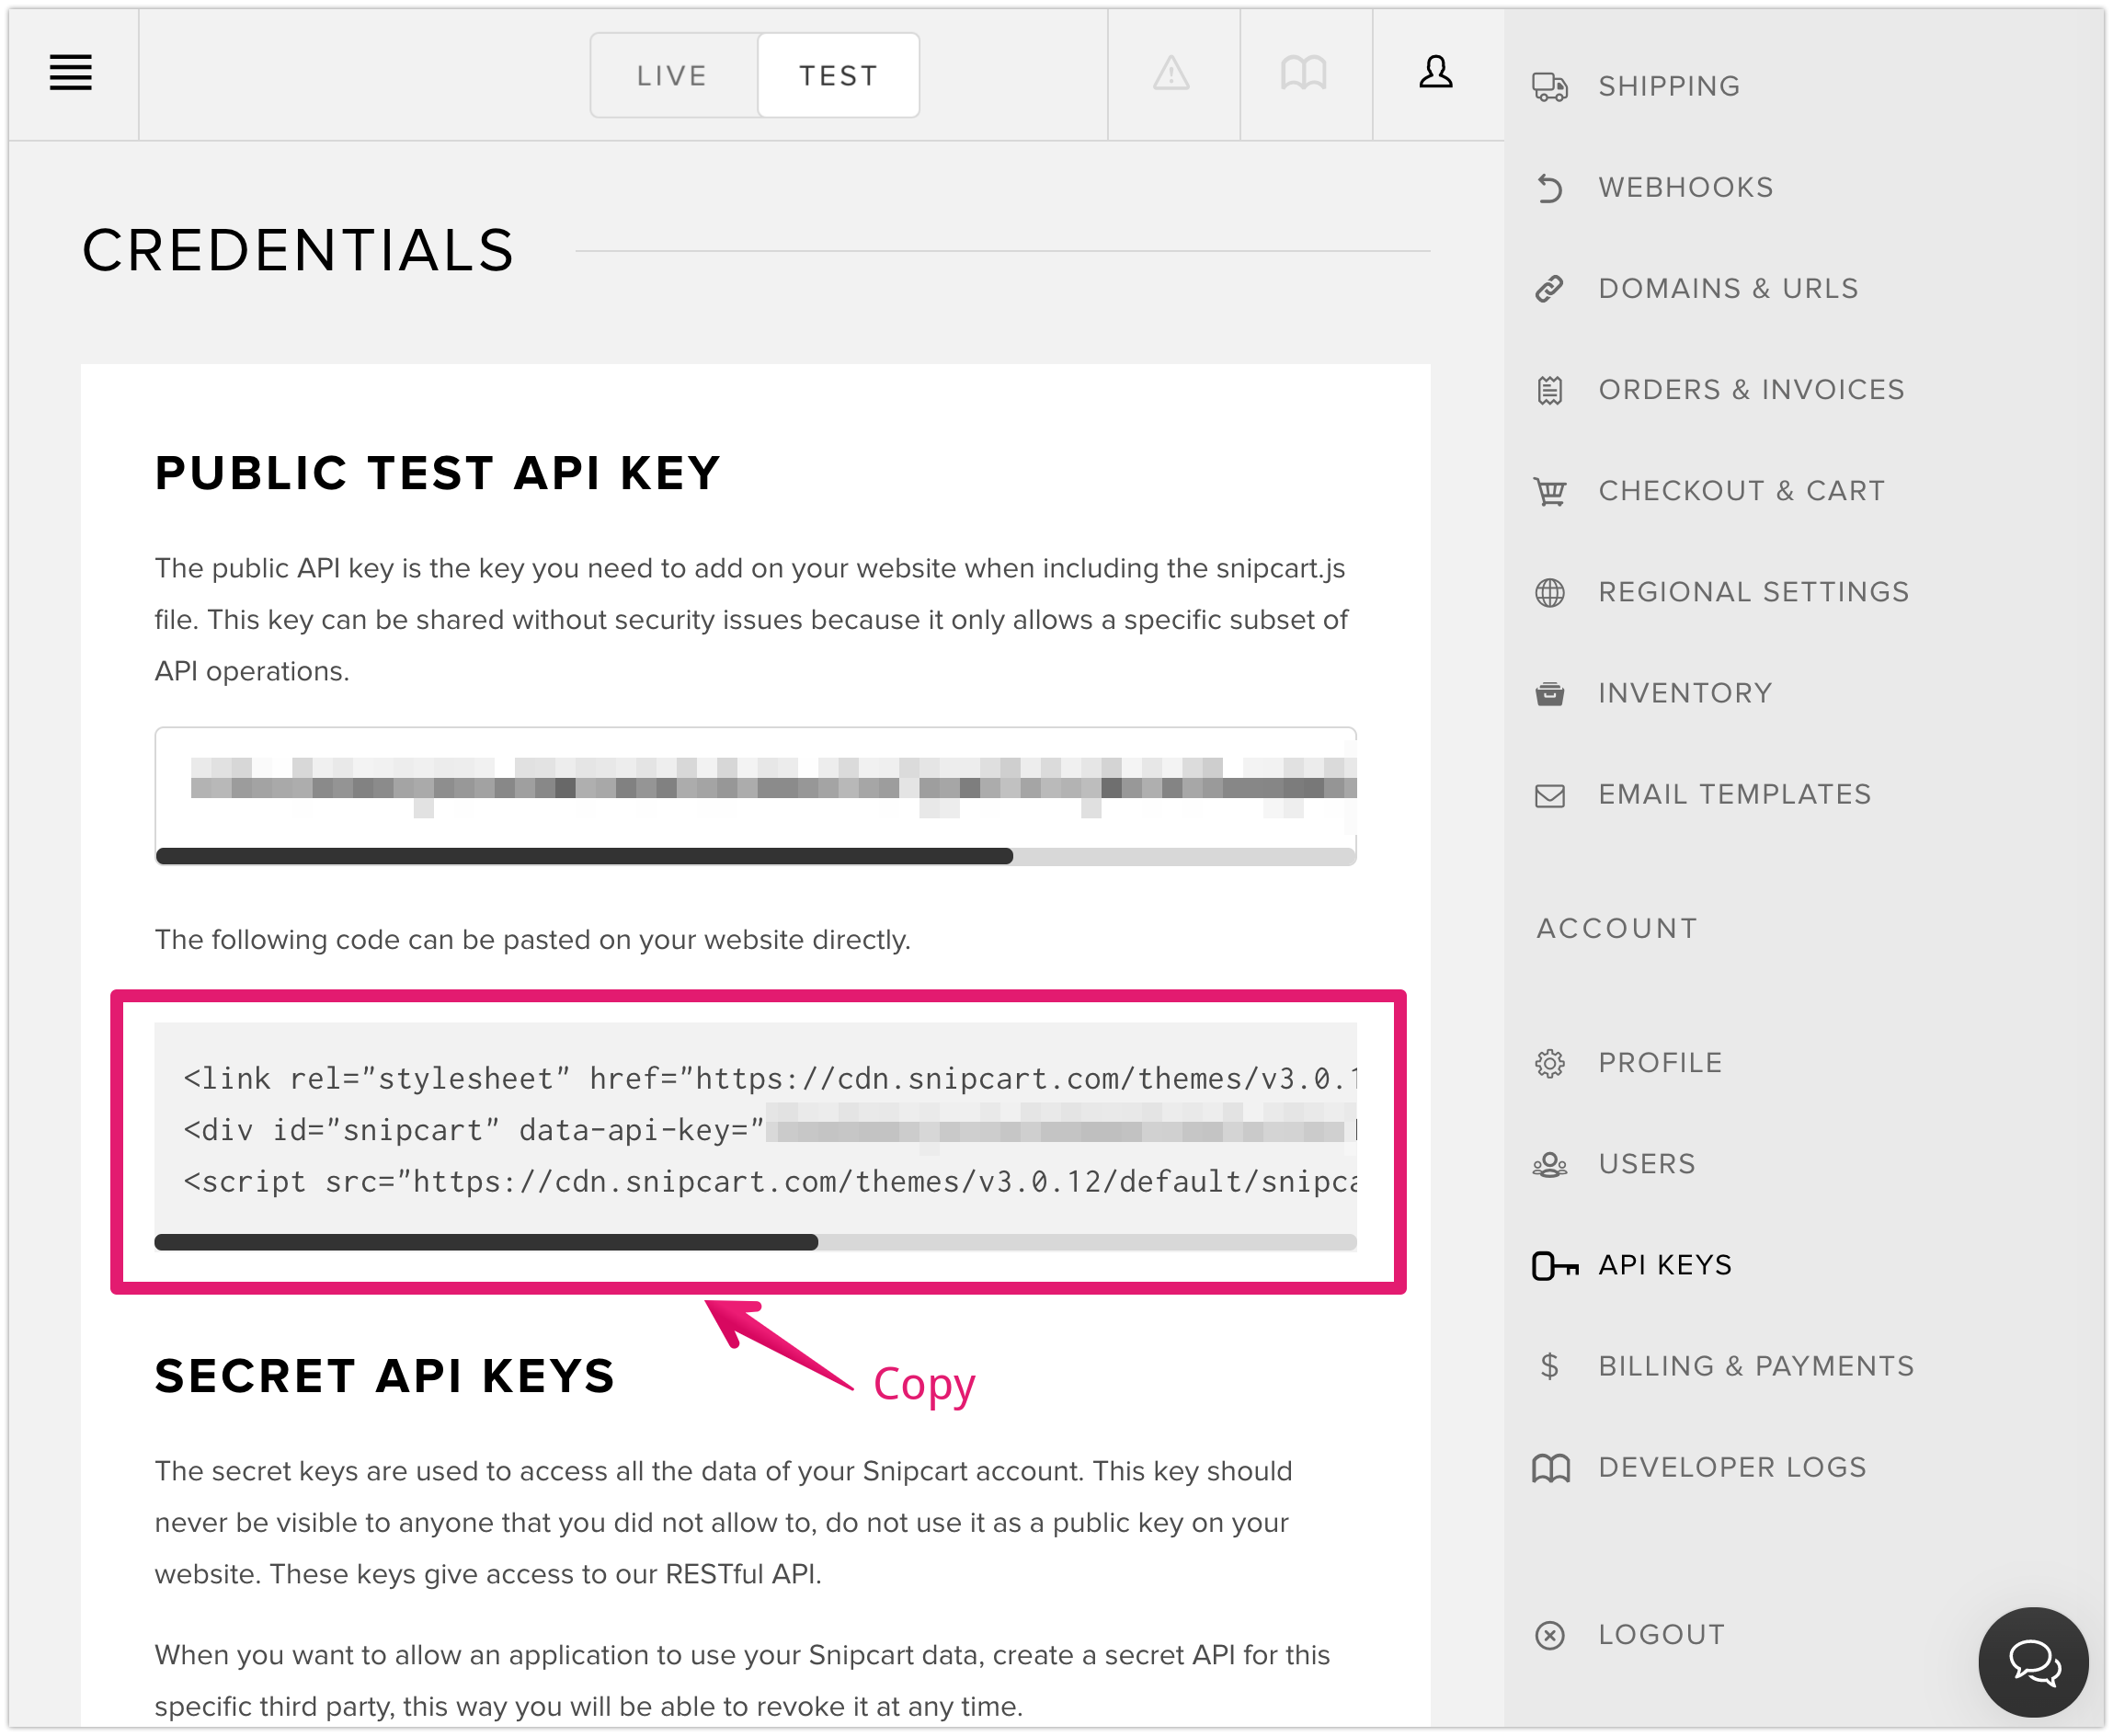
Make sure [TEST] is activated
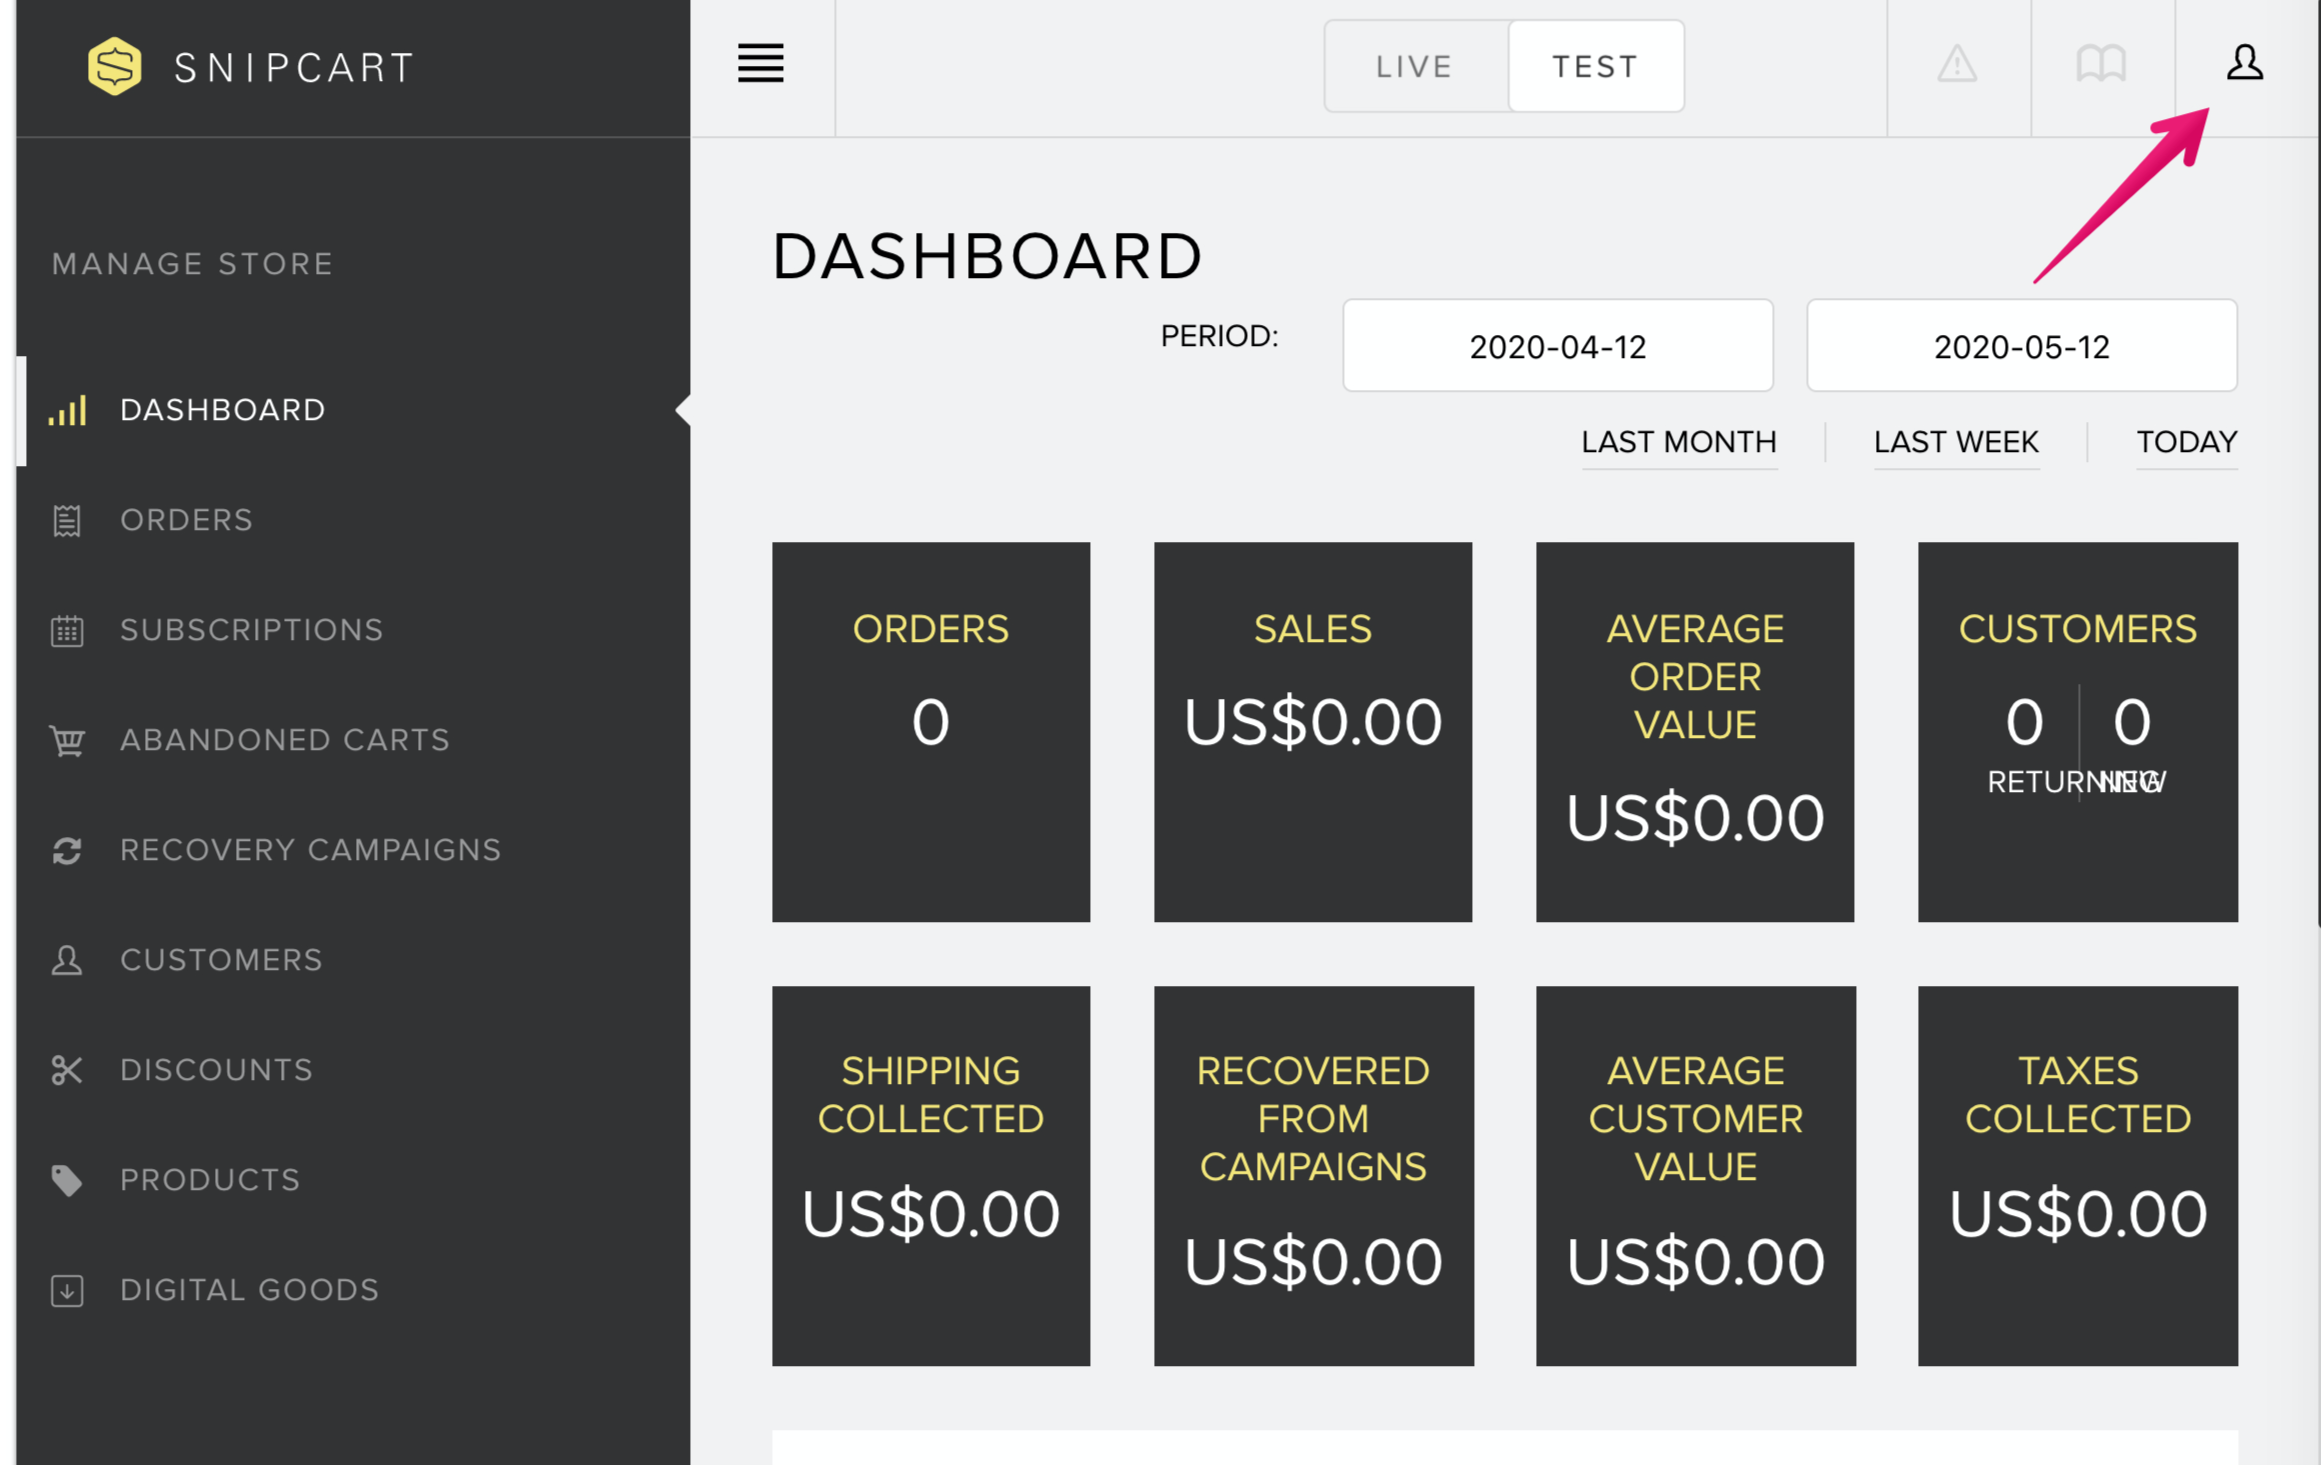
Click Account icon top of right of page
Click [API KEYS]
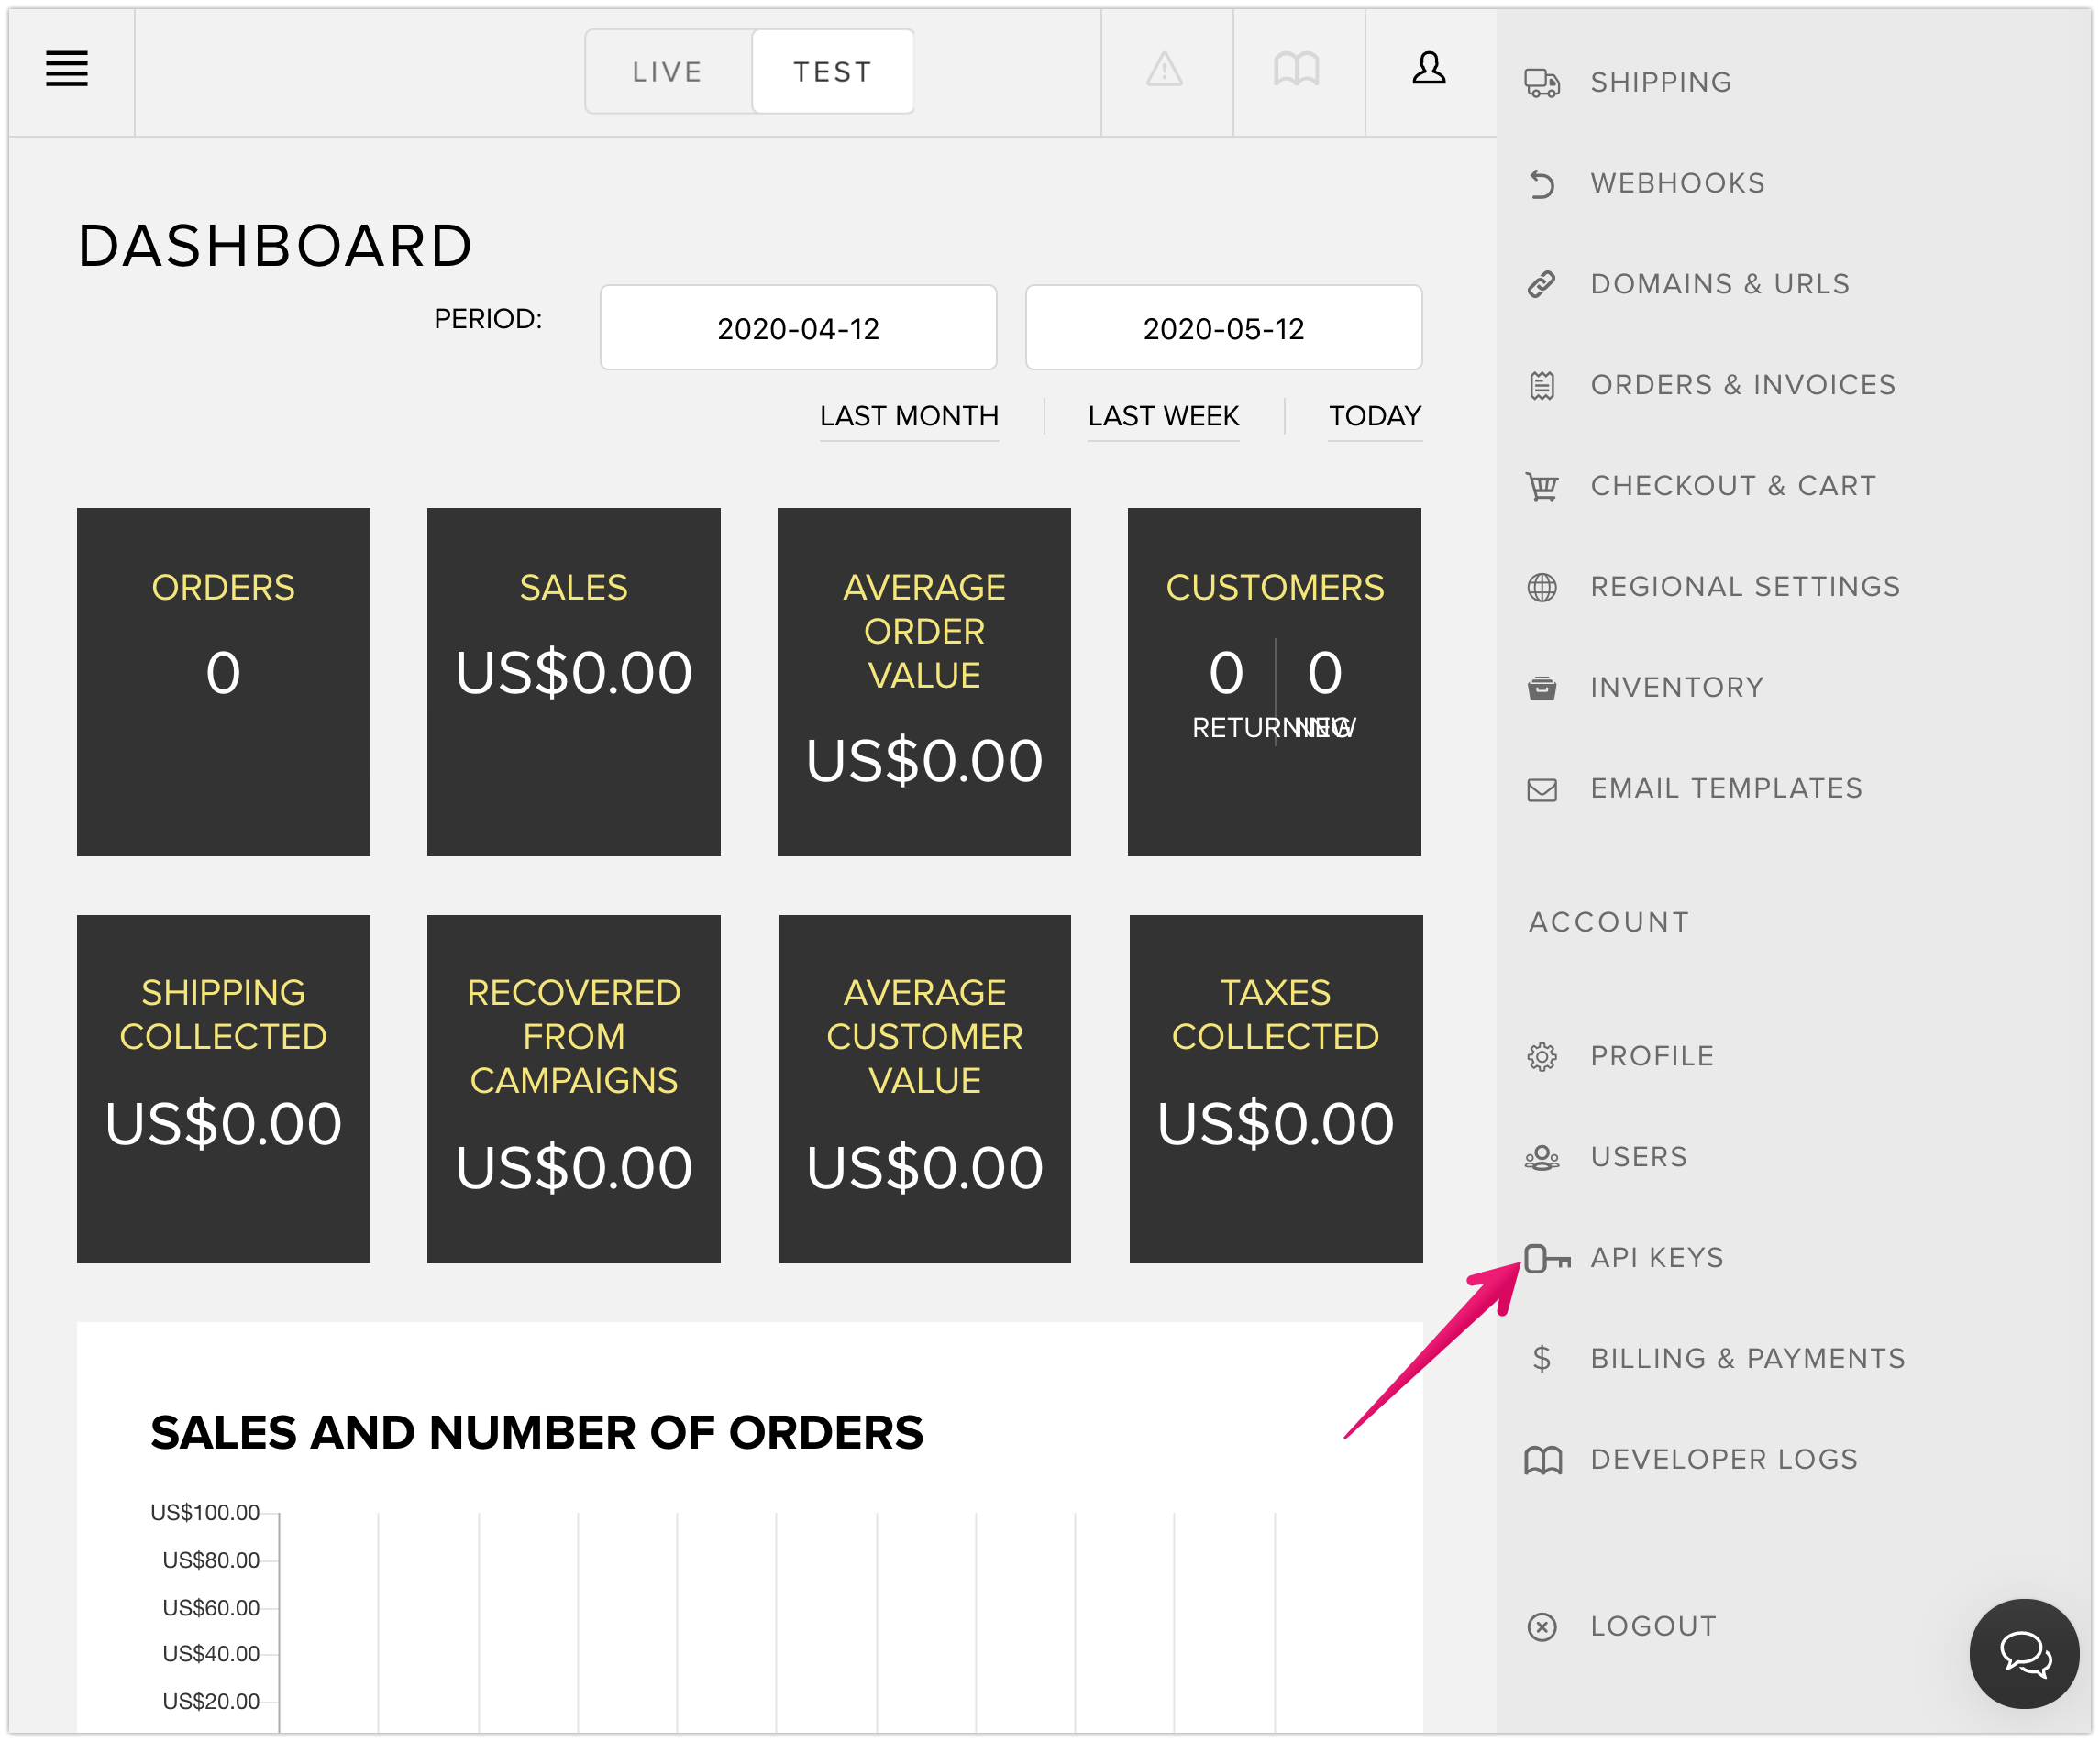
Copy HTML code contains API key
This code will be paste to WordPress theme’s file.
Whitelist domains
Navigate to [DOMAINS & URLS] under [ACCOUNT] menu
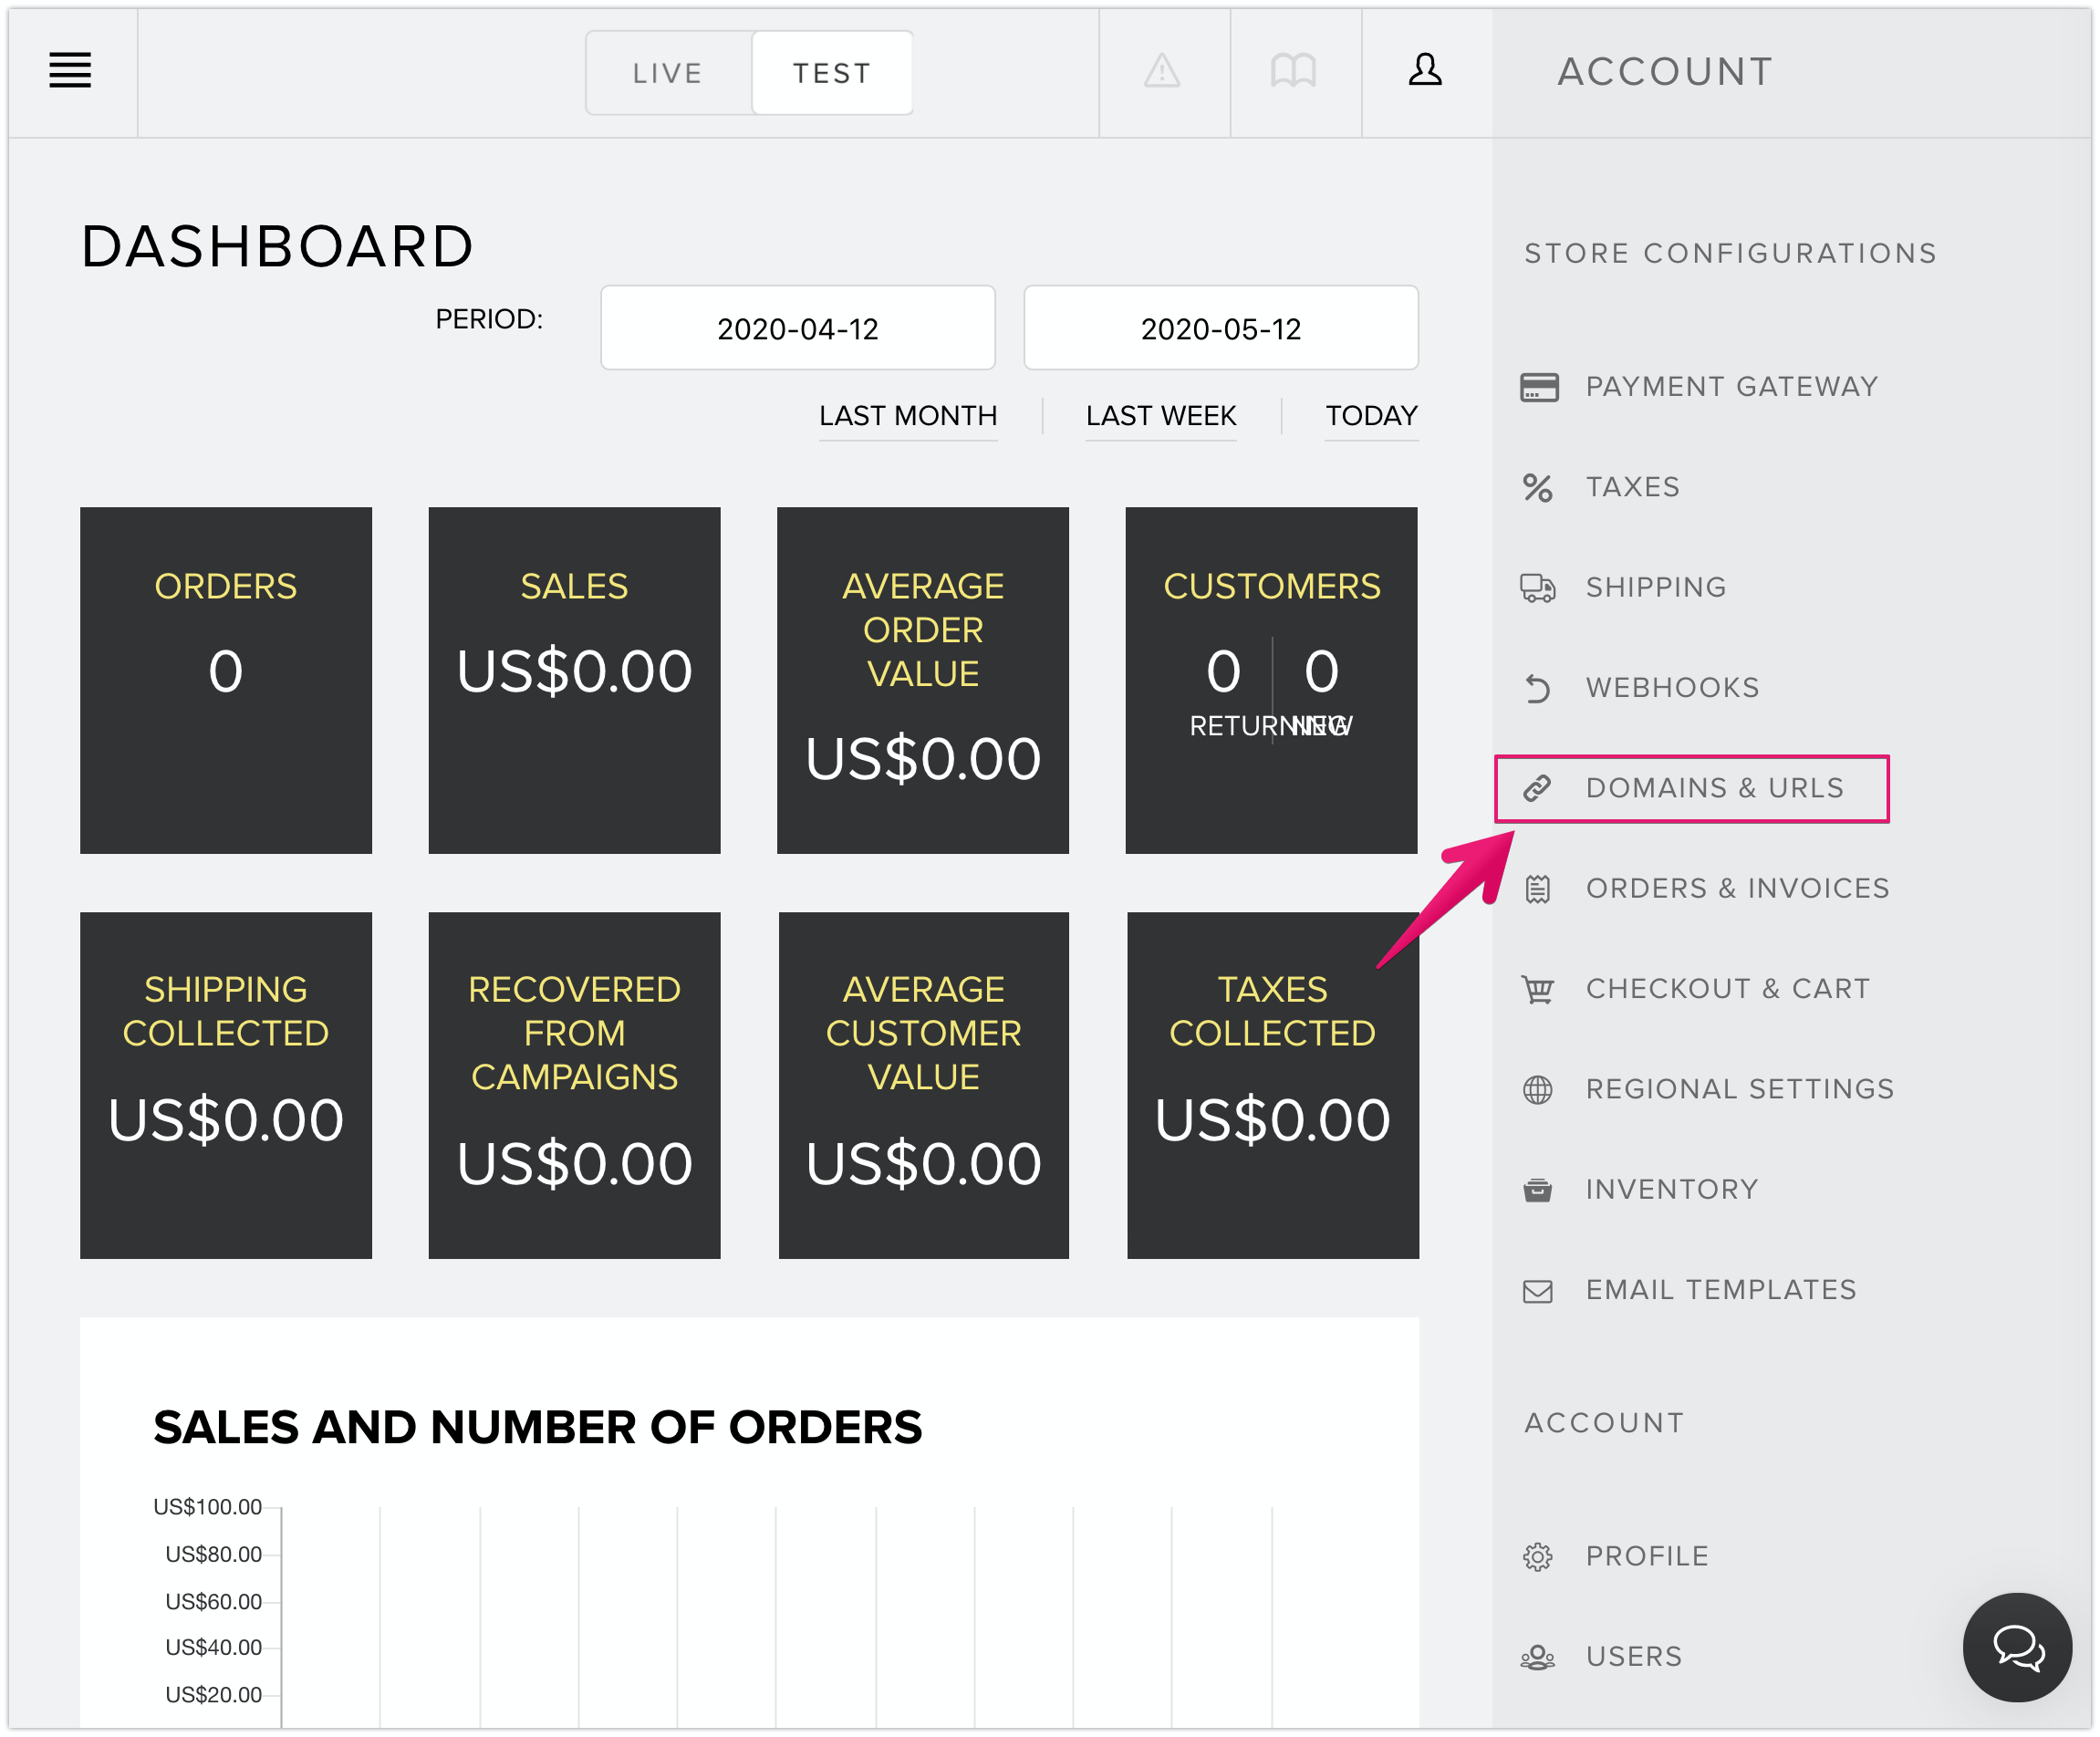
Set default website domain
Choose [https] from [PROTOCOL] and input your domain name (e.g. www.example.com, getshfter.io) to DOMAIN field.
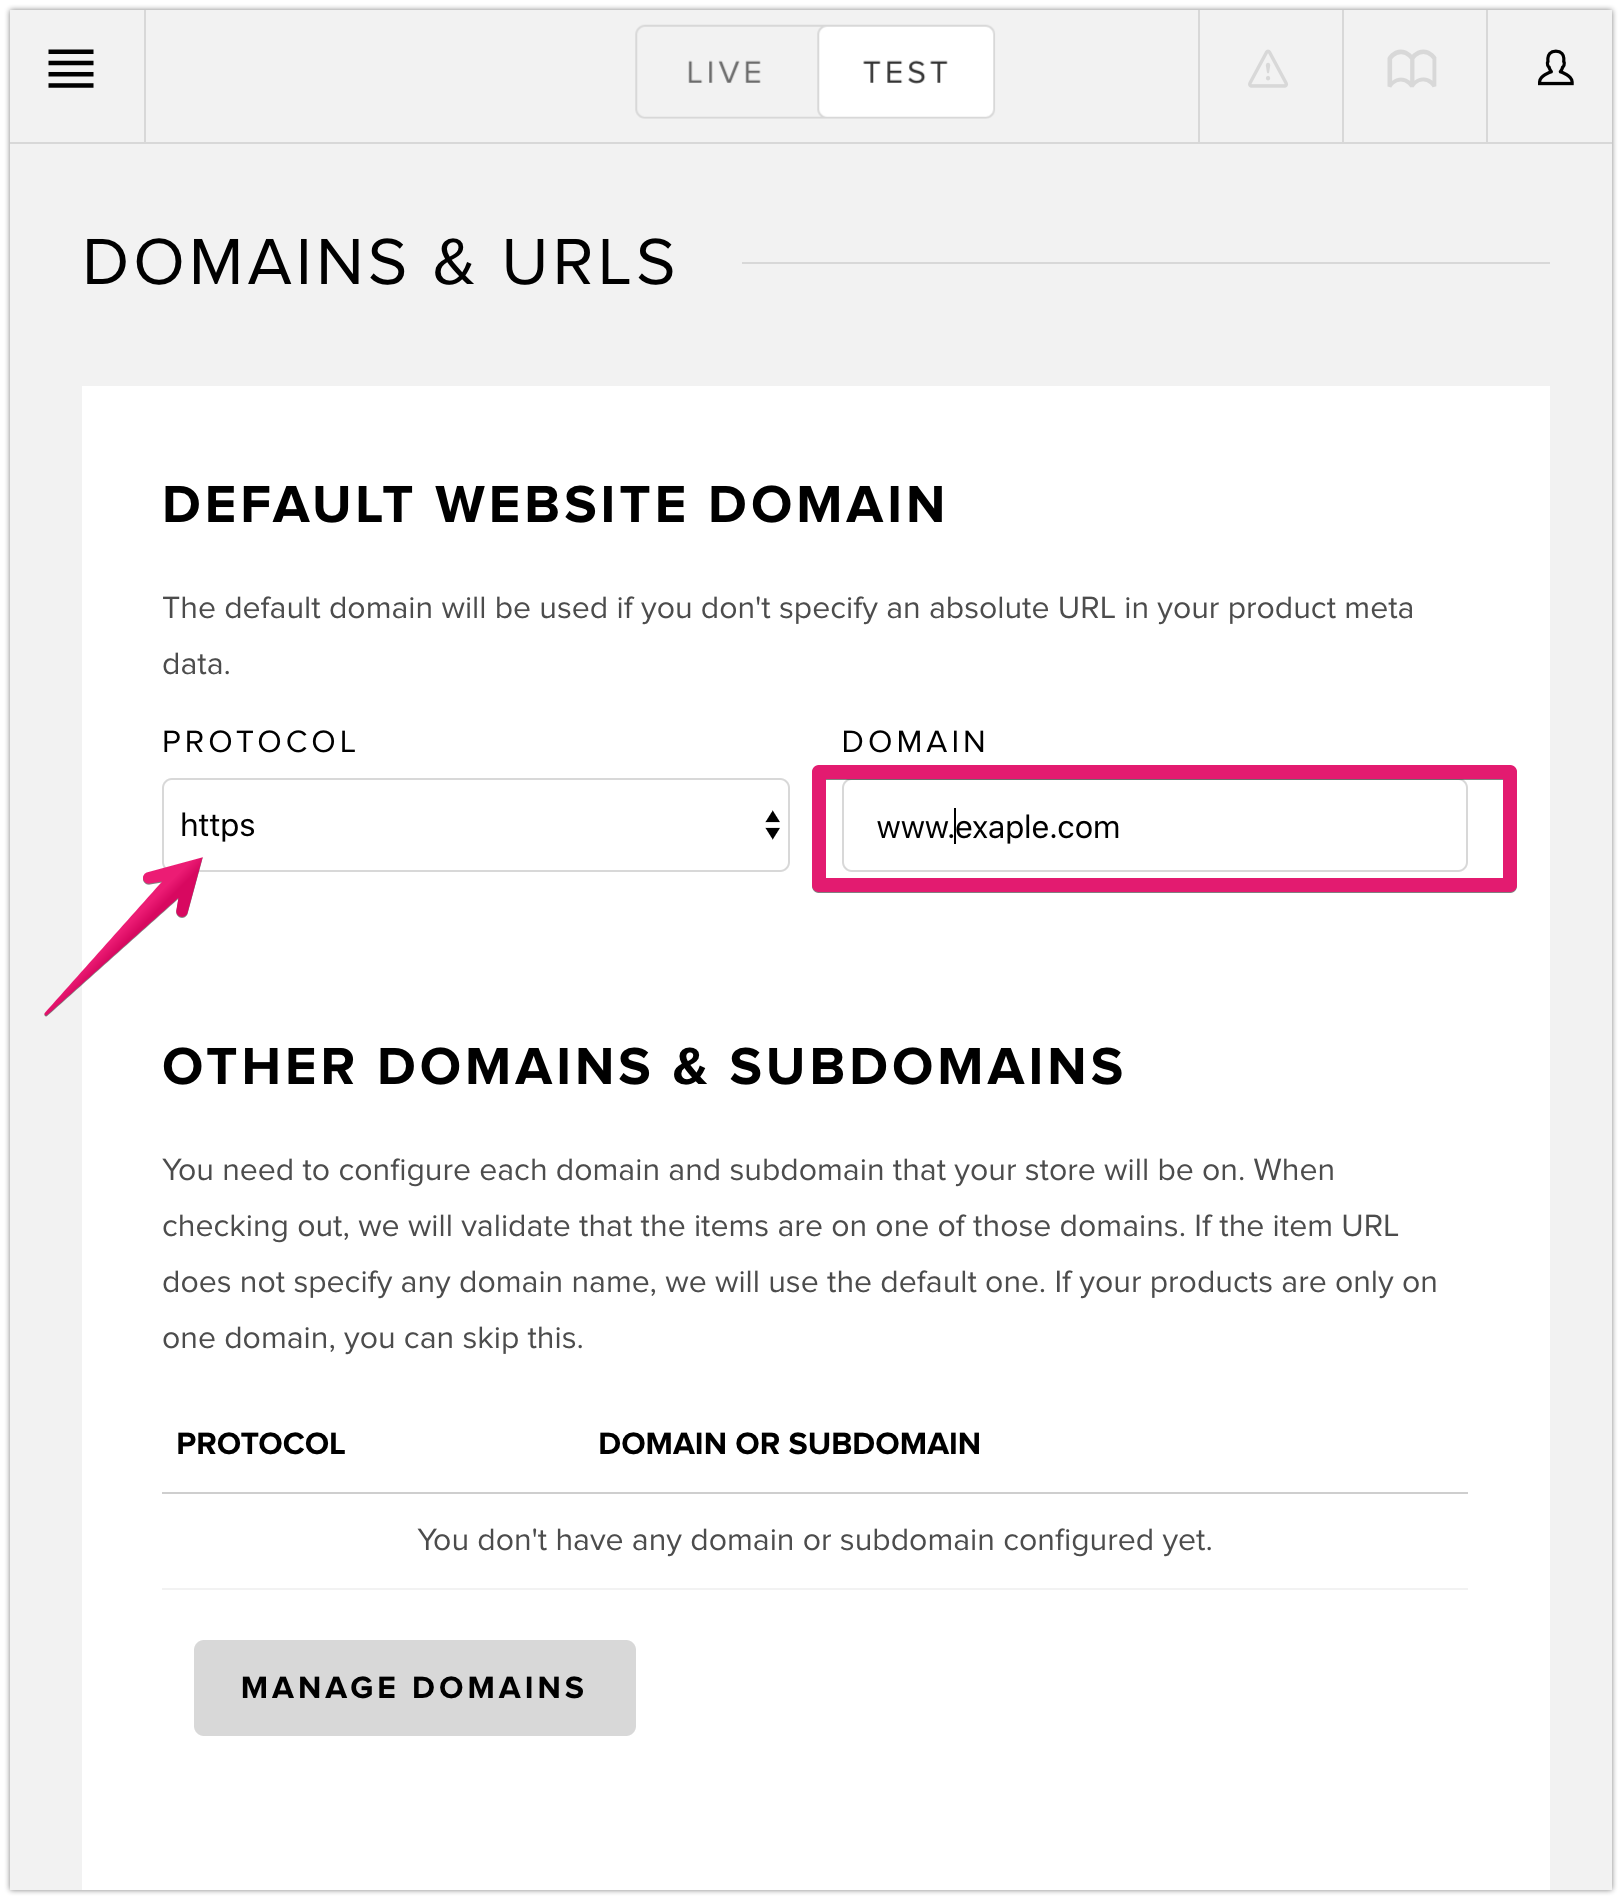
Click [Save] to apply changes
Phase 2. Install set up plugins on WordPress
Todos on WordPress
-
Install required plugins (Advanced Custom Field and Custom Post UI) and set them up
-
Modifying theme files (e.g.
header.php,single-snipcart_product.php,archive-snipcart_product.php) -
Confirm Snipcart wroks
-
Generate and deploy
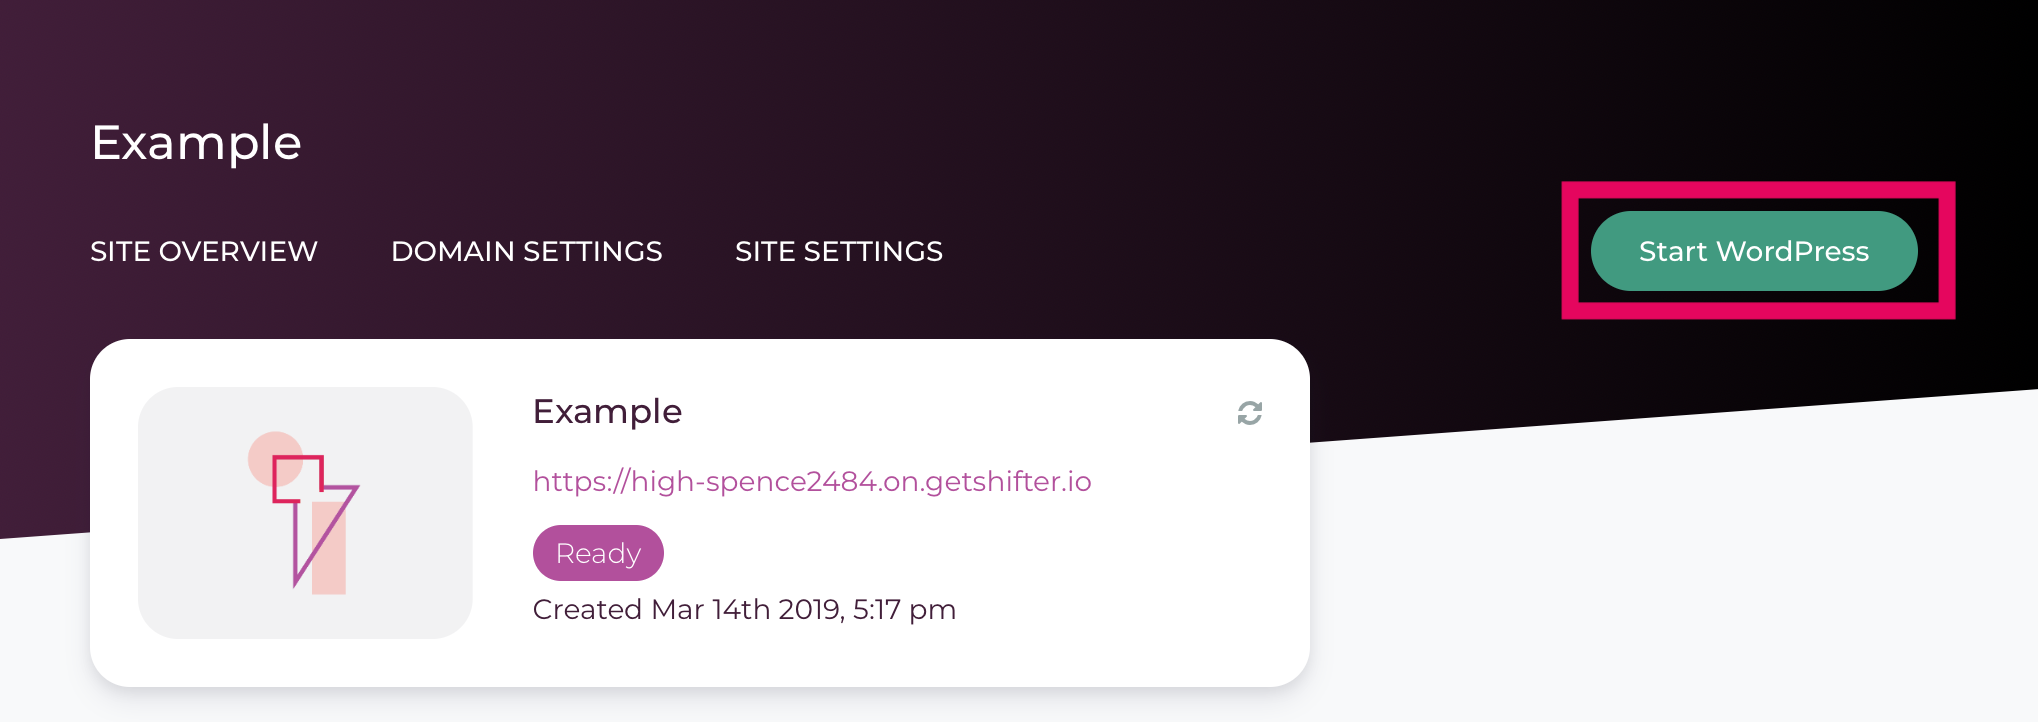
Start WordPress
Login to Shifter dashboard
Start WordPress and login to it
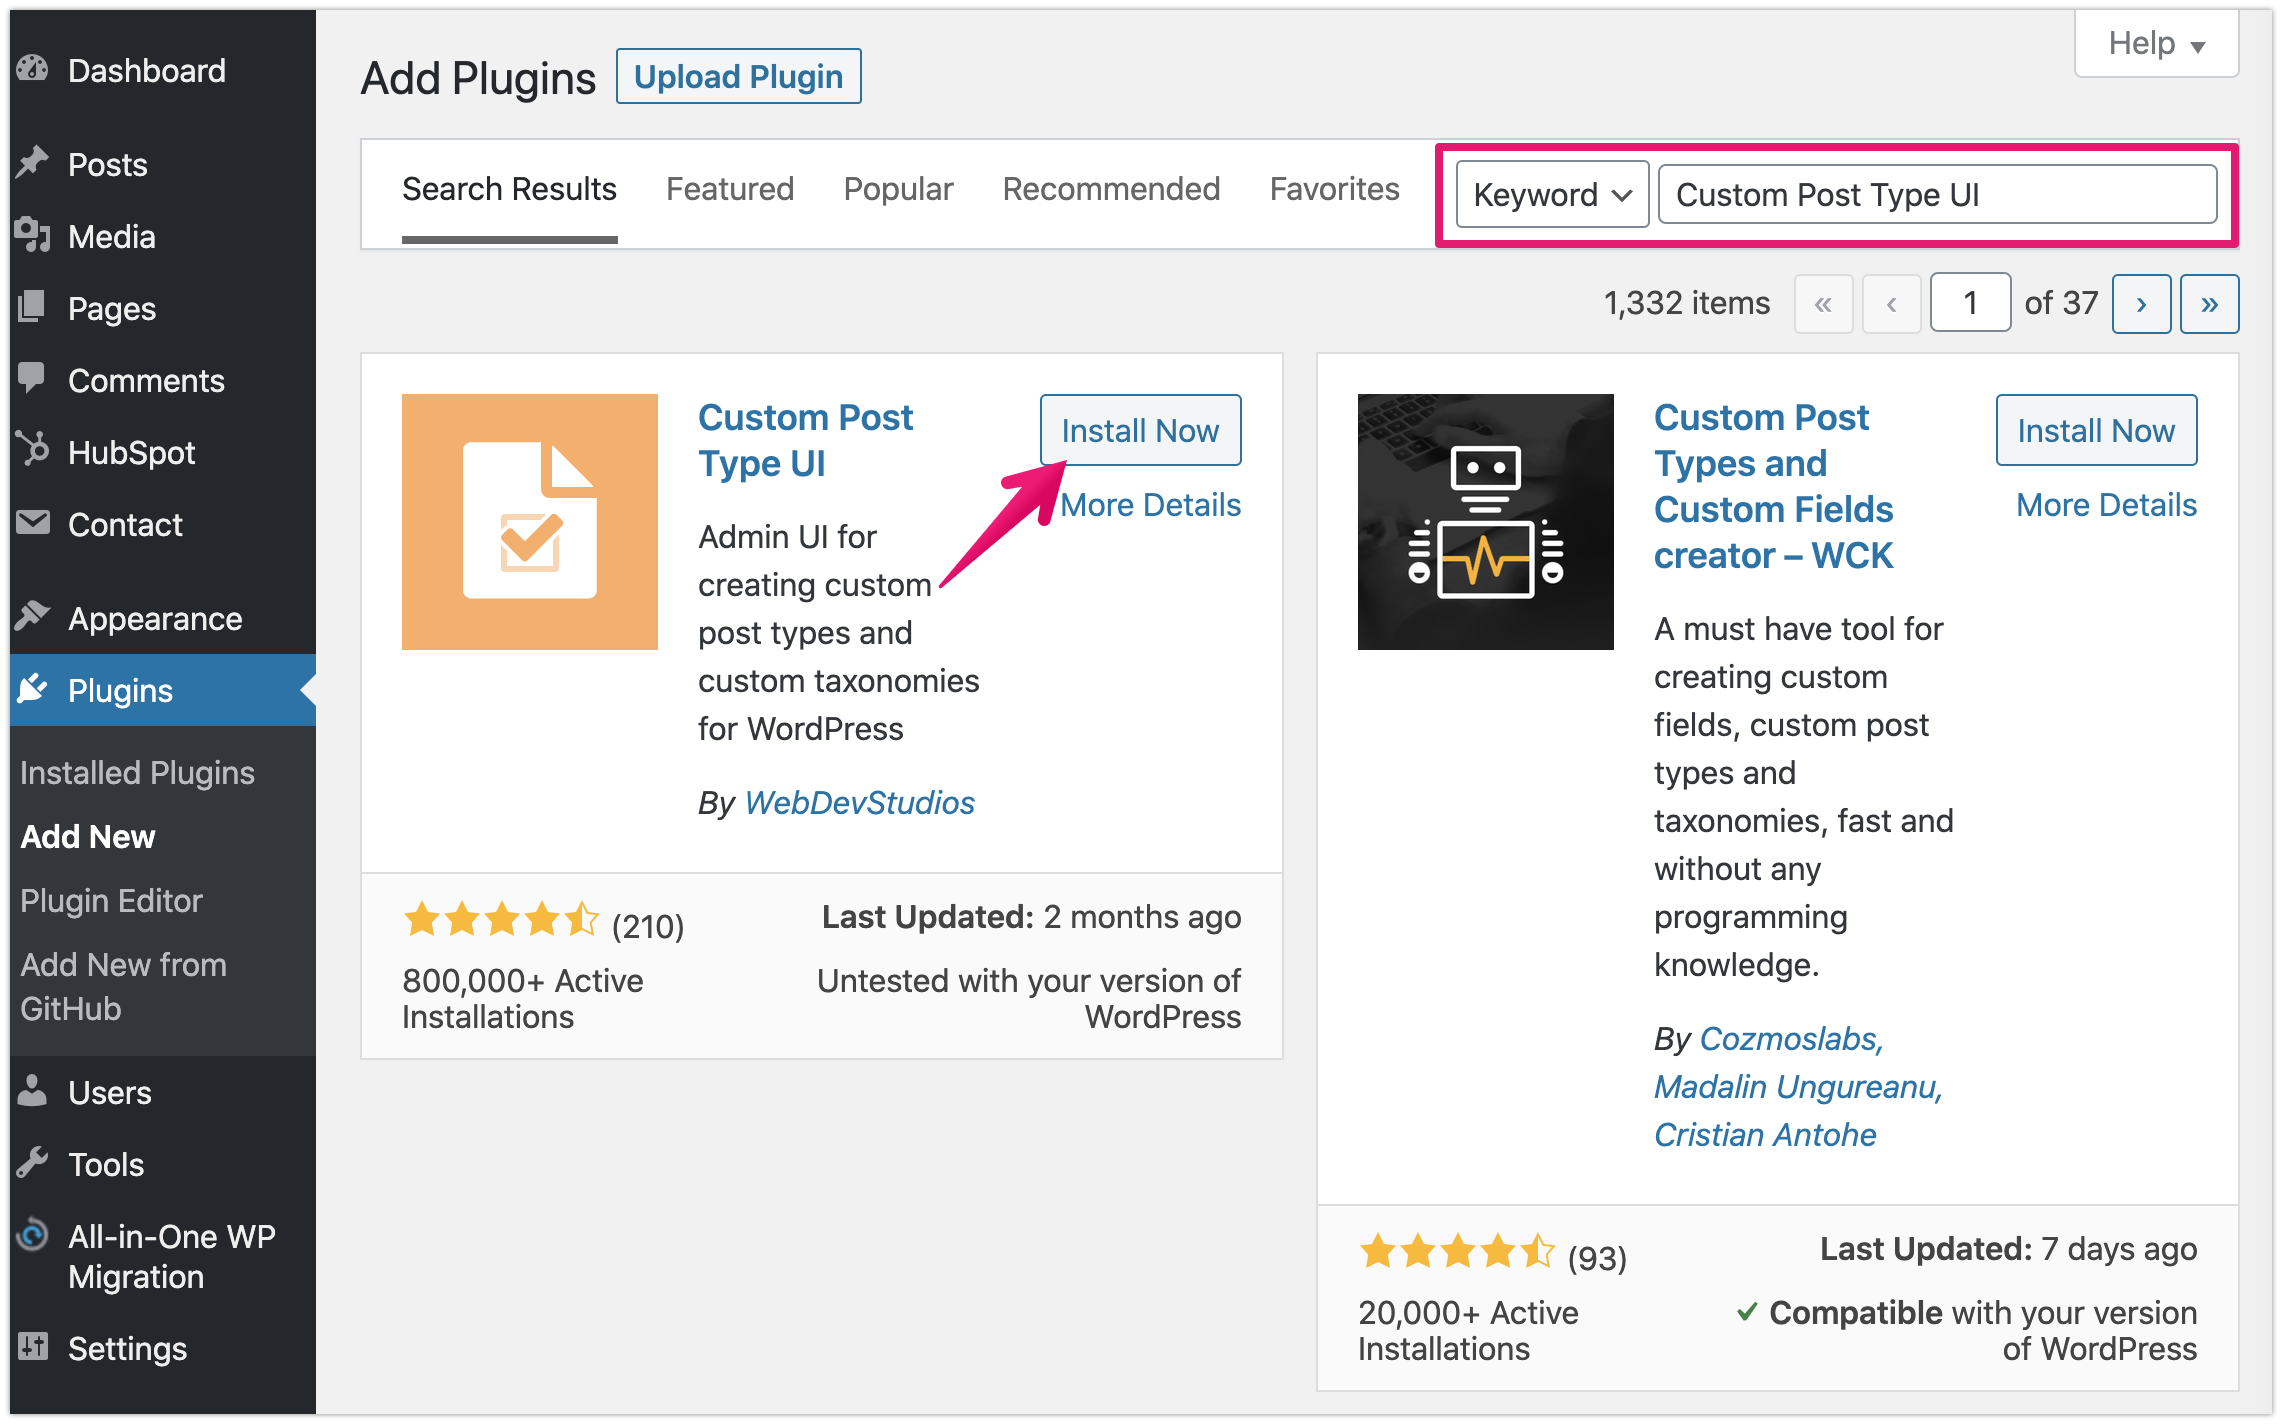
Setting up Custom Post UI plugin
Install Custom Post UI plugin
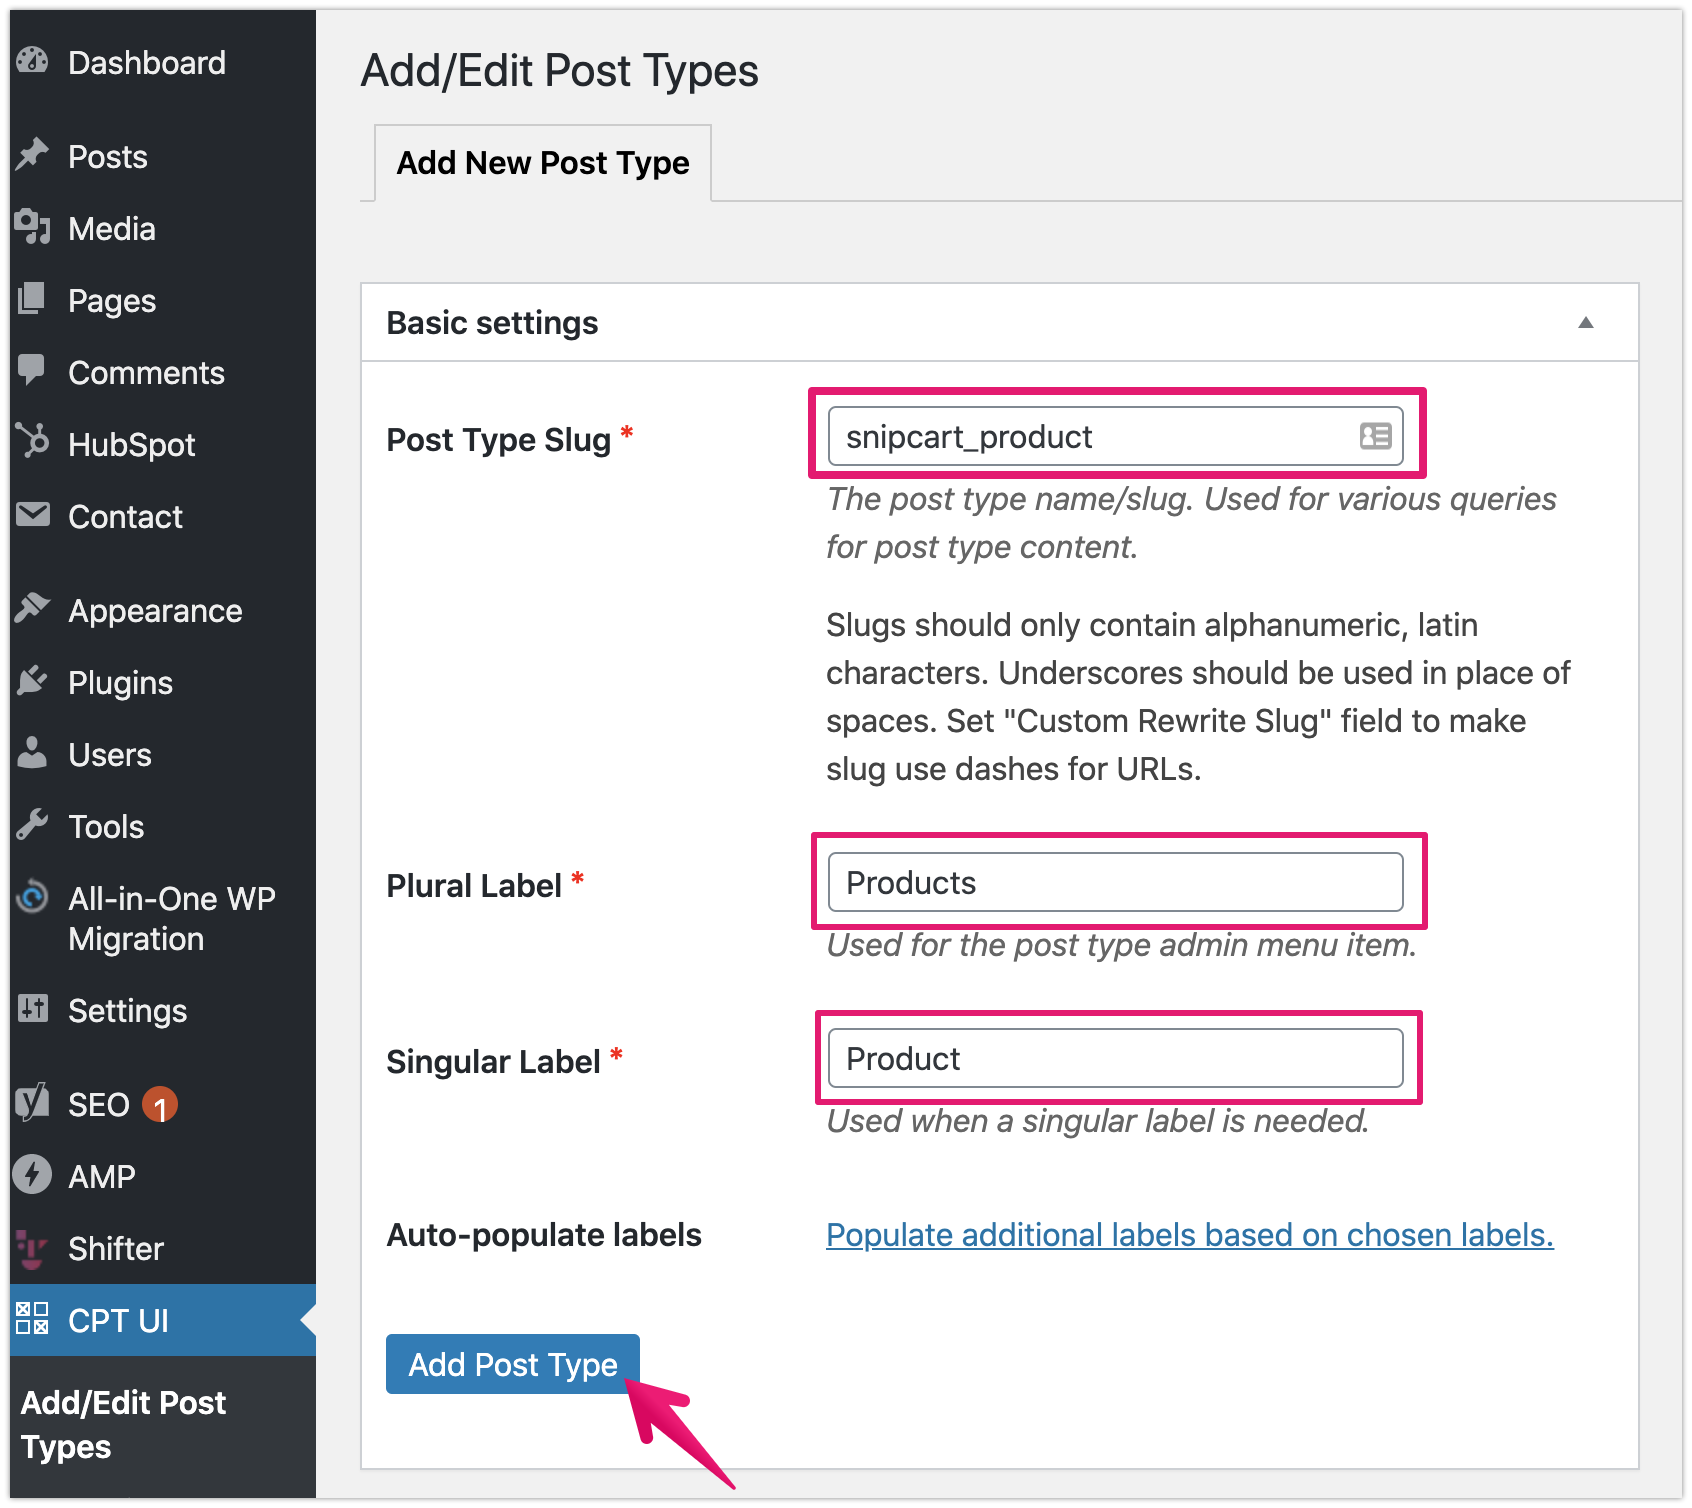
Add new post type
For sample
Post Type Slug: snipcart_product
Plural Label: Product
Singular Label: Product
Setting up Advanced Custom Field
Install Advanced Custom Field
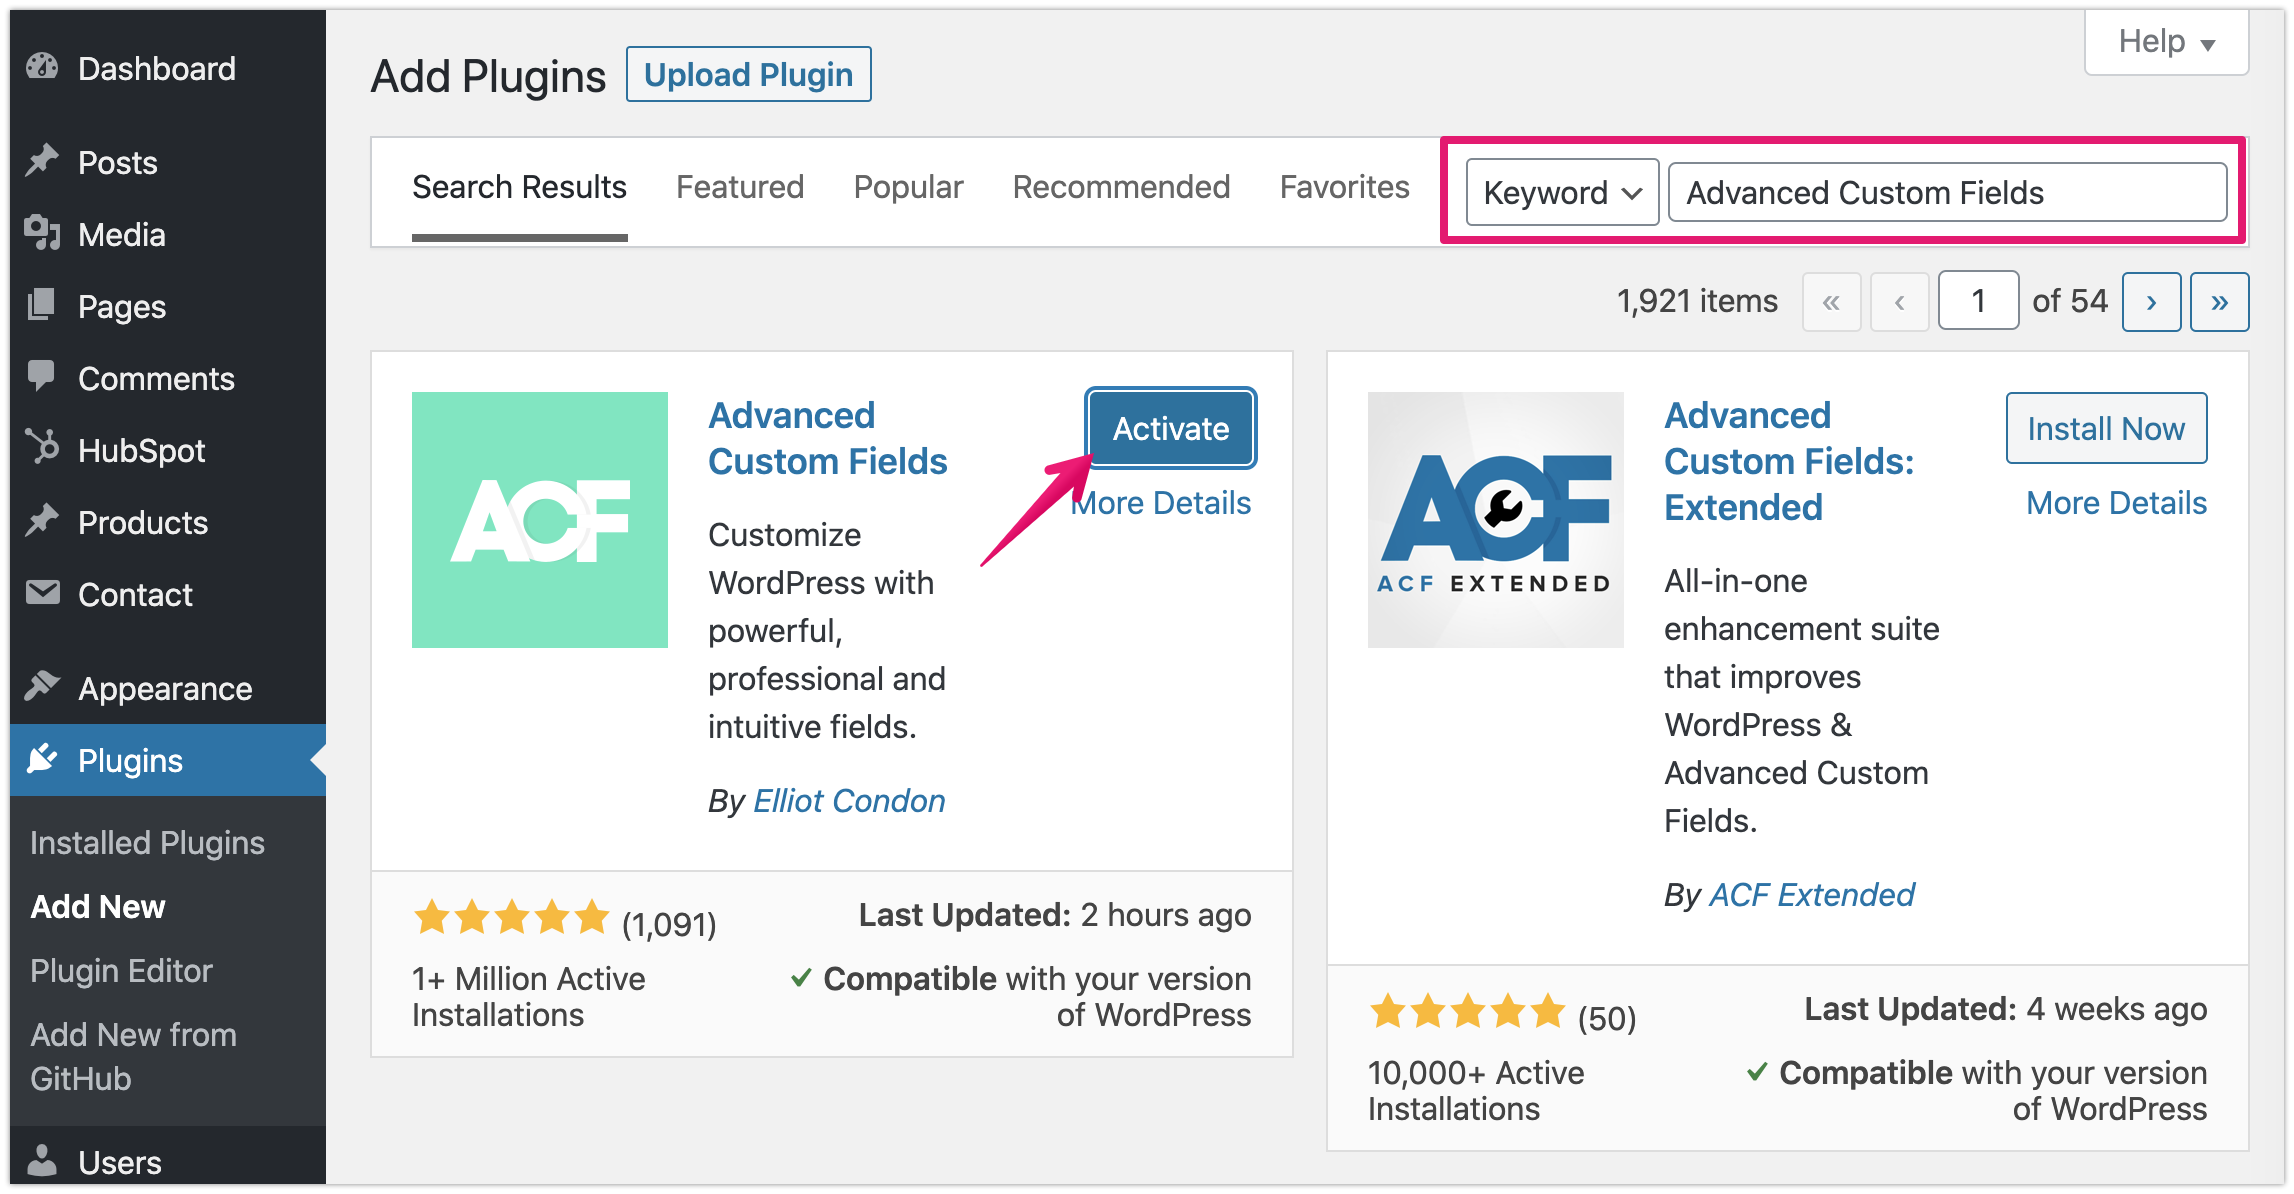
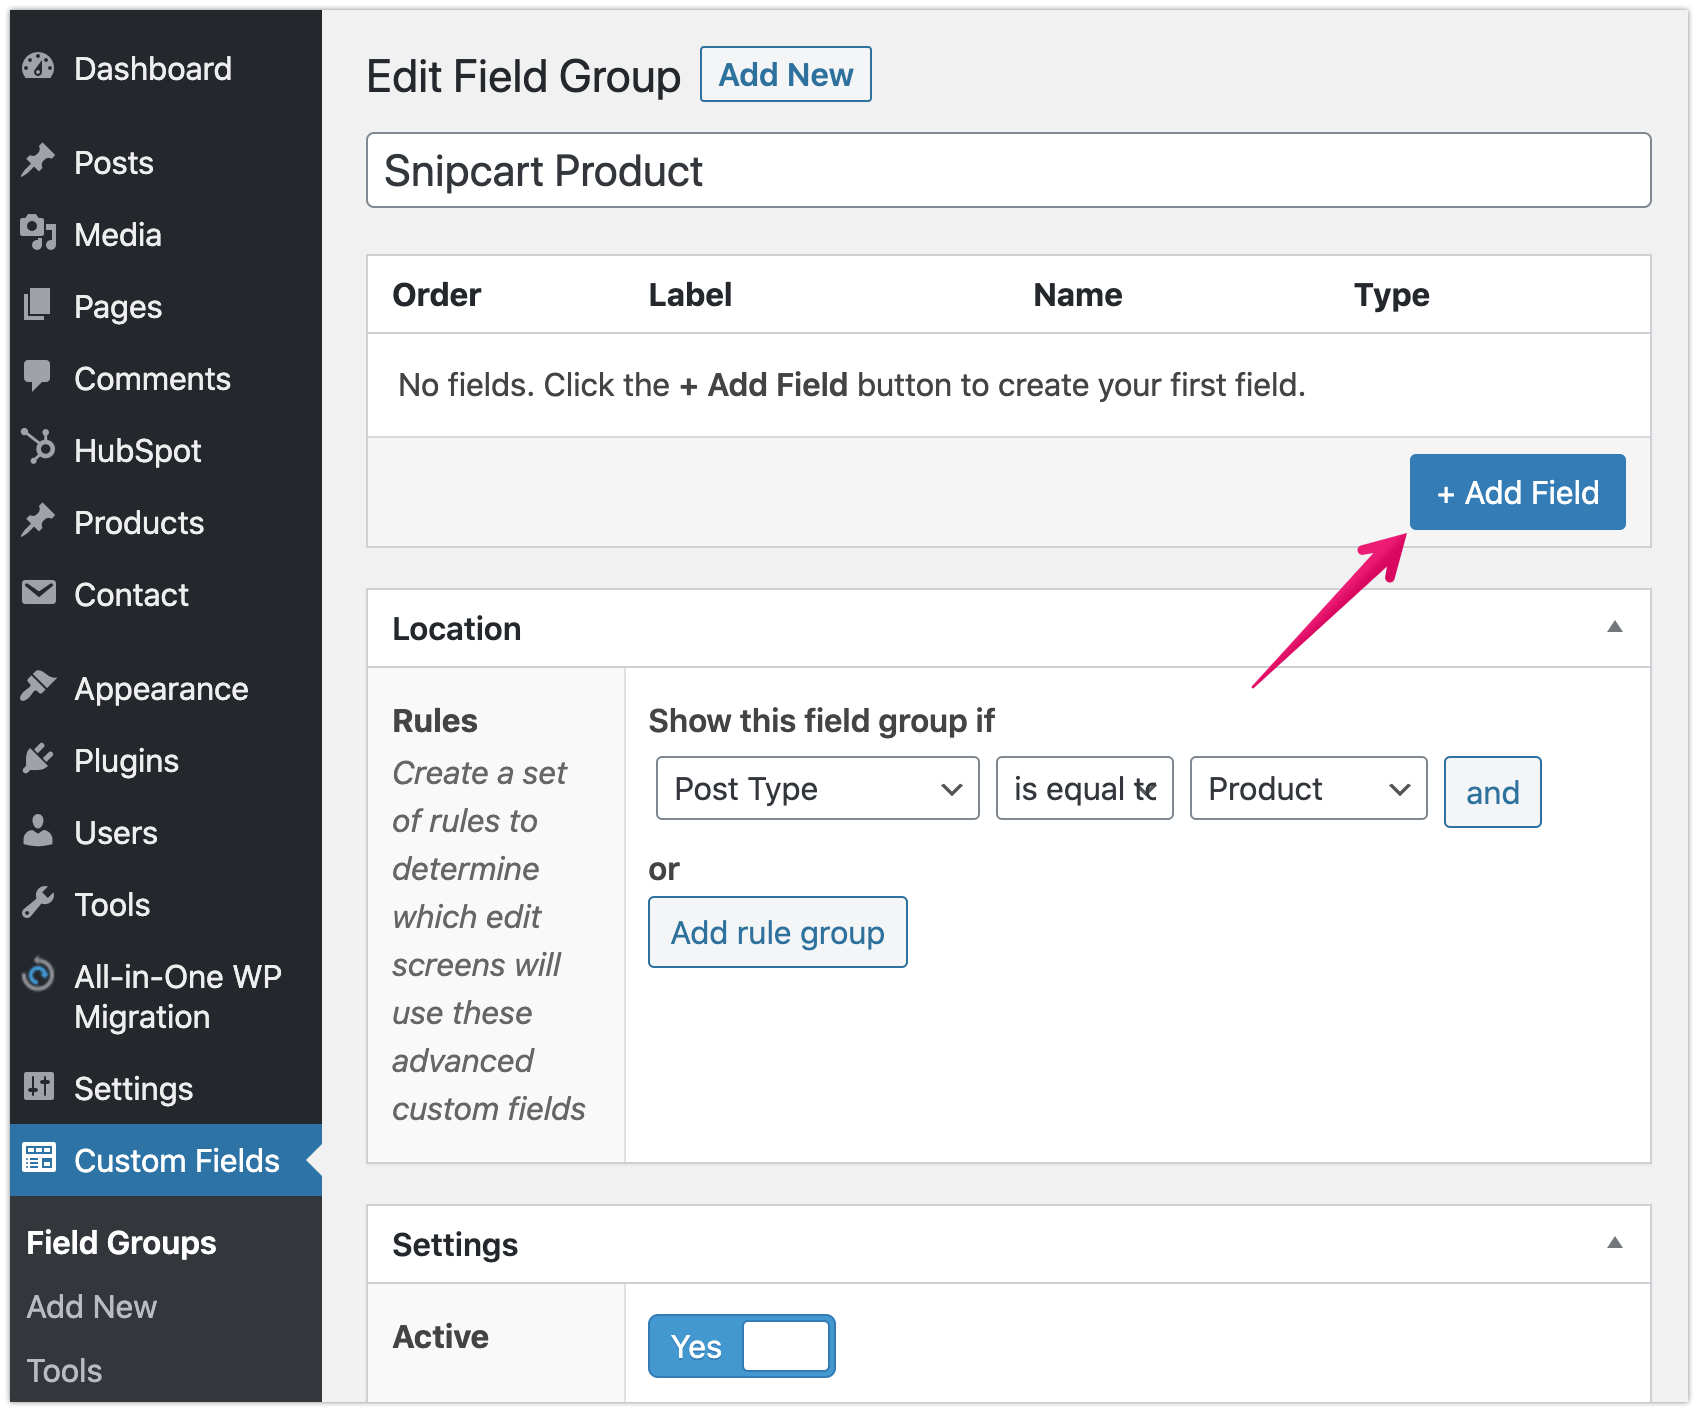
Add new field grop
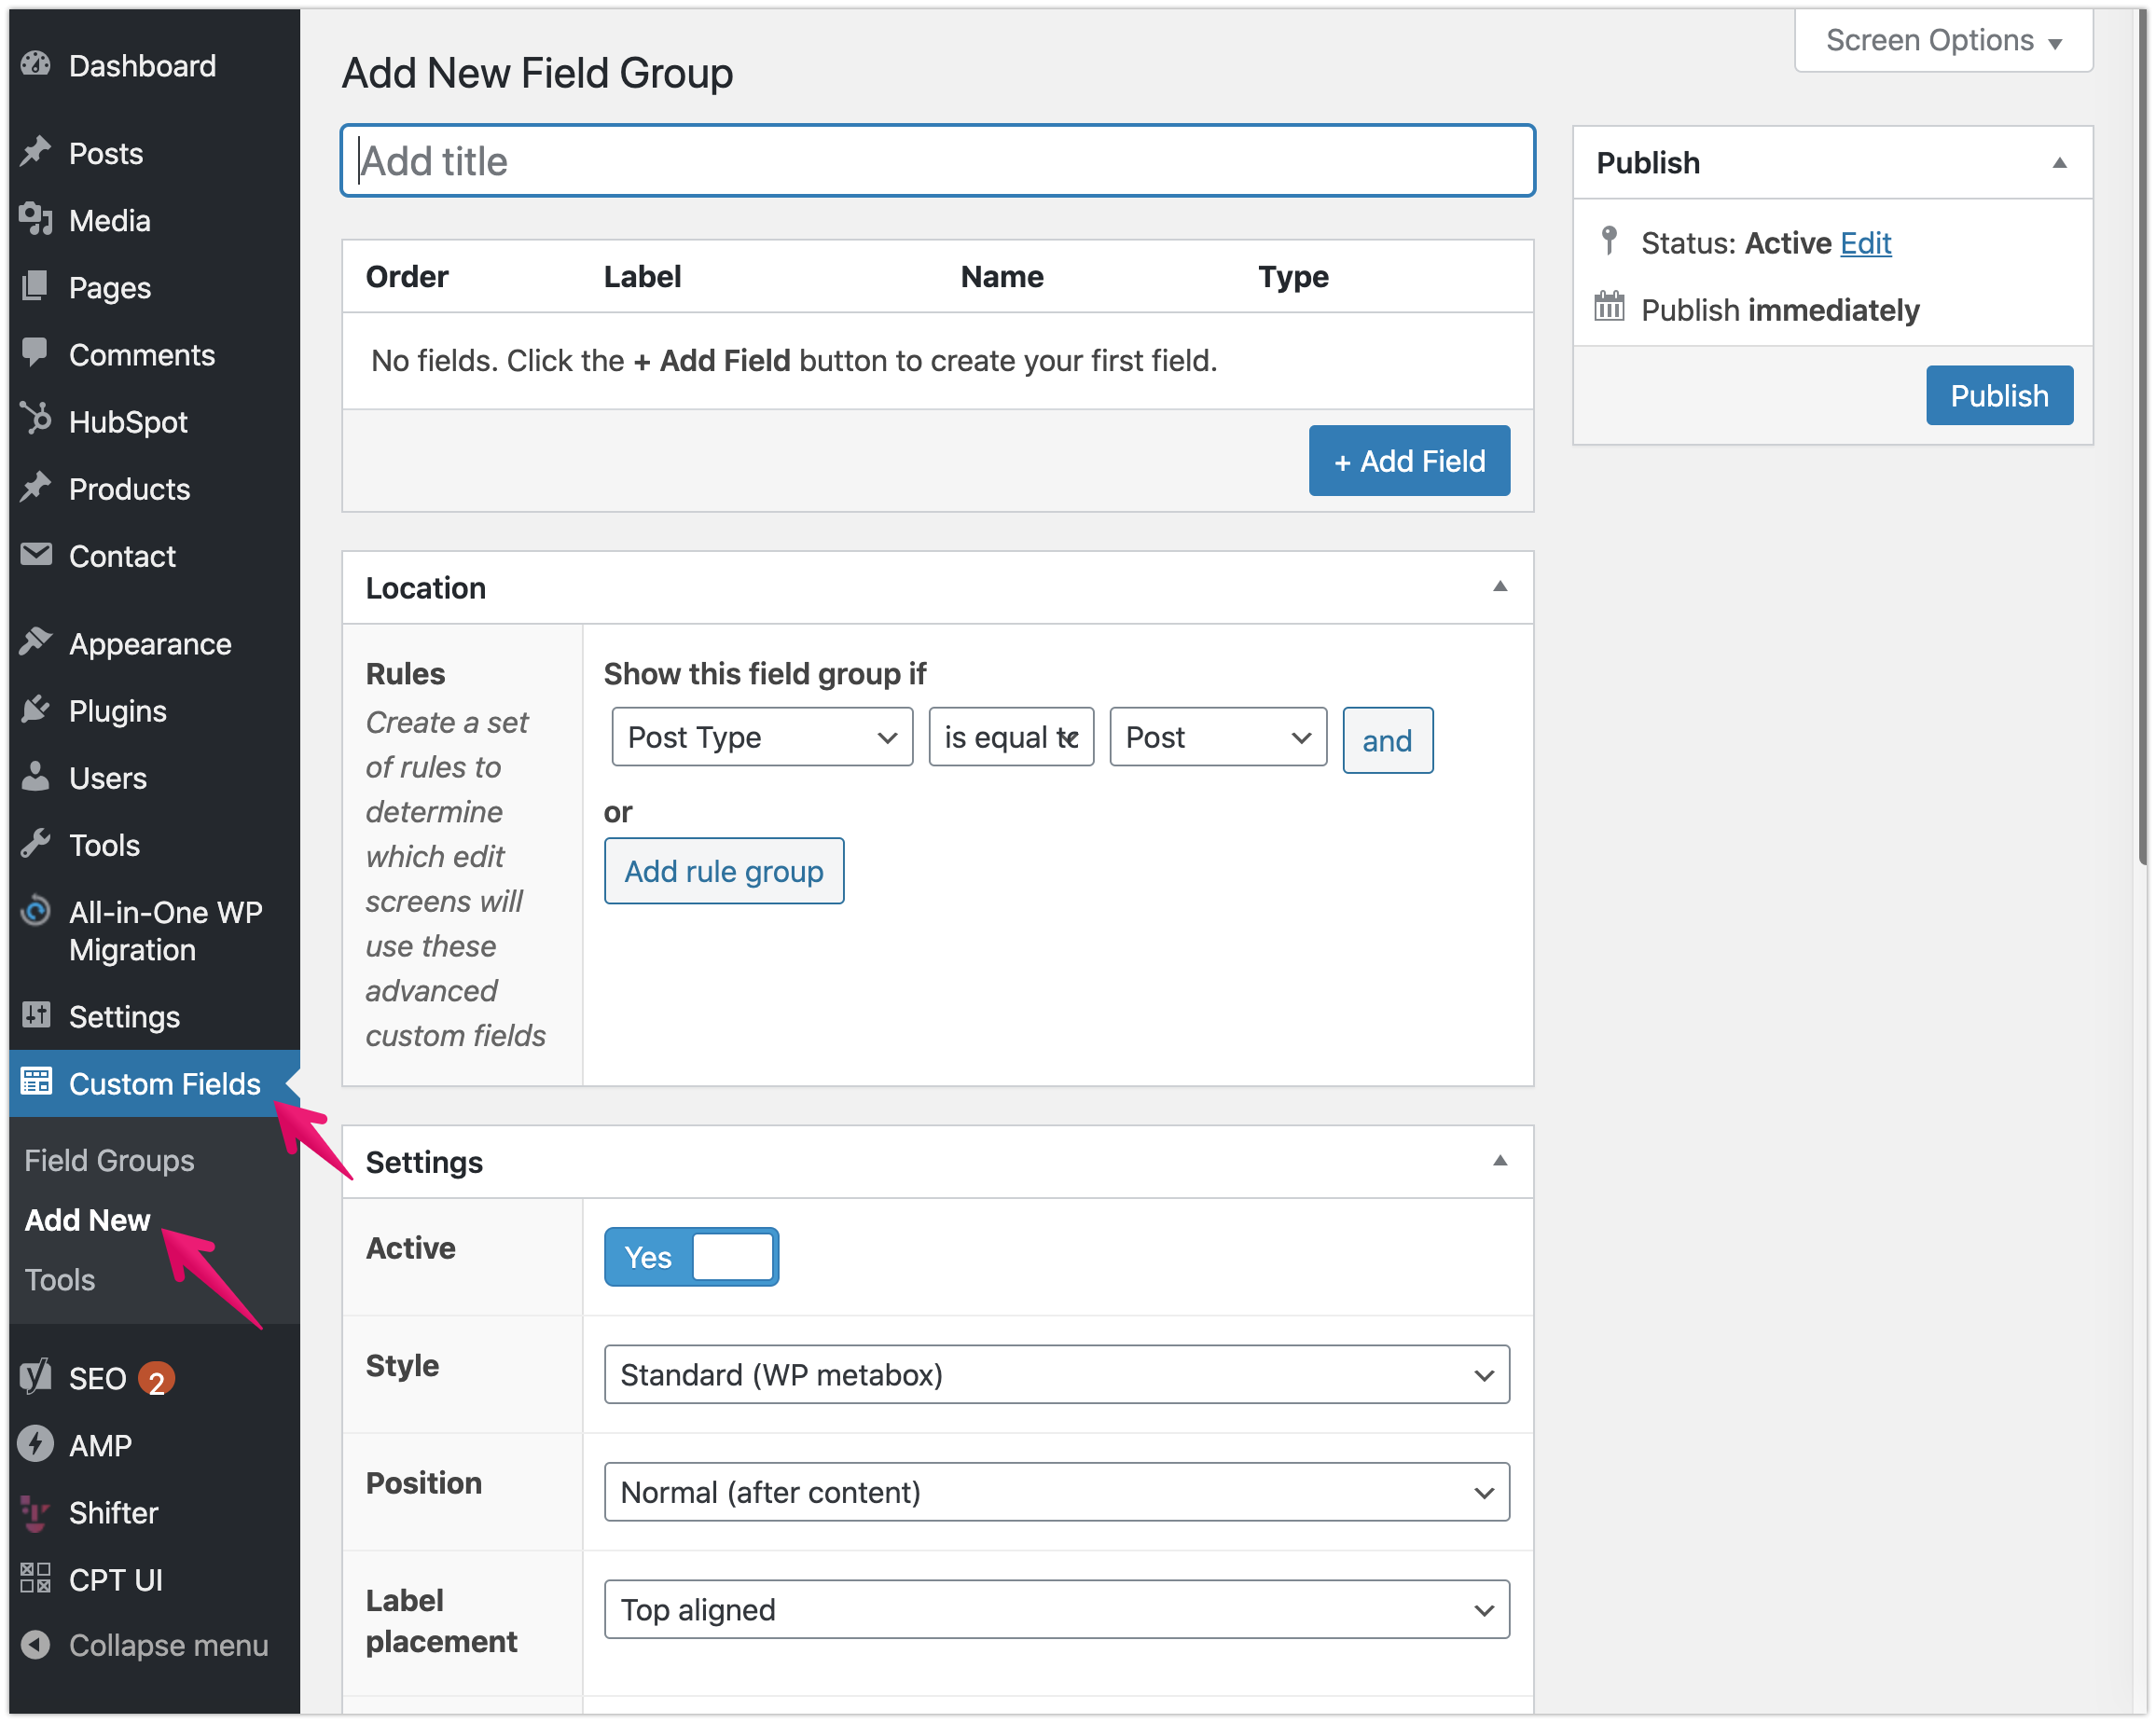
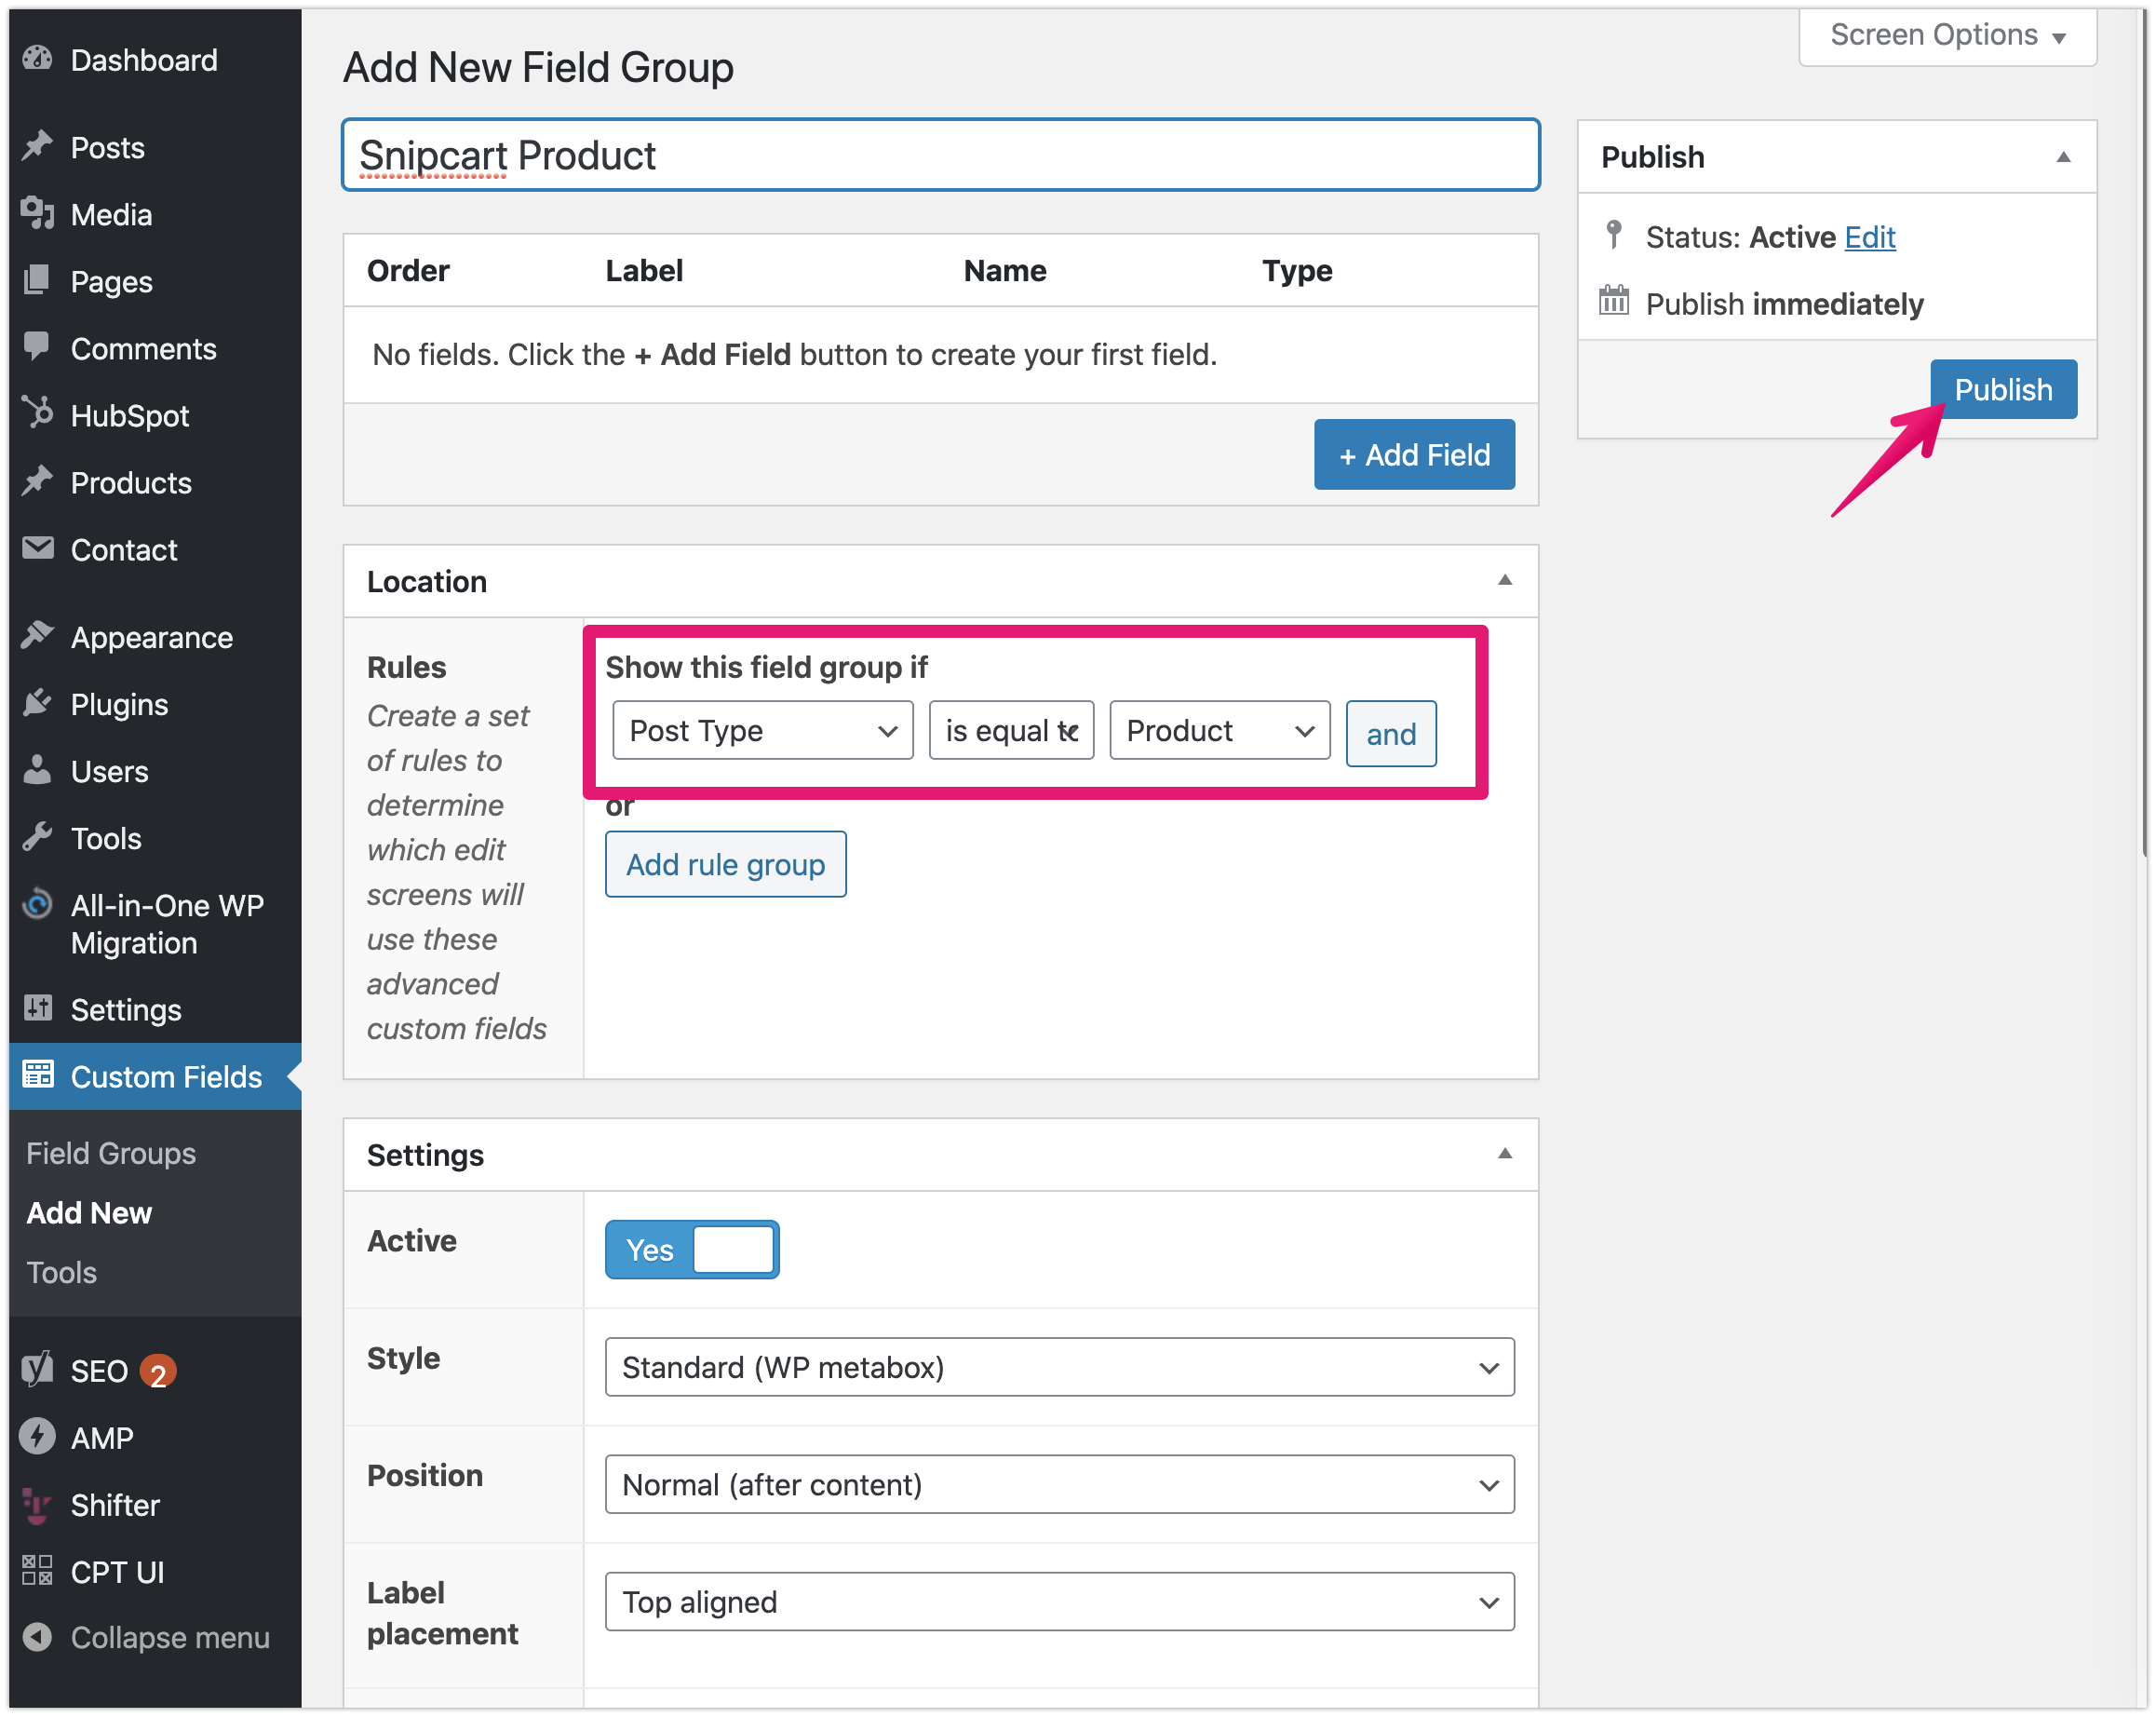
Title: Snipcard Product
Rules: [Post Type] is [equal] [ Product]
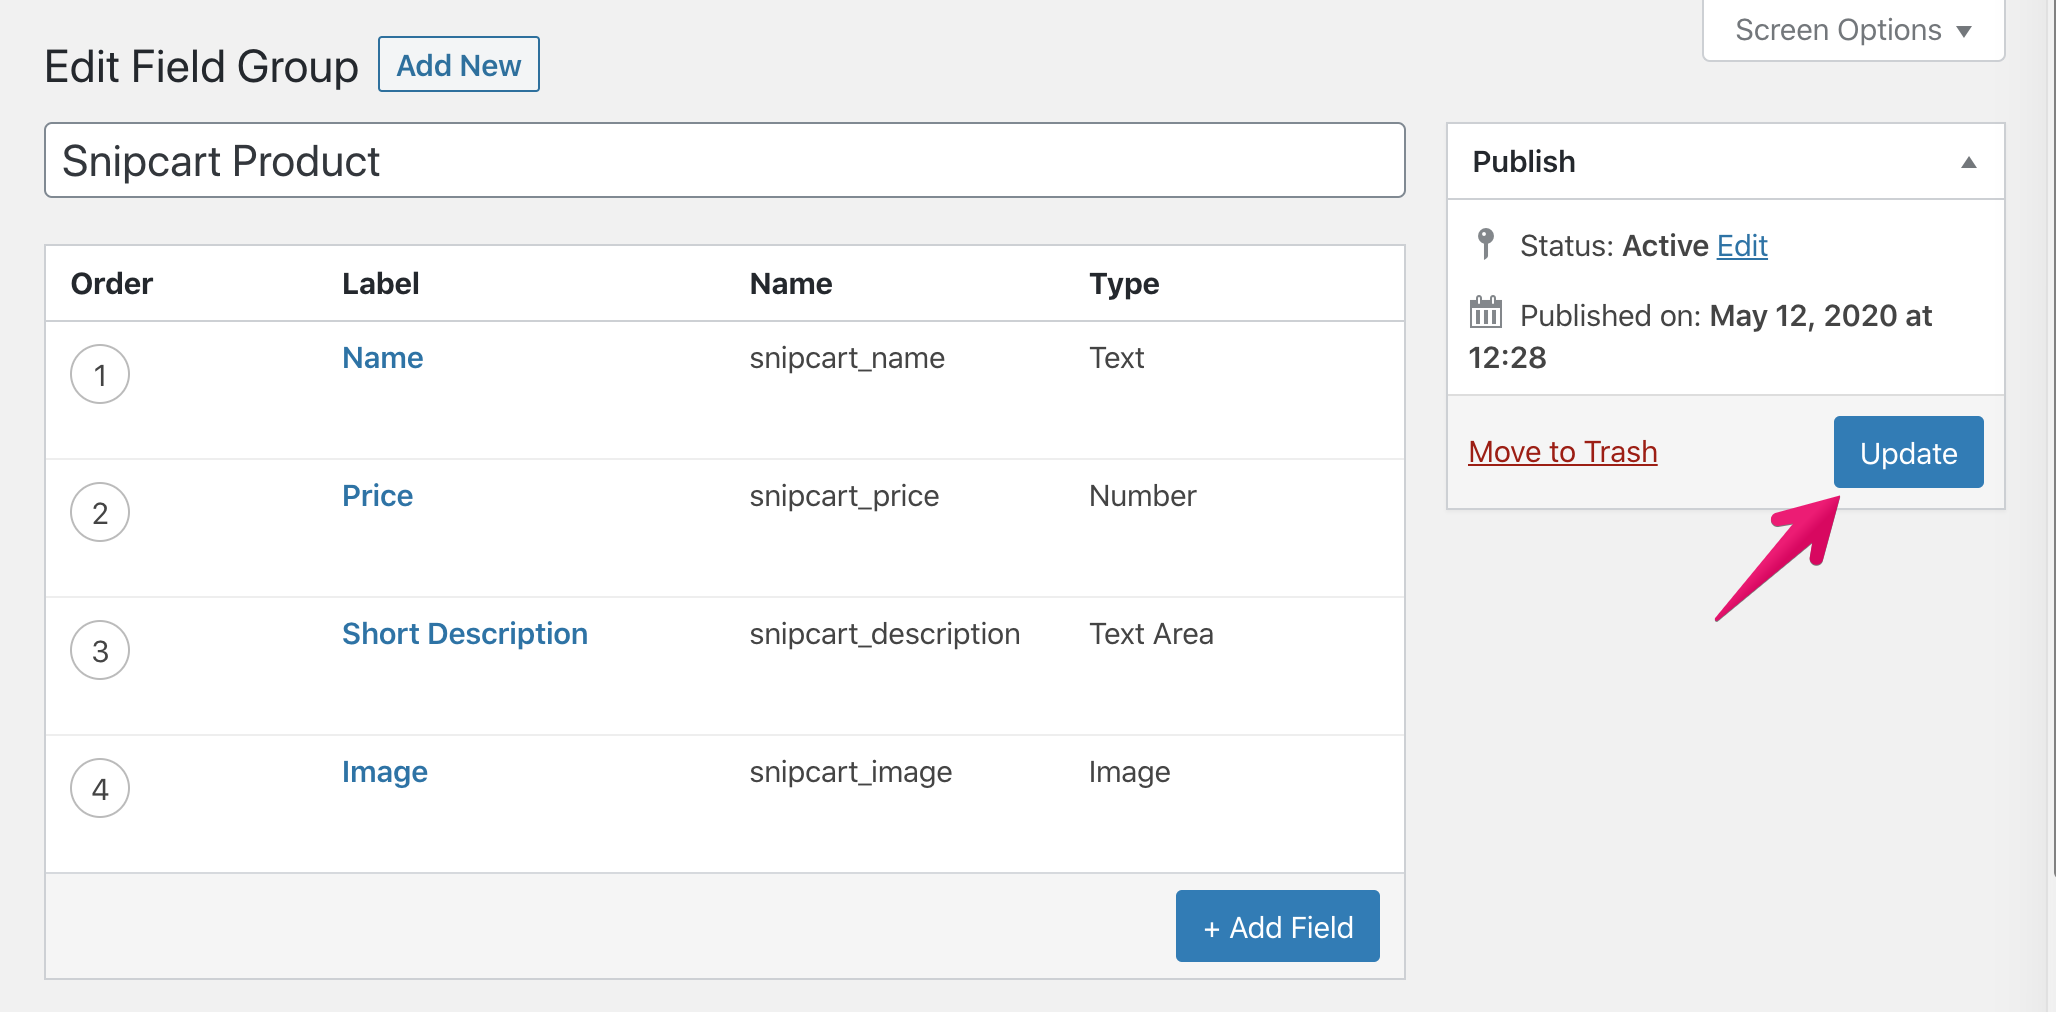
Click created Field Group
In here, it’s Snipcard Product.
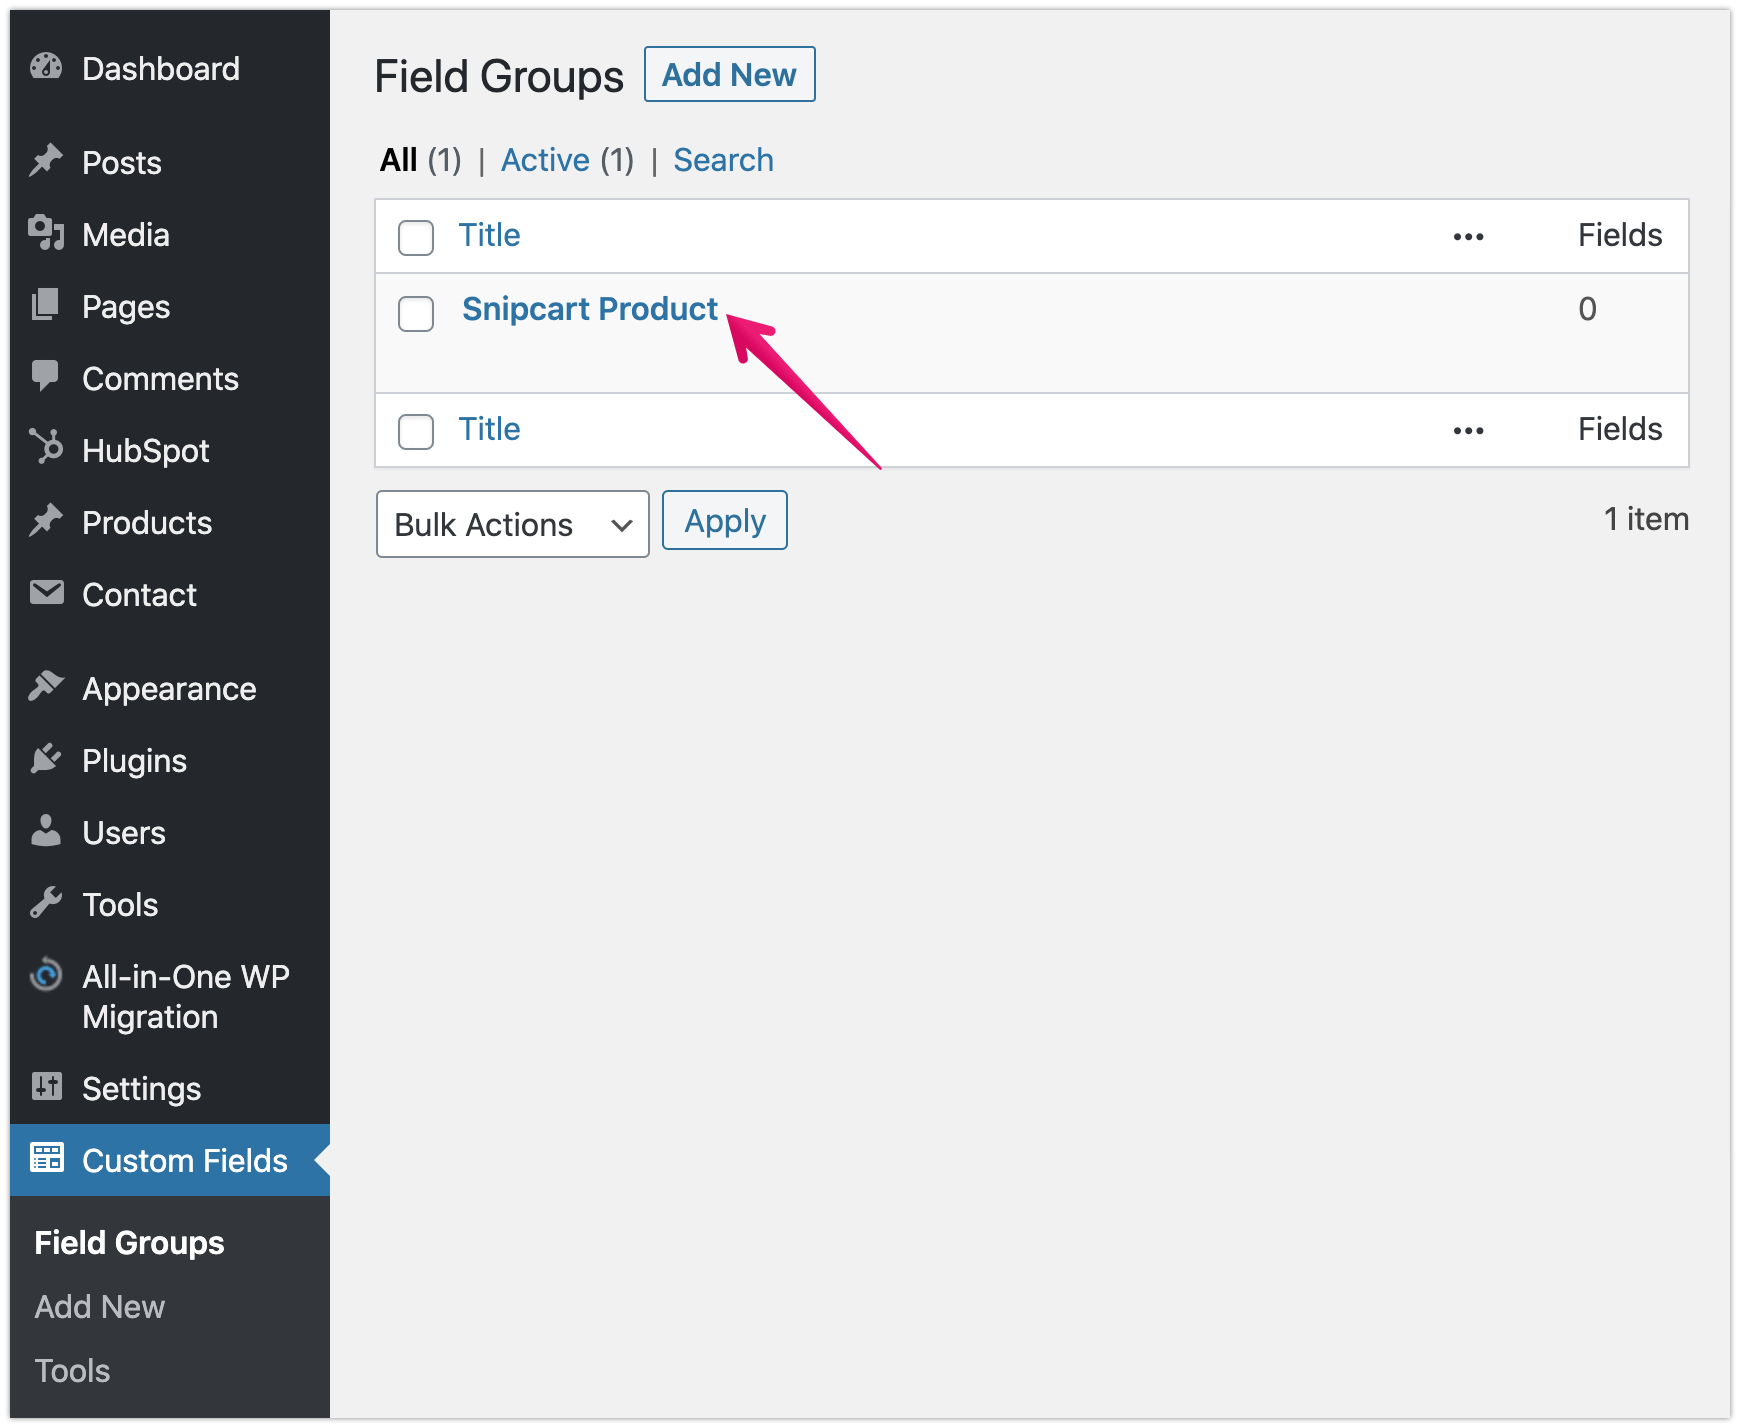
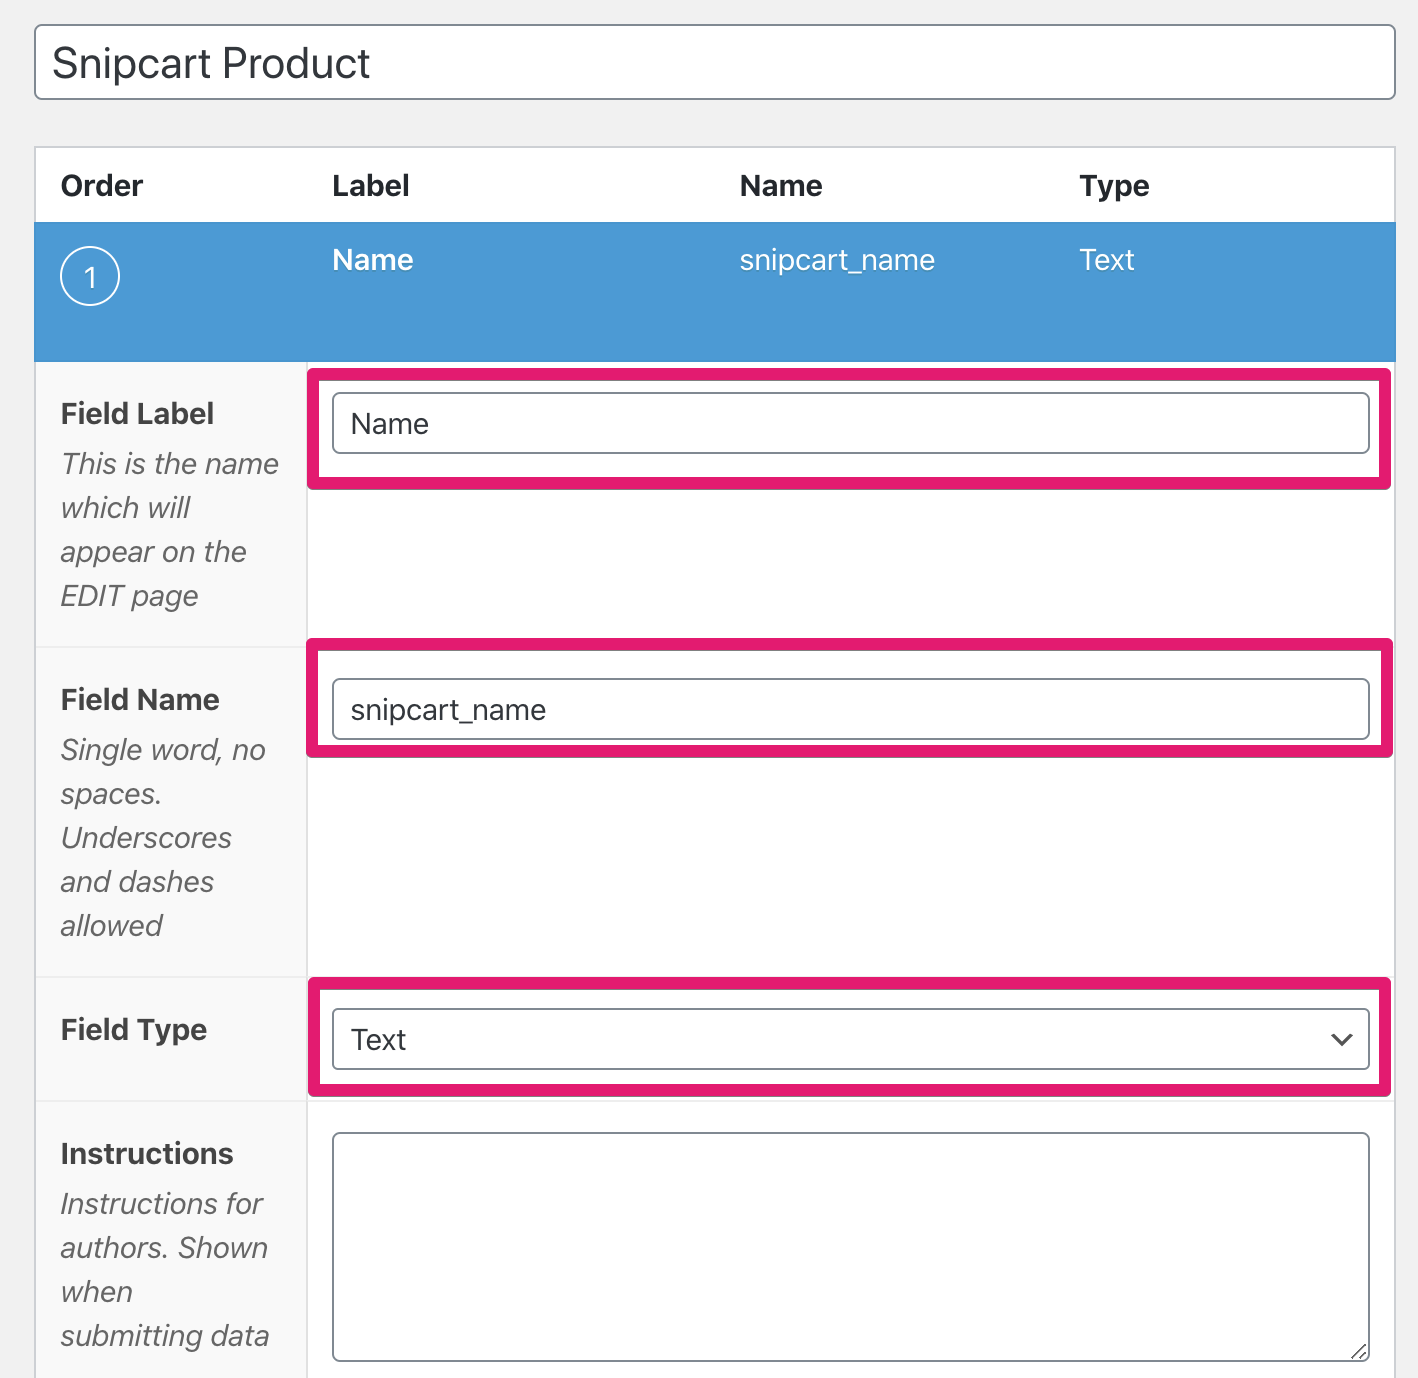
Click [ + Add Field] button to add some requirements
(1) Name
Field Label: Name
Field Name: snipcart_name
Field Type: Text
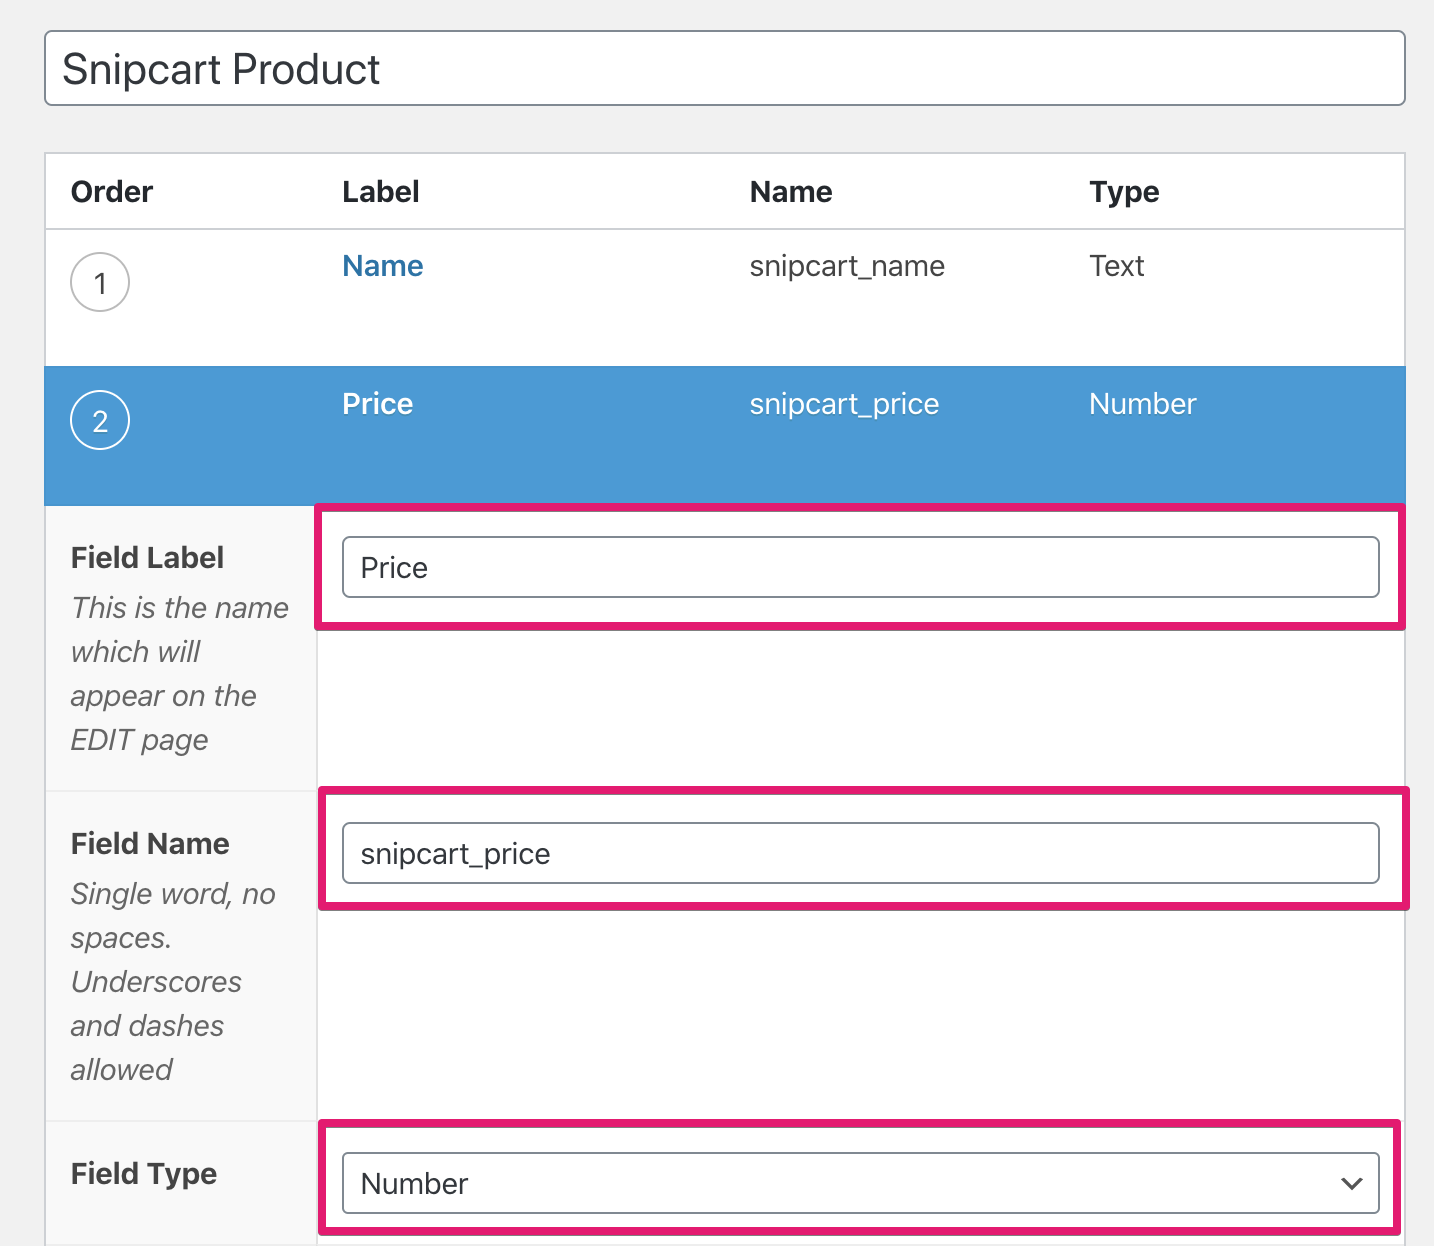
(2) Price
Field Label: Price
Field Name: snipcart_price
Field Type: Number
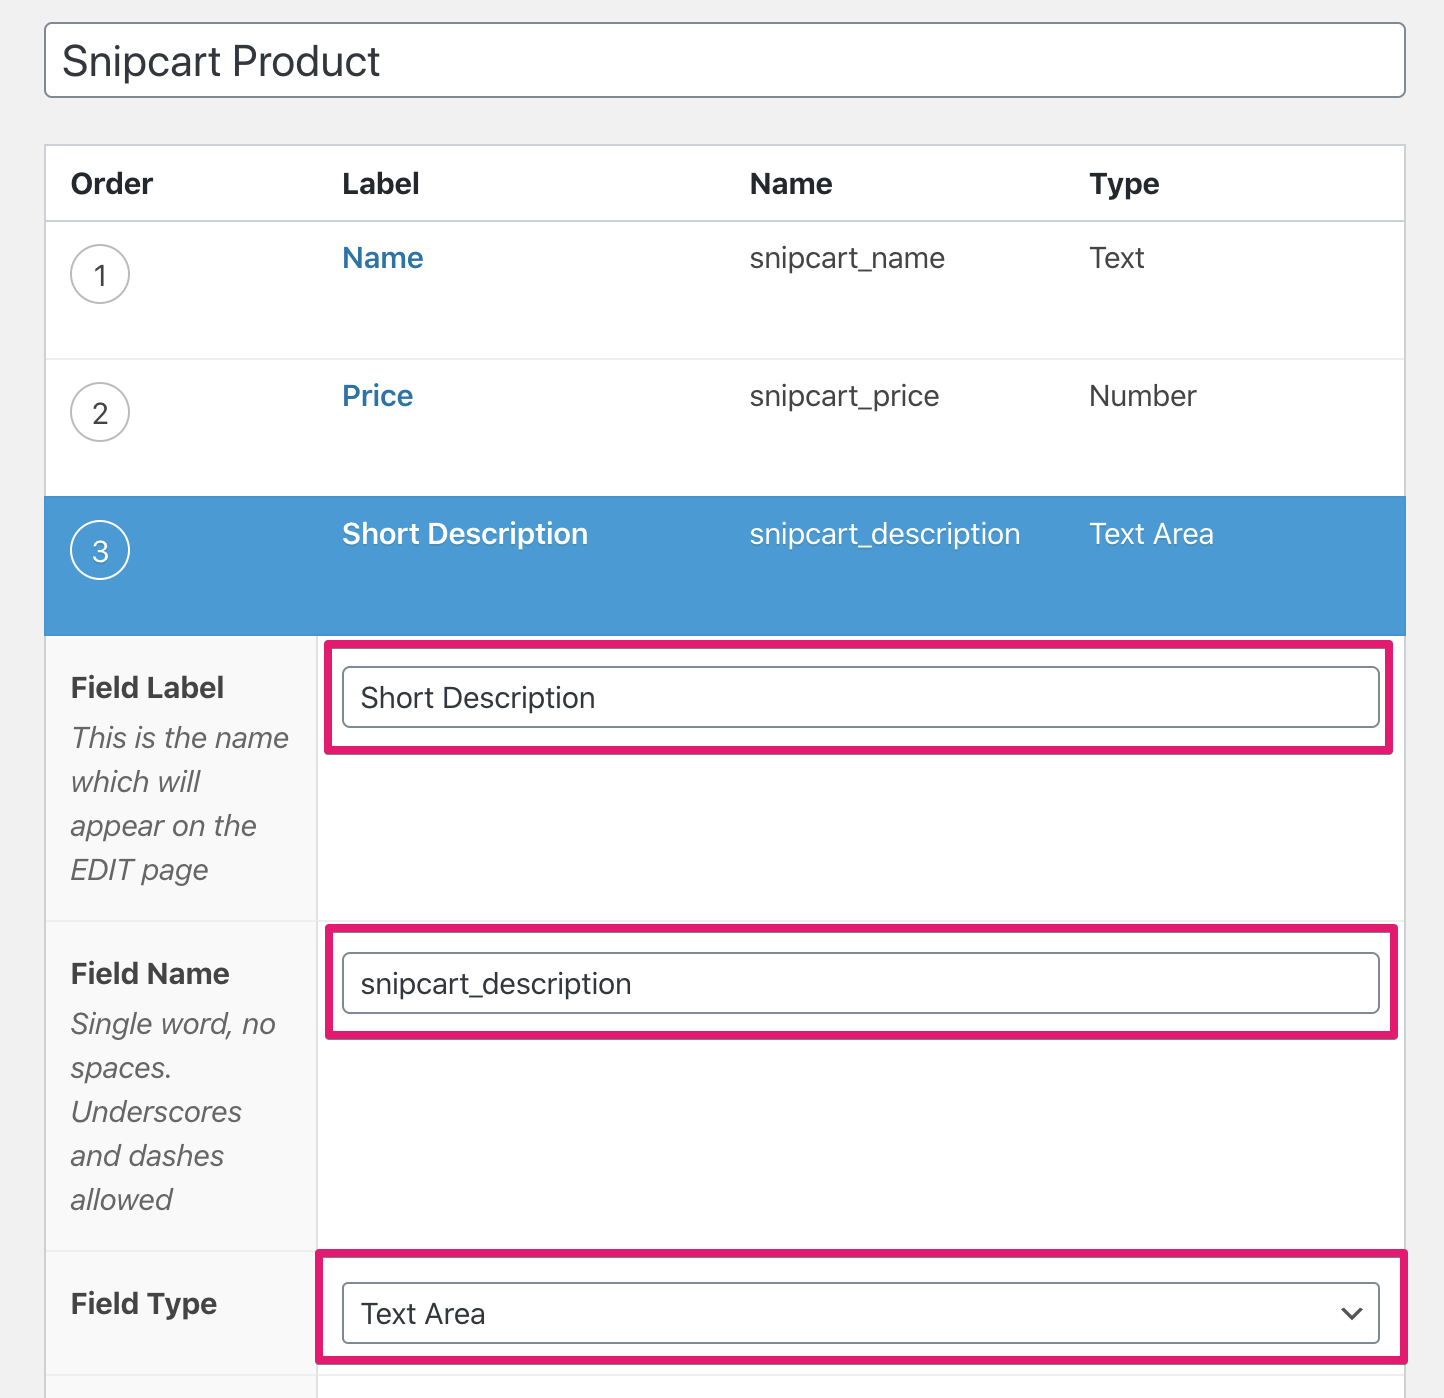
(3) Short Description
Field Label: Short Description
Field Name: snipcart_ḍescription
Field Type: Text Area
(4) Image
Field Label: Image
Field Name: snipcart_image
Field Type: Image
Return Format: Image URL
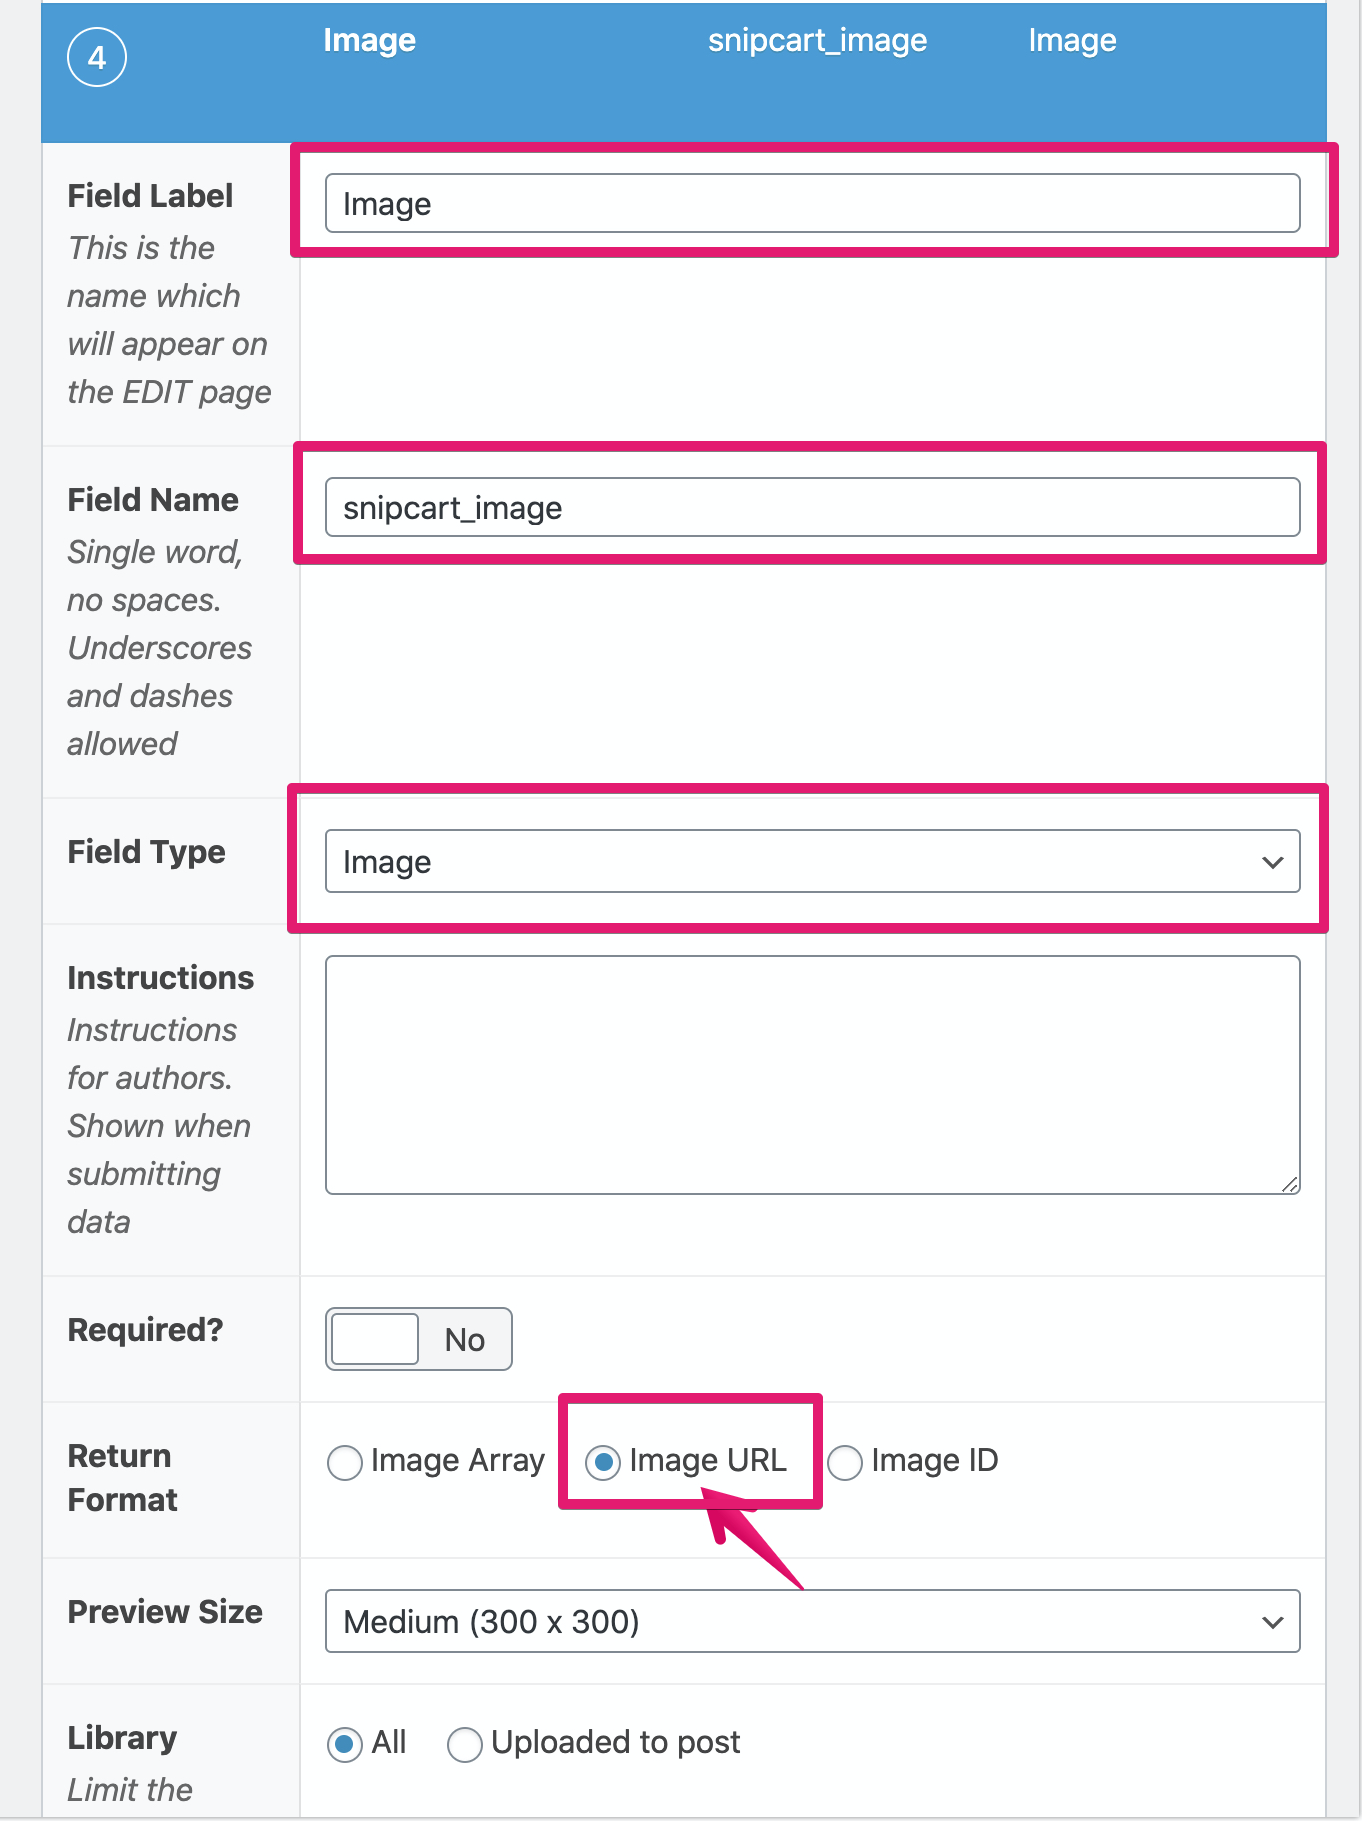
Click [Update] to save changes
Phase 3. Edit Theme files
We recommend using Shifter Github Theme/Plugin Installer for modifying theme files.
Refer to our support document: Developing WordPress site on Shifter with GitHub.
All sample code below are quoted from Snipcart’s official document: WordPress Integration: An Easier Way to Manage Products.
header.php
Insert copied HTML code contains API key to header.php
For example
<script type="text/javascript" src="//ajax.googleapis.com/ajax/libs/jquery/1.11.0/jquery.min.js"></script>
<script type="text/javascript" id="snipcart" src="https://app.snipcart.com/scripts/snipcart.js" data-api-key="{YOUR_API_KEY}"></script>
<link type="text/css" id="snipcart-theme" href="https://app.snipcart.com/themes/base/snipcart.css" rel="stylesheet" />
Note: jQuery code can be trimmed if theme already calls it.
Copy and rename single.php to single-snipcart_product.php them modify it to set Snipcart buy button.
For example
<div id="product" class="site-content">

    <img src="<?php the_field('snipcart_image') ?>" />

    <button class="snipcart-add-item"
        data-item-id="<?php echo $post->ID ?>"
        data-item-name="<?php the_field('snipcart_name') ?>"
        data-item-url="<?php echo get_permalink(); ?>"
        data-item-price="<?php the_field('snipcart_price') ?>"
        data-item-description="<?php the_field('snipcart_description') ?>"
        data-item-image="<?php the_field('snipcart_image') ?>">
        Buy now for <?php the_field('snipcart_price') ?> $
    </button>
</div>
Create archive-snipcart_product.php under your theme directory to list your products.
Note: To usearchive-snipcart_product.php, Has Archives is set to True is required when creating the custom post type.
The code would be like below.
<h1>Products</h1>
<?php if ( have_posts() ) : ?>
<table>
    <thead>
        <th>
            Name
        </th>
        <th>
            Price
        </th>
    </thead>
    <tbody>
        <?php while ( have_posts() ) : the_post(); ?>
        <tr>
            <td>
                <a href="<?php echo get_permalink(); ?>">
                    <?php the_field('snipcart_name') ?>
                </a>
            </td>
            <td>
                <?php the_field('snipcart_price') ?> $
            </td>
        </tr>
        <?php endwhile; ?>
    </tbody>
</table>
<?php endif; ?>
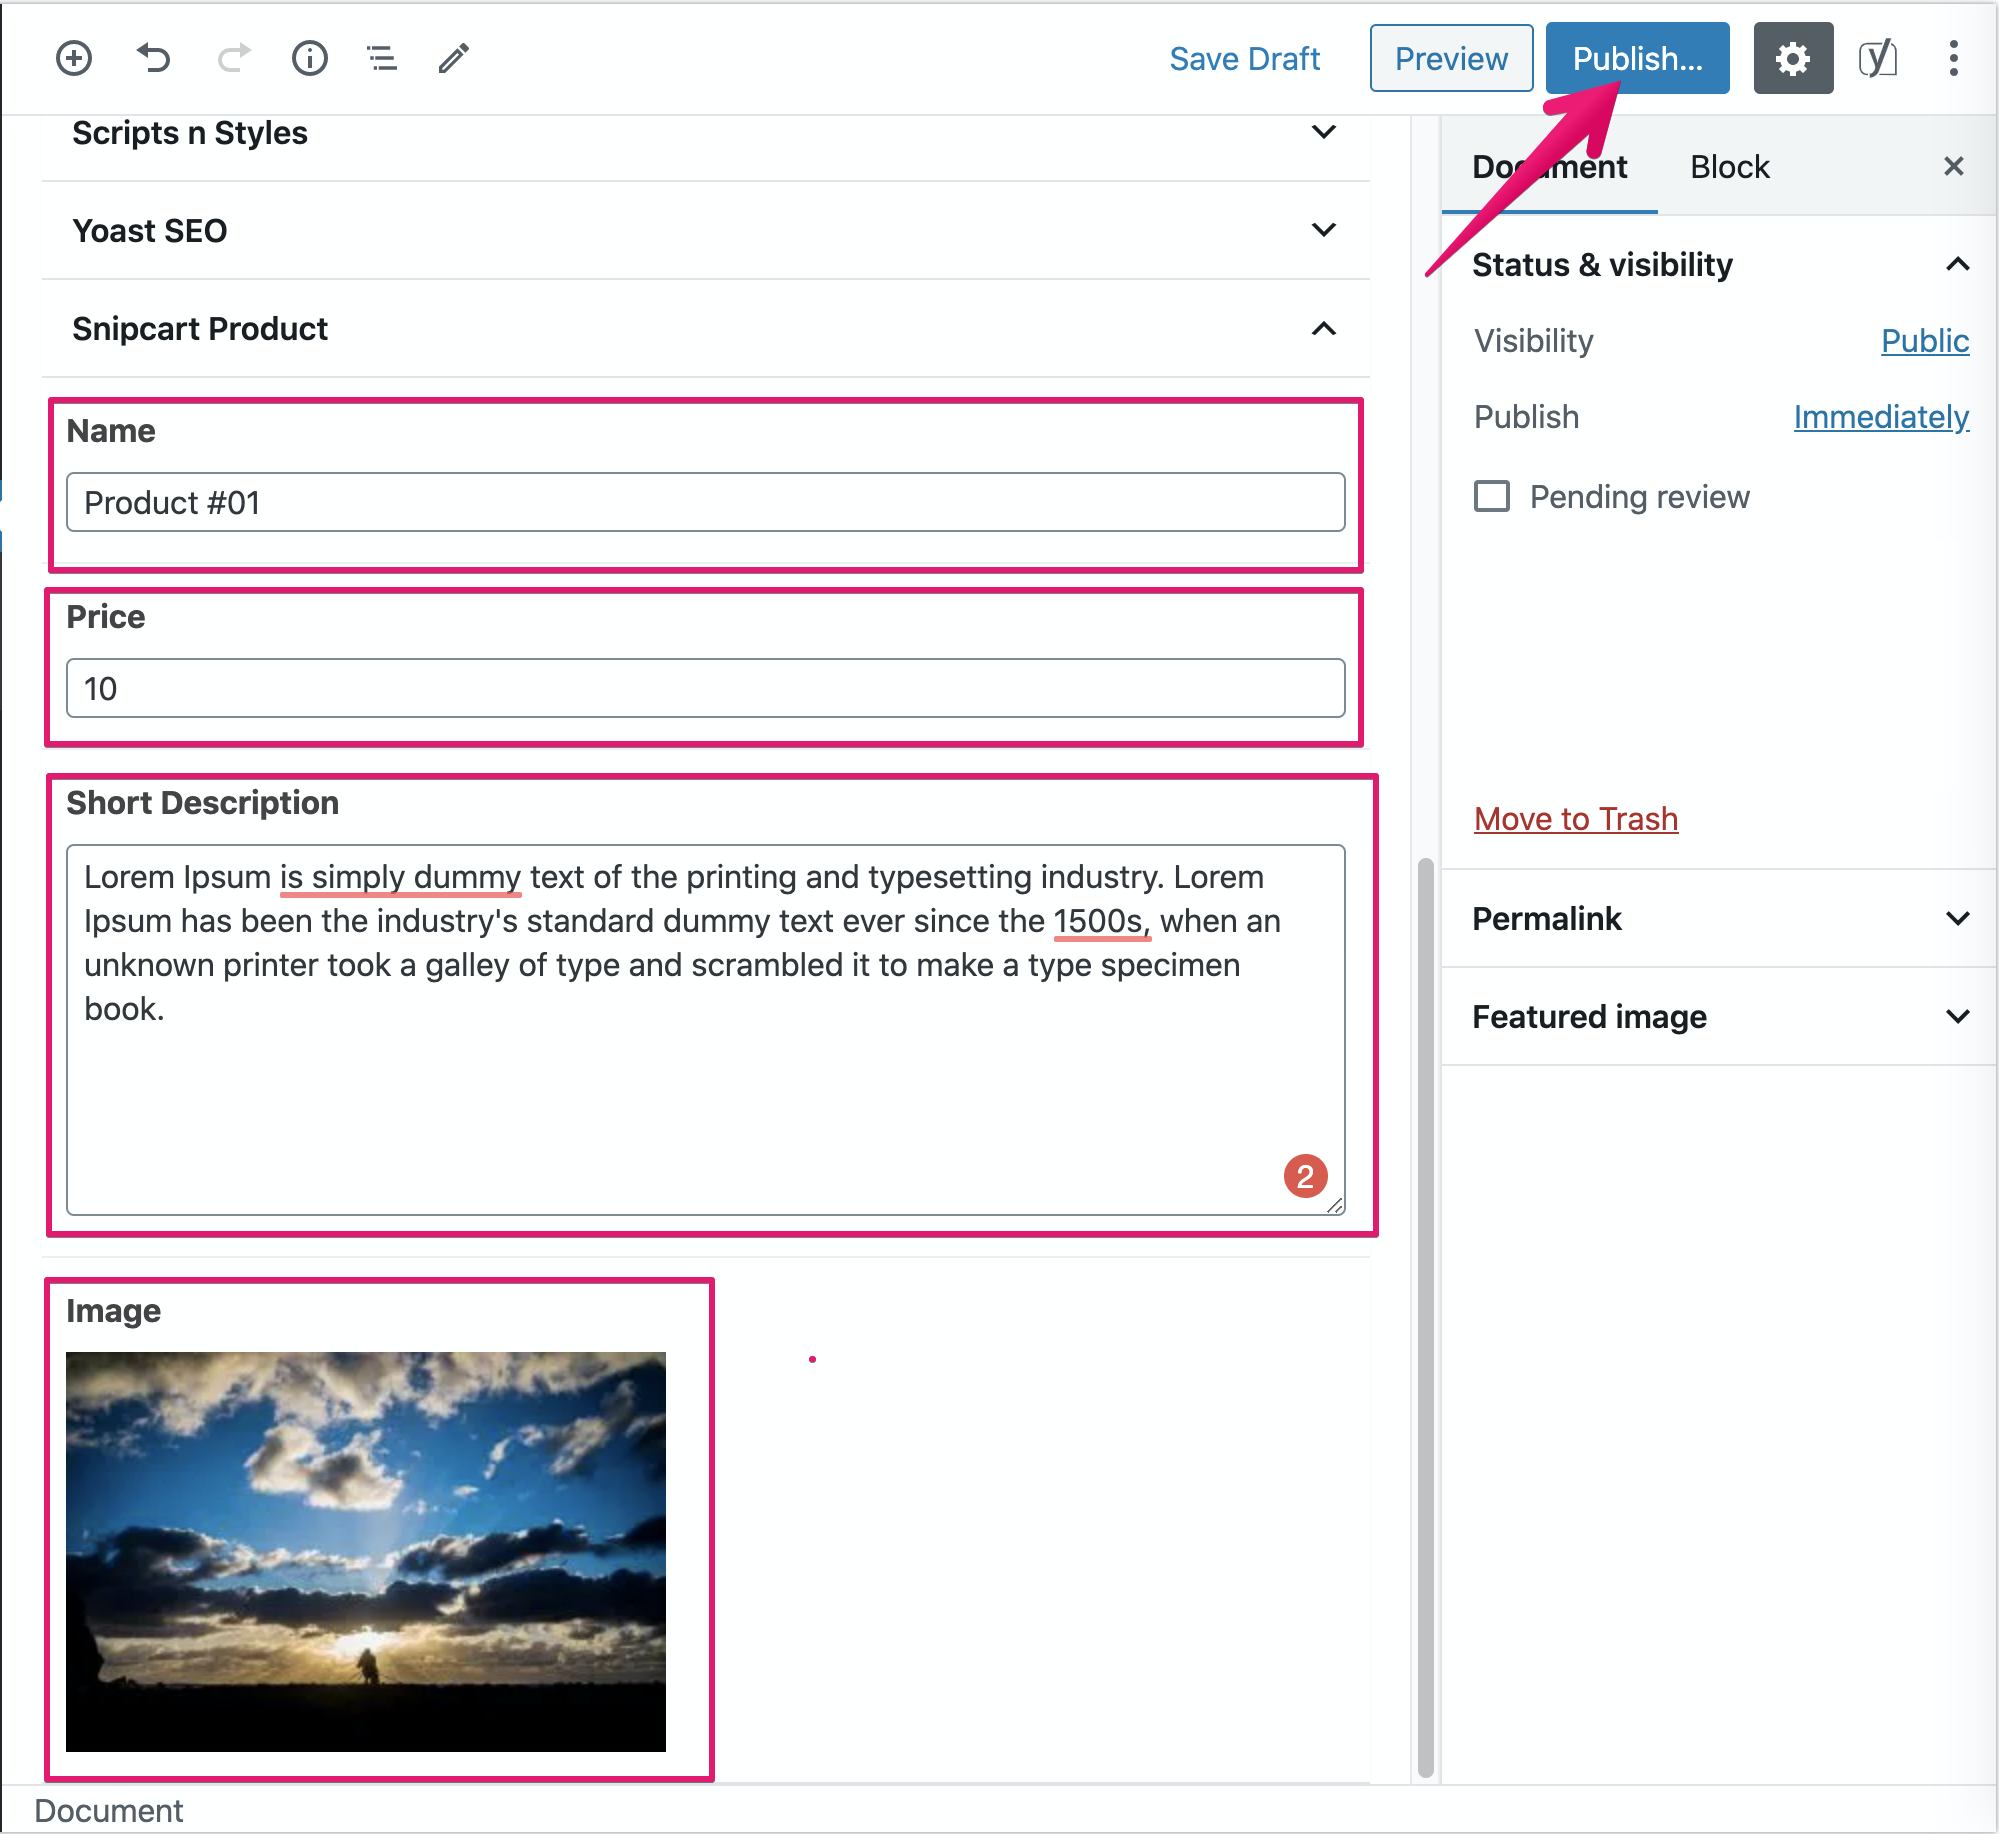
Phase 4. Add new Products
Back to Shifter and WordPress.
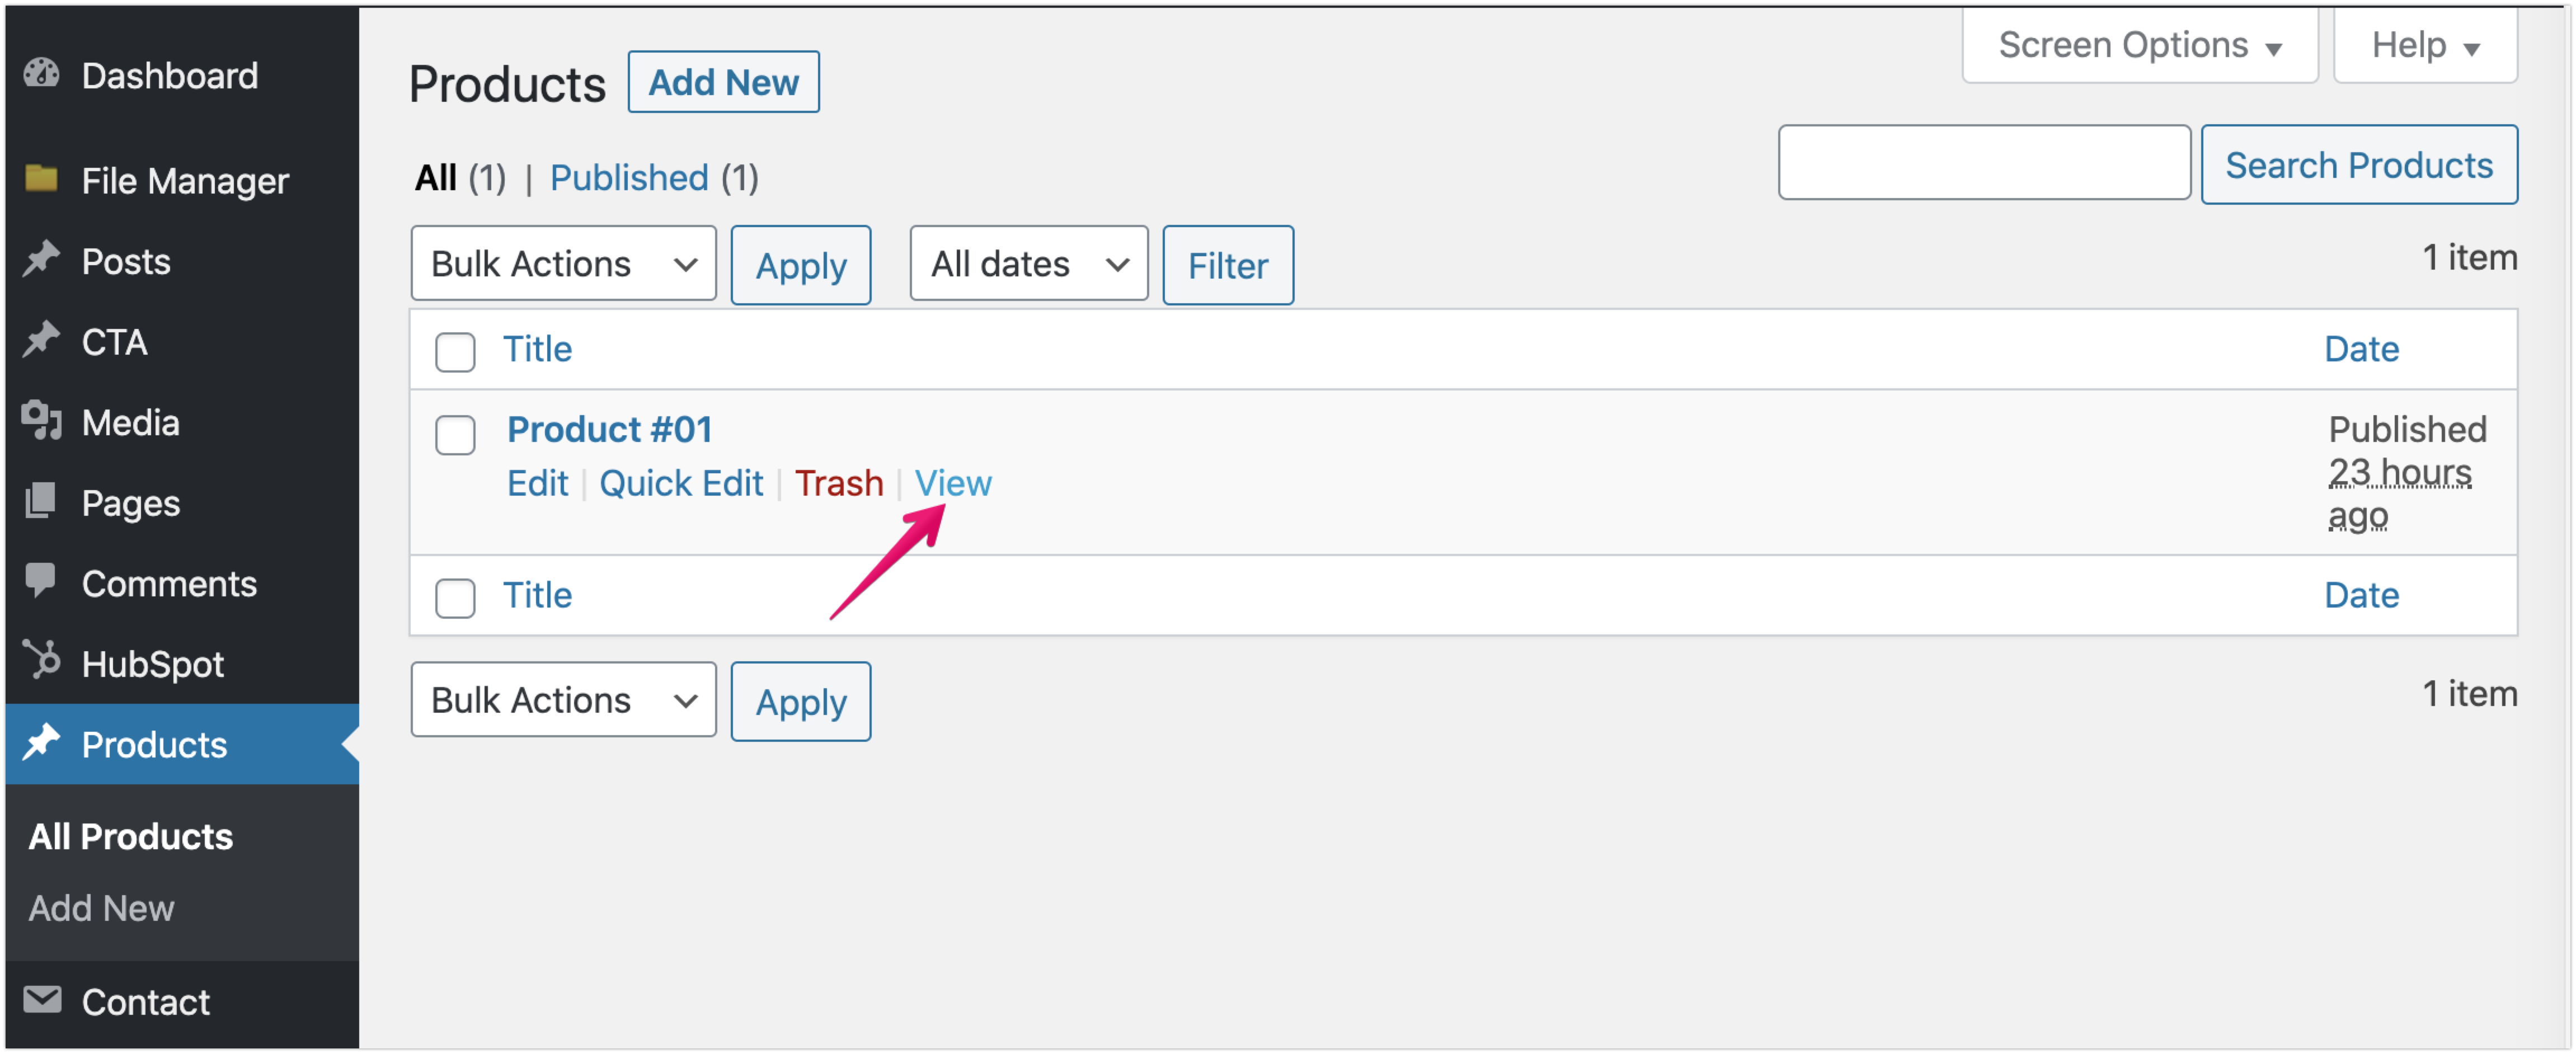
Navigate to [Products] menu
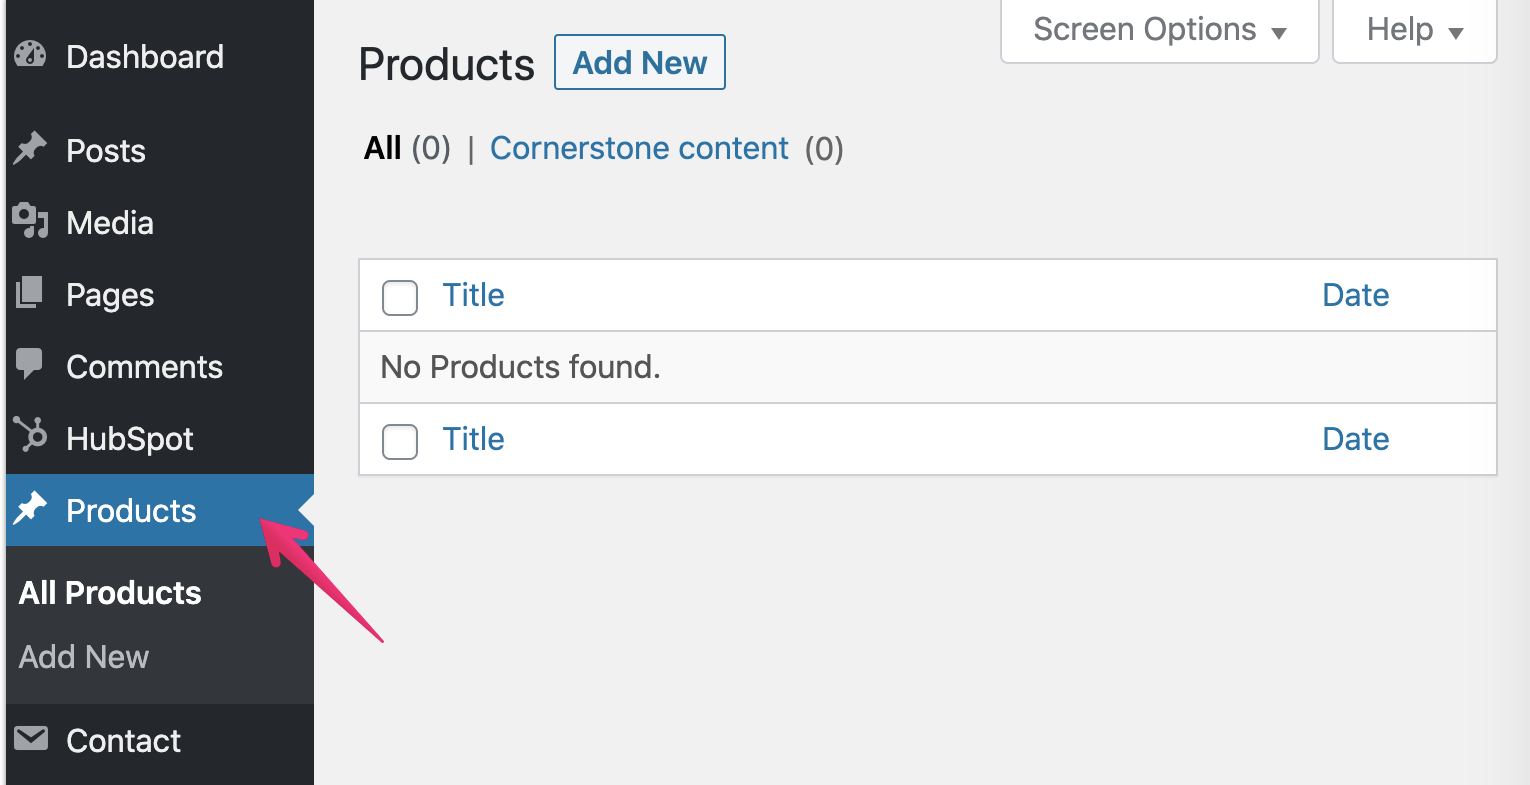
Click [Add New] button
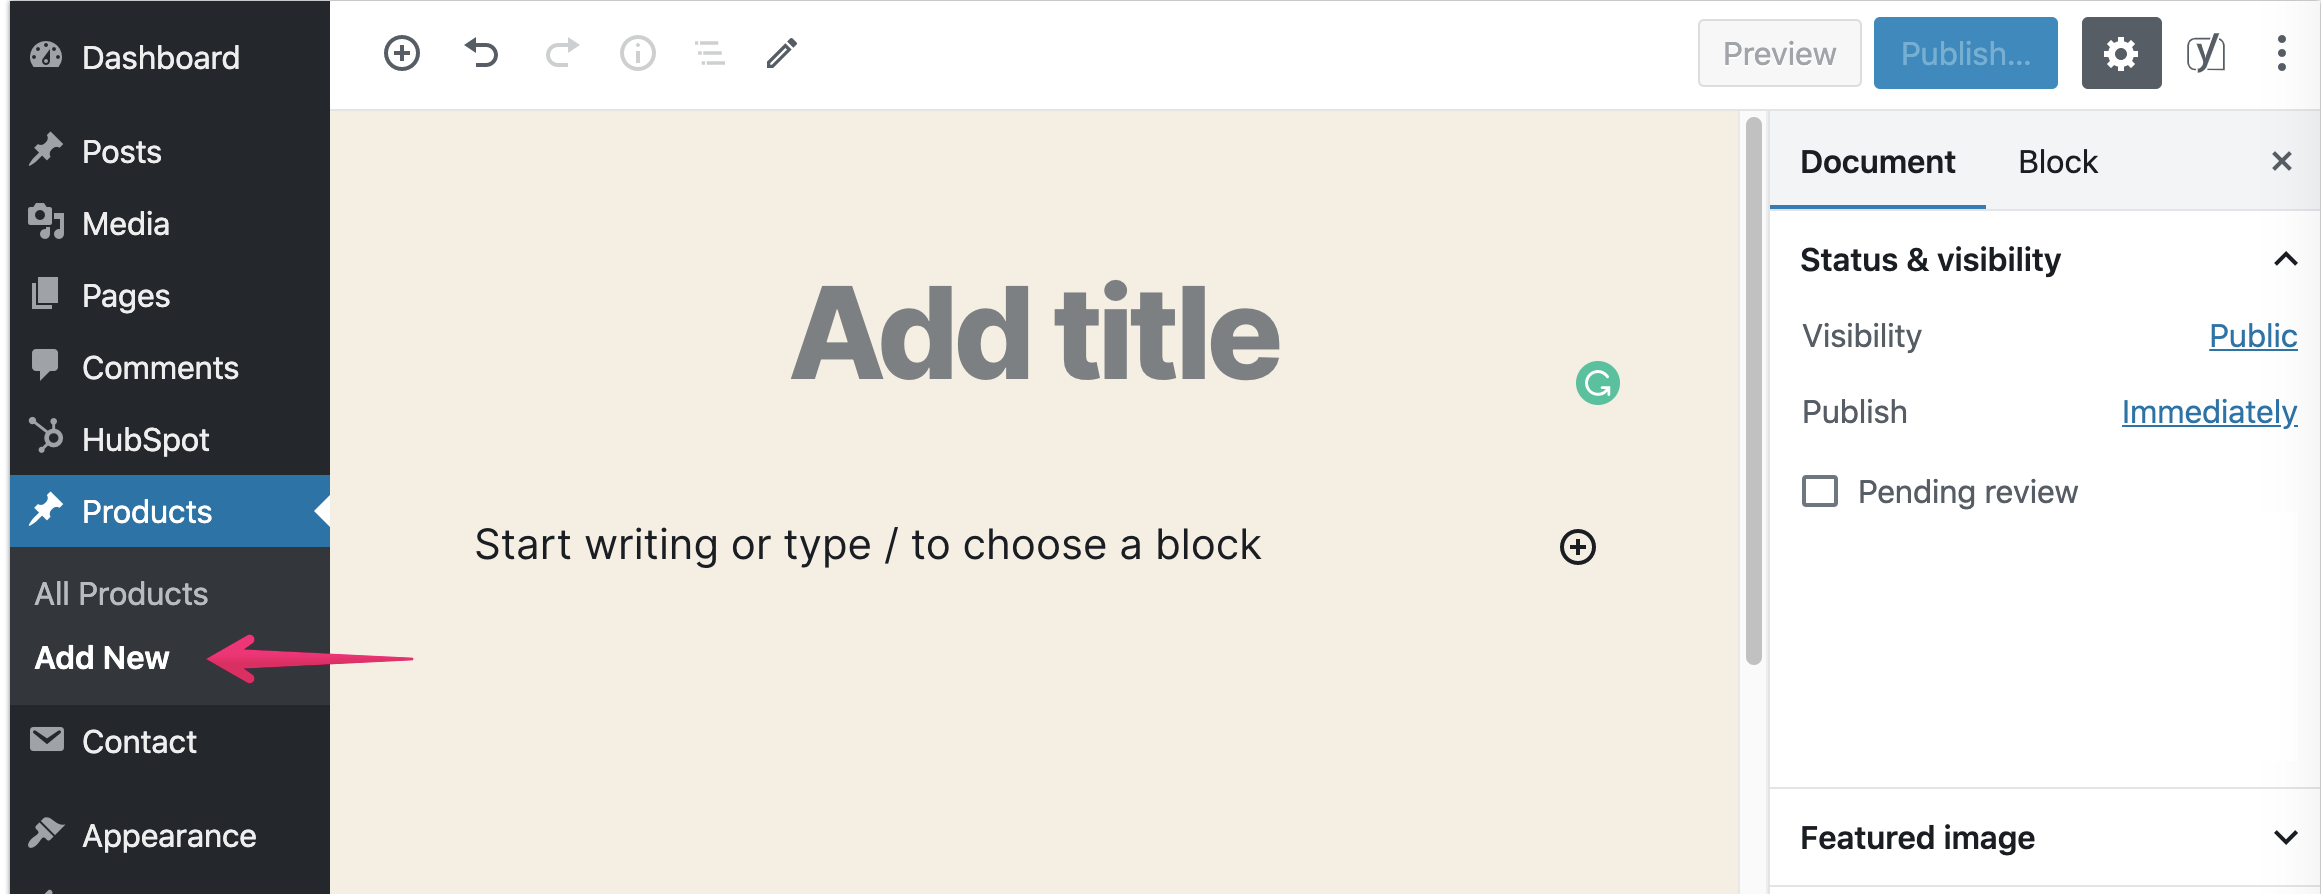
Add product name, price, descriptions, image then publish
Confirm product will be displayed on running WordPress

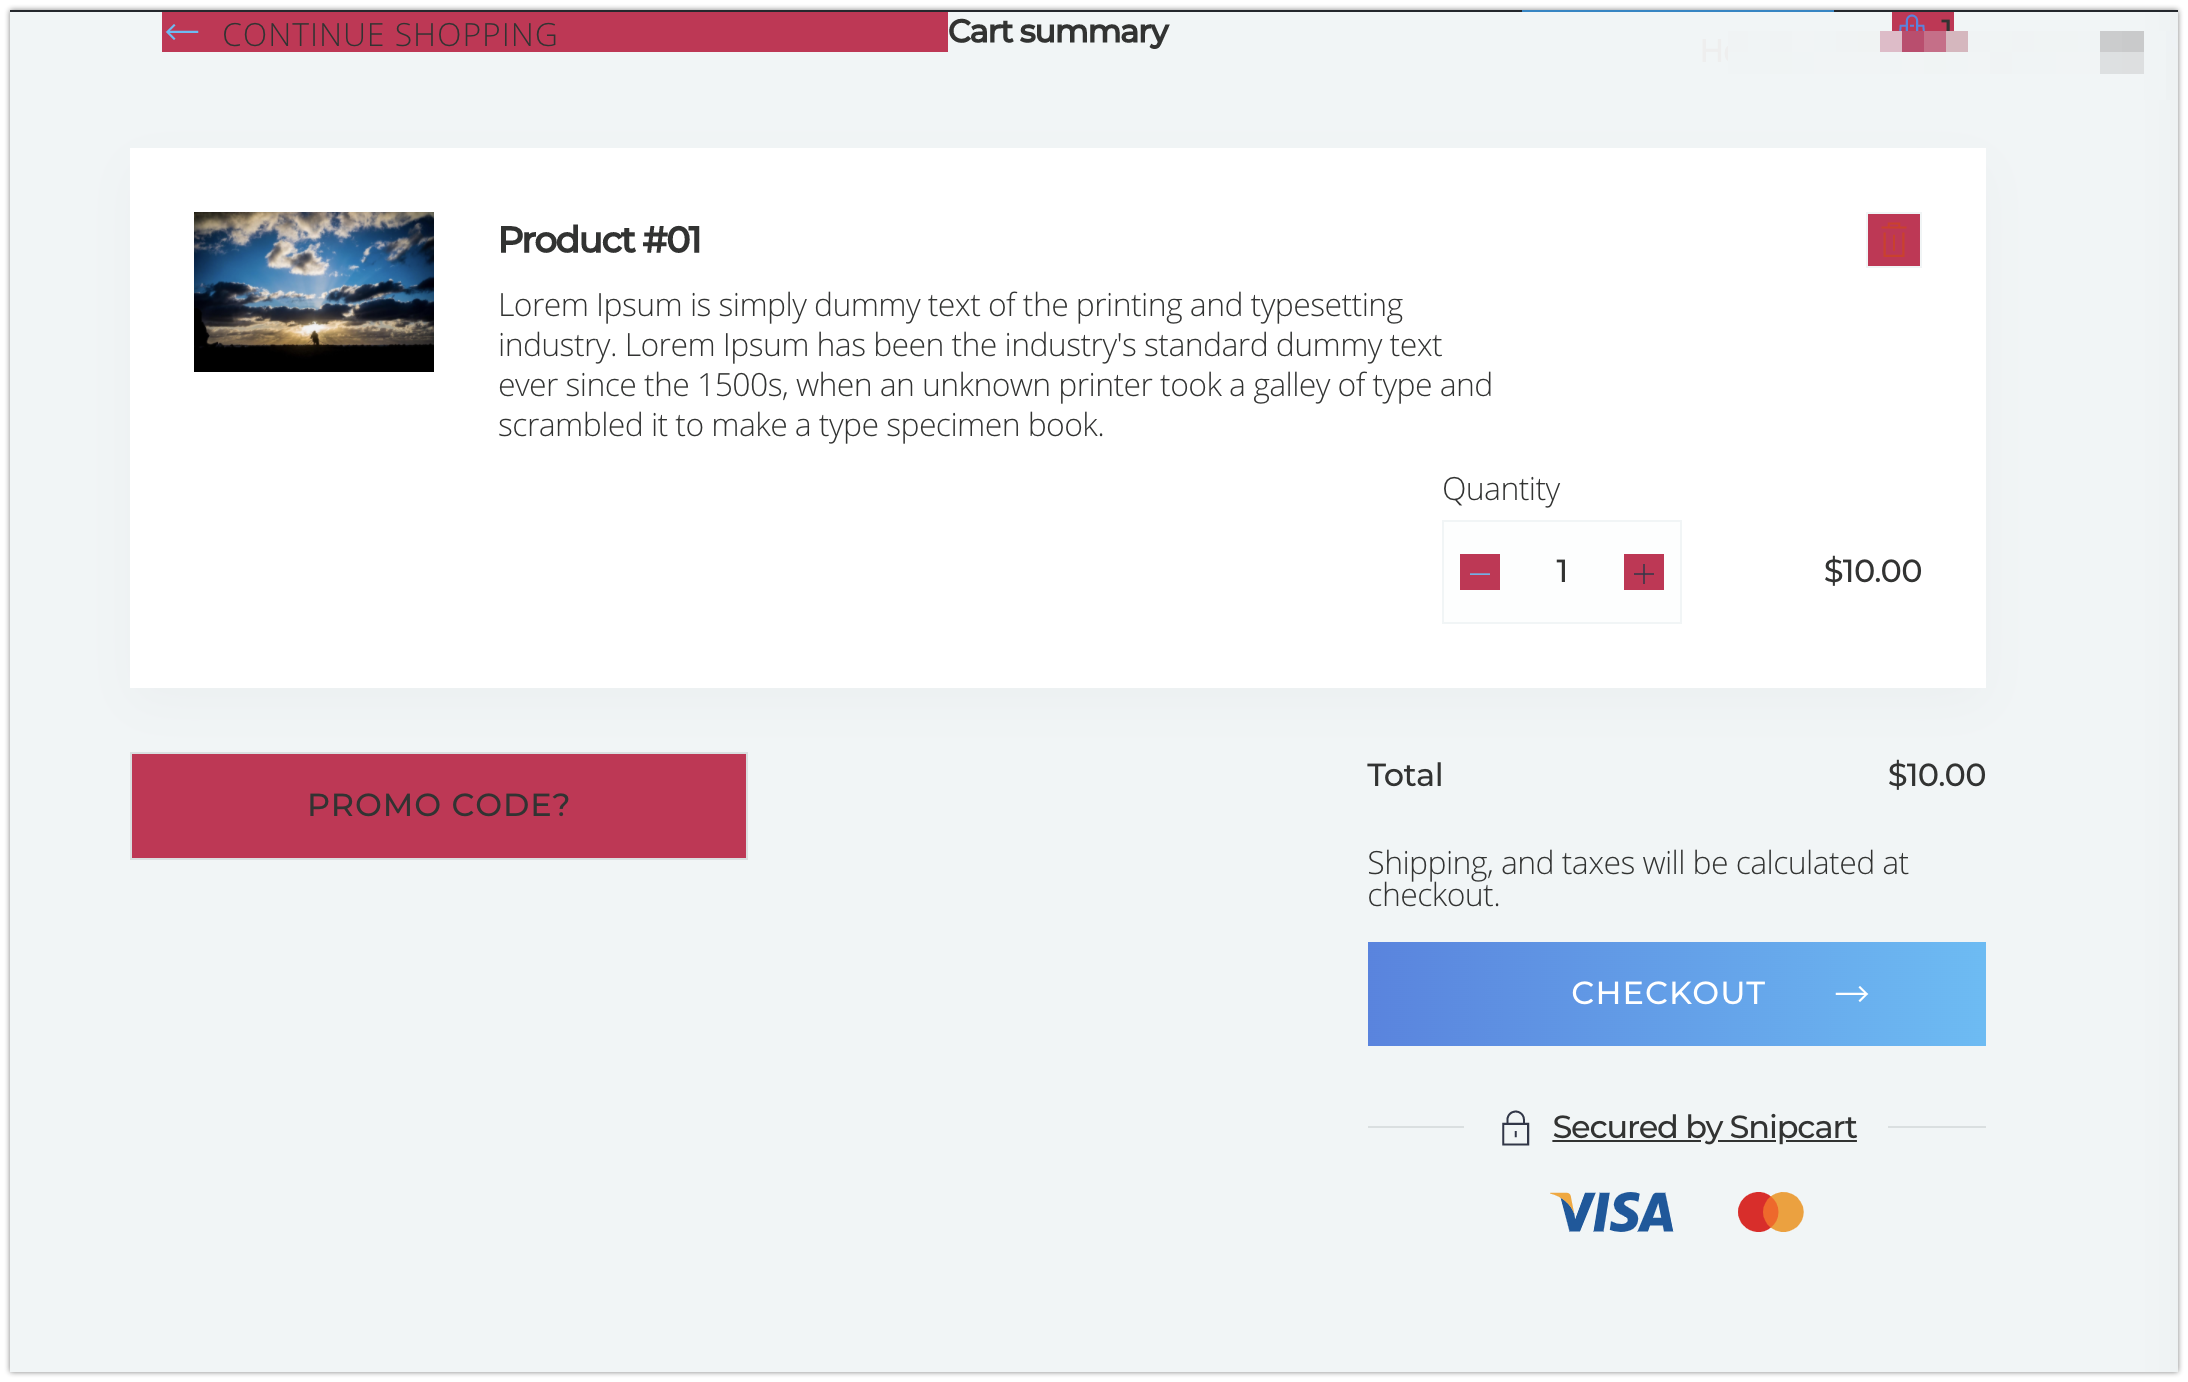
Phase 5. Generate and deploy an artifact
Back to Shifter Dashboard and generate an Artifact
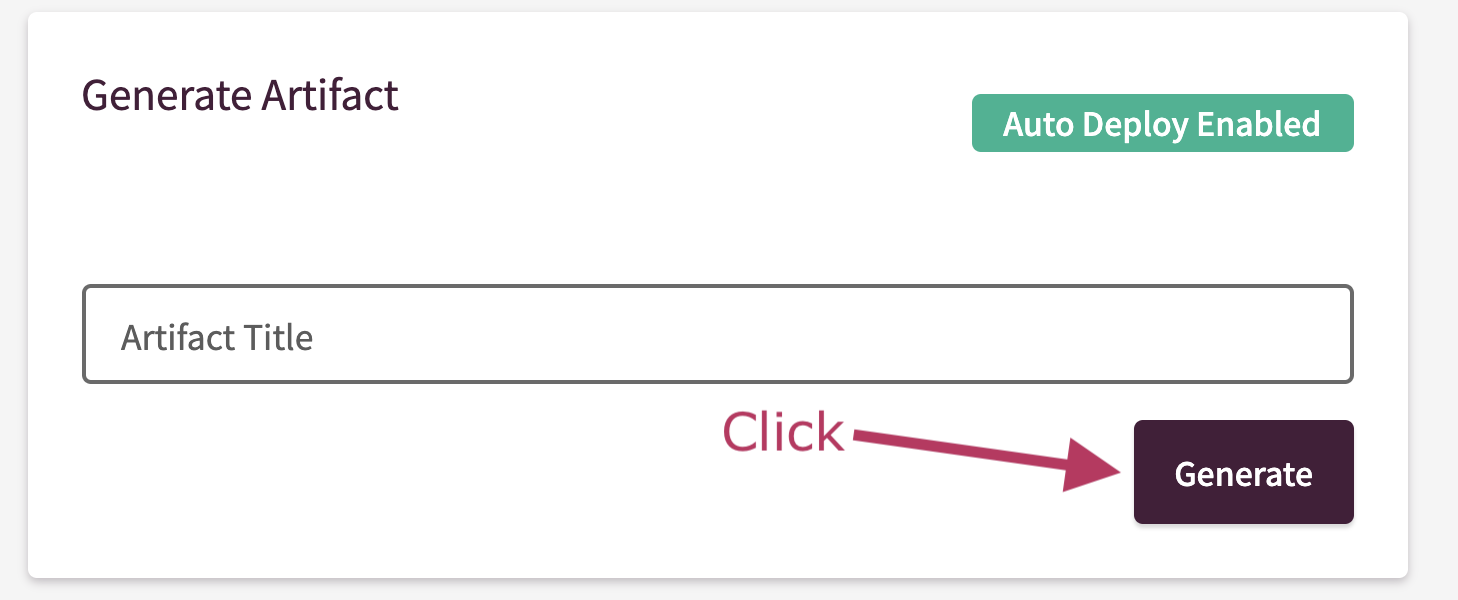
Then, access your Product’s page and confirm it works
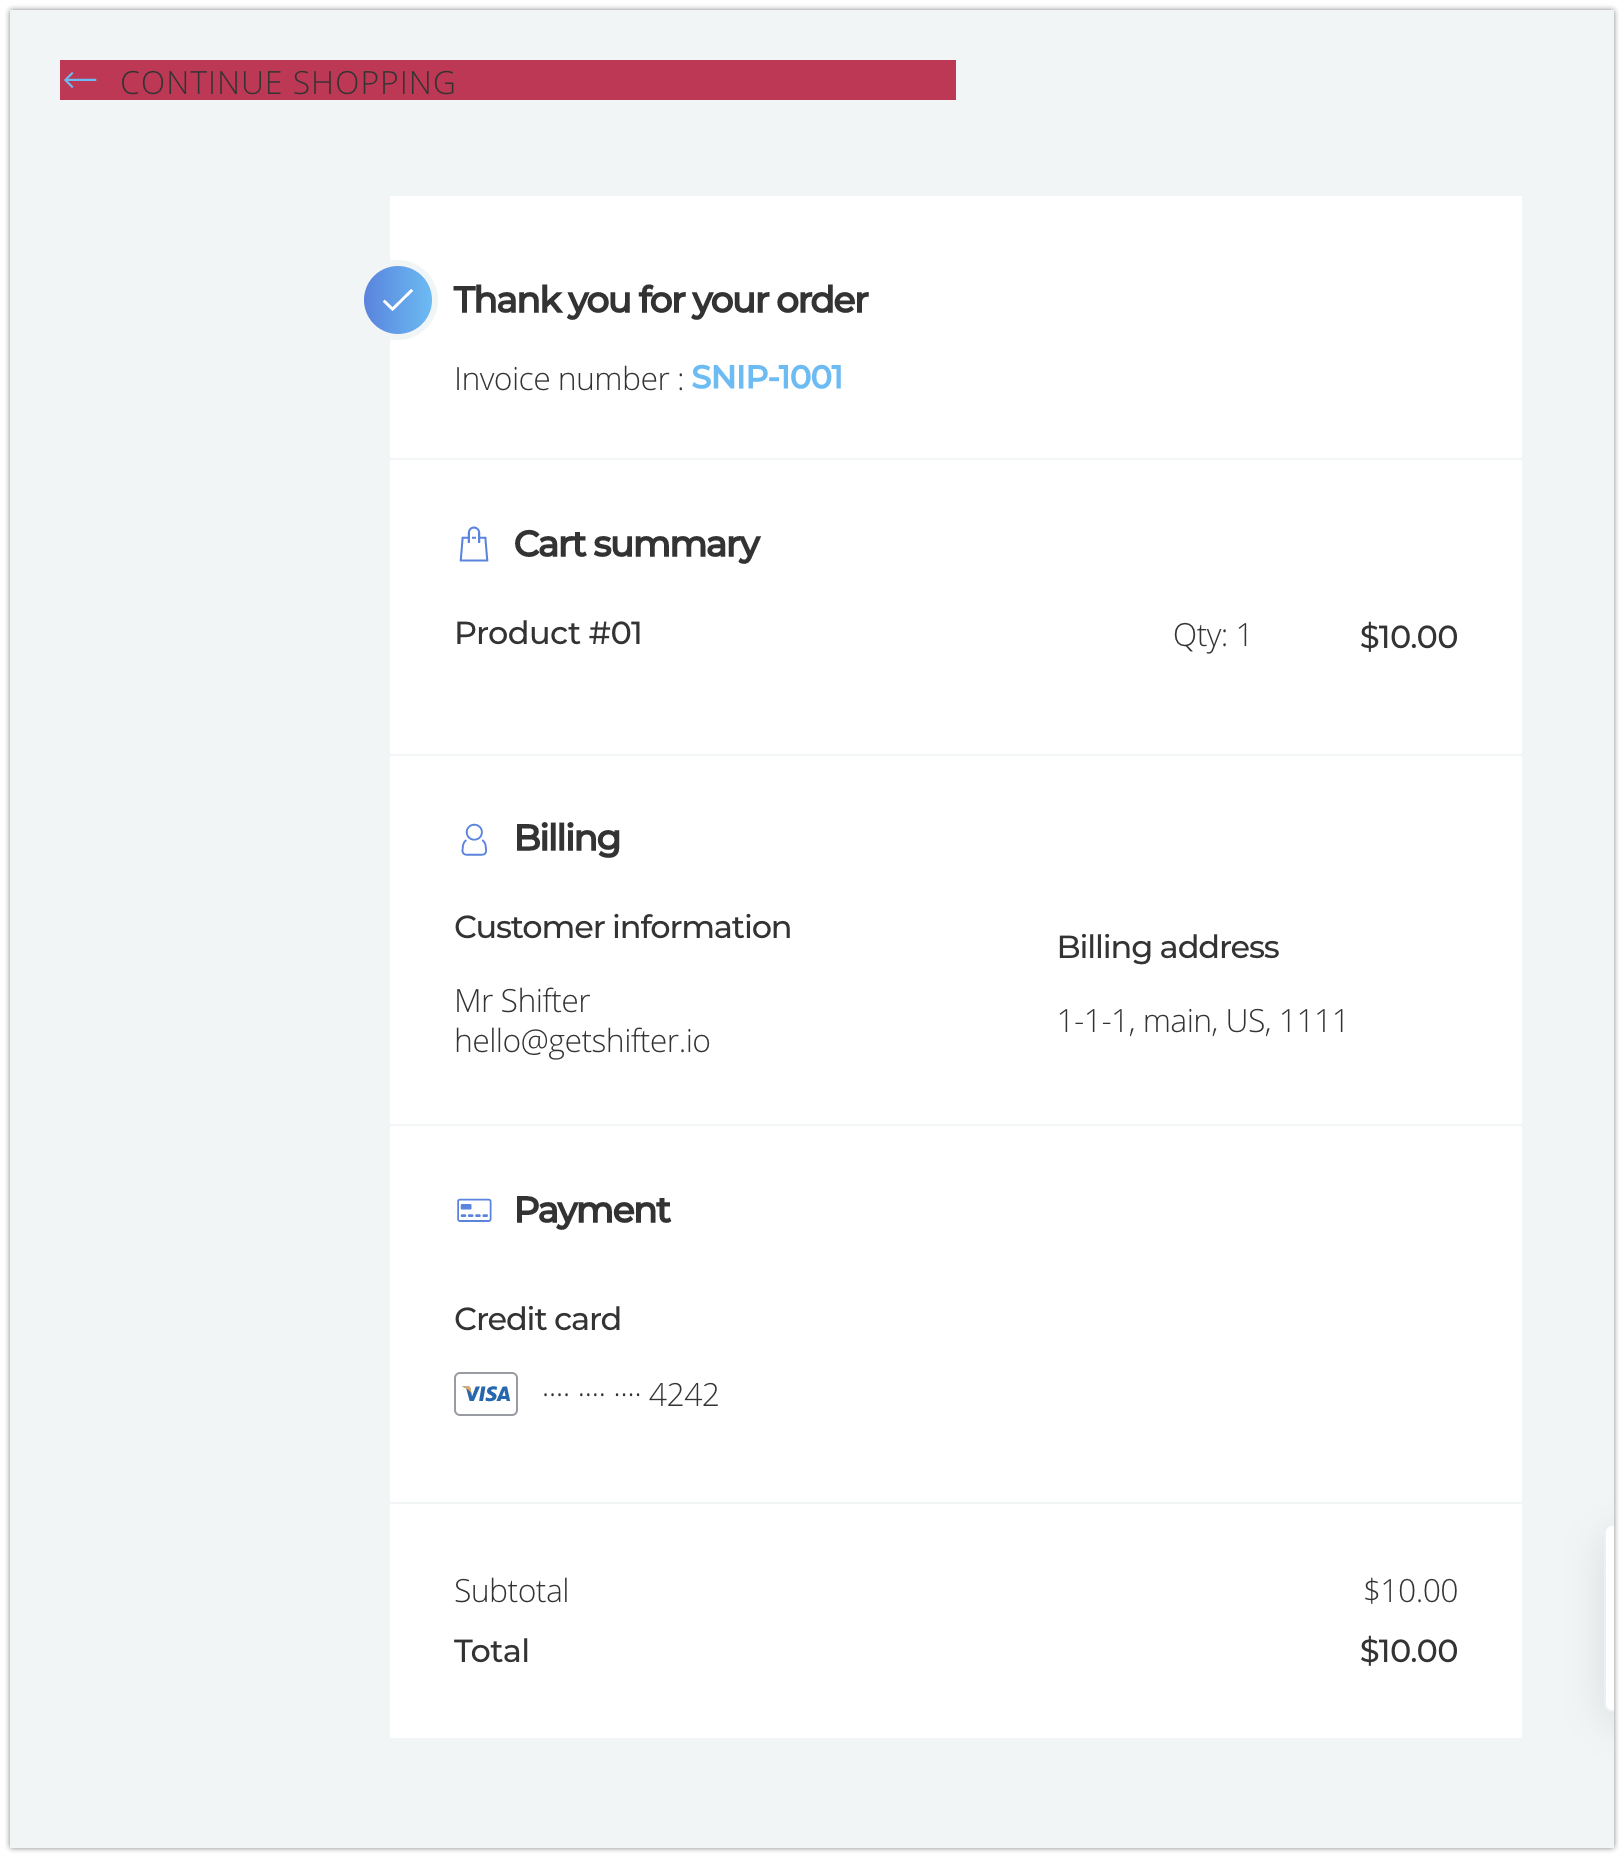
Never forget to check test order.
Navigate to ORDERS on Snipcrt’s Dashboard.
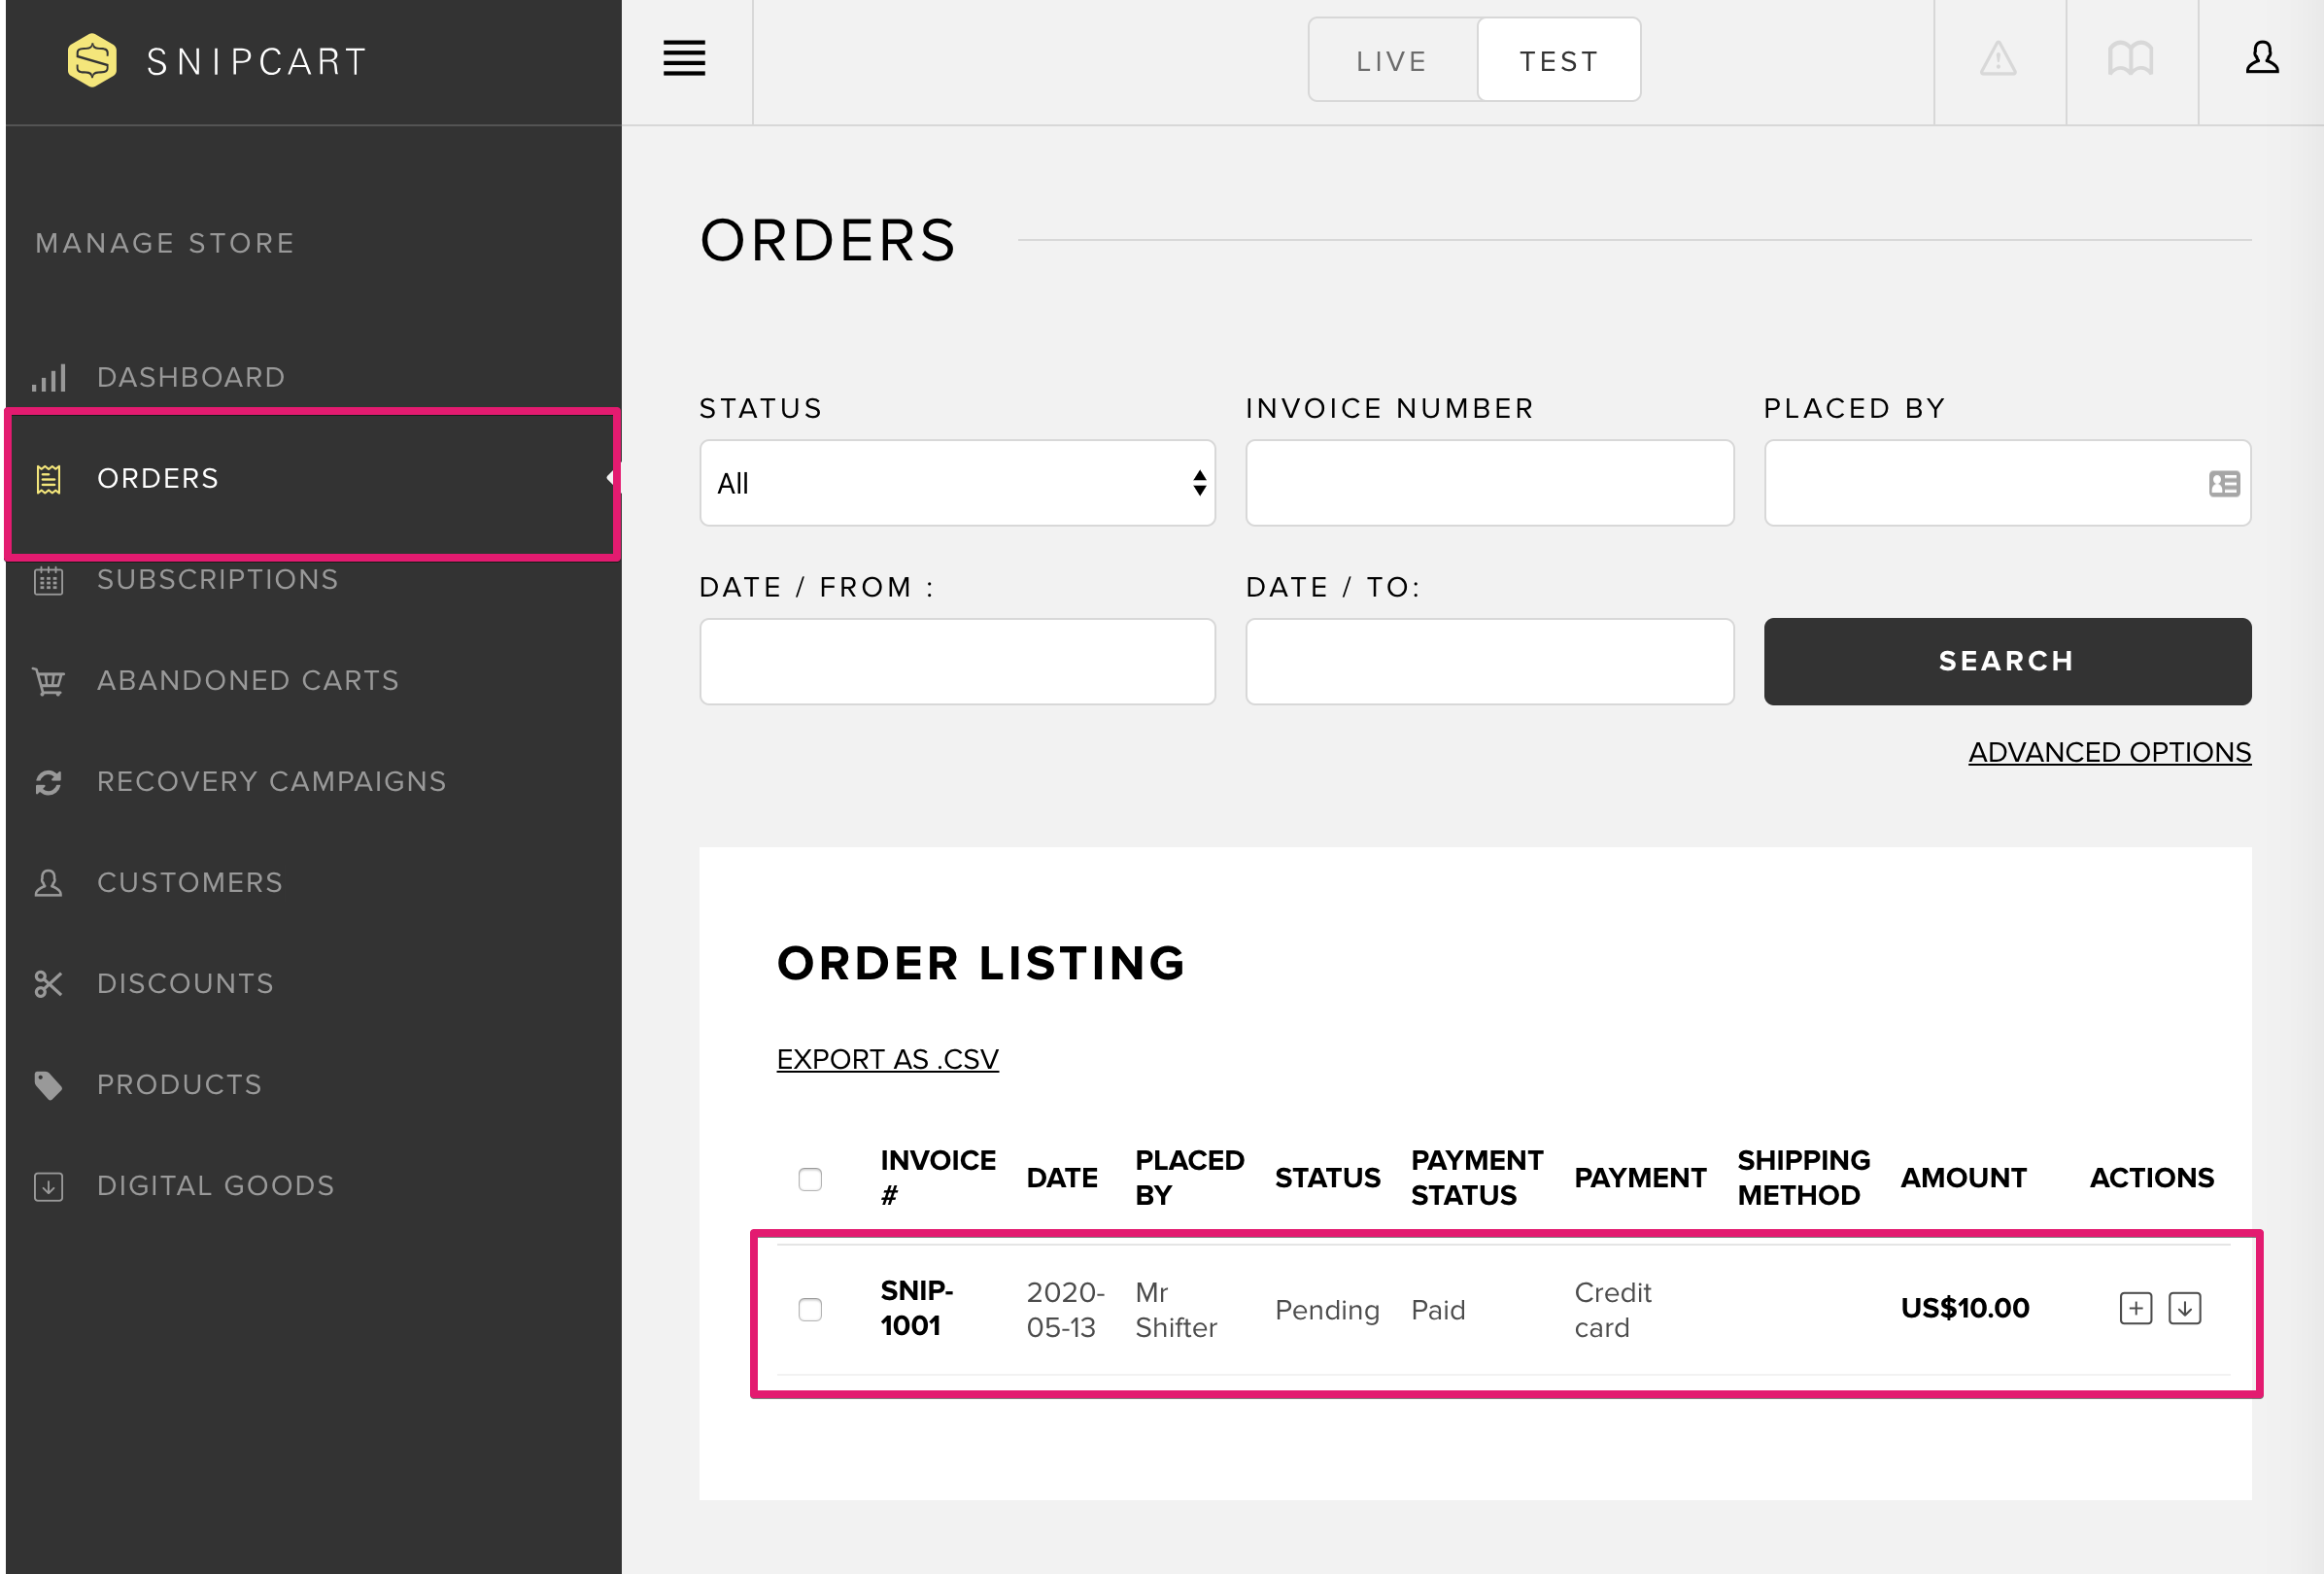
That’s all!