This document is a part three of four articles:
II. Adding verification DNS records
III. Assigning a domain name to the site and create a new artifact
IV. Adding DNS records for production
III. Assigning a domain name to the site and create a new artifact
1. Mak sure the status of the domain is “Ready”
Verification may take a few minutes to 60 minutes. You can click the [Resync DNS Verification Code] button to sync again. Once the domain name is verified, we can attach the domain for use.
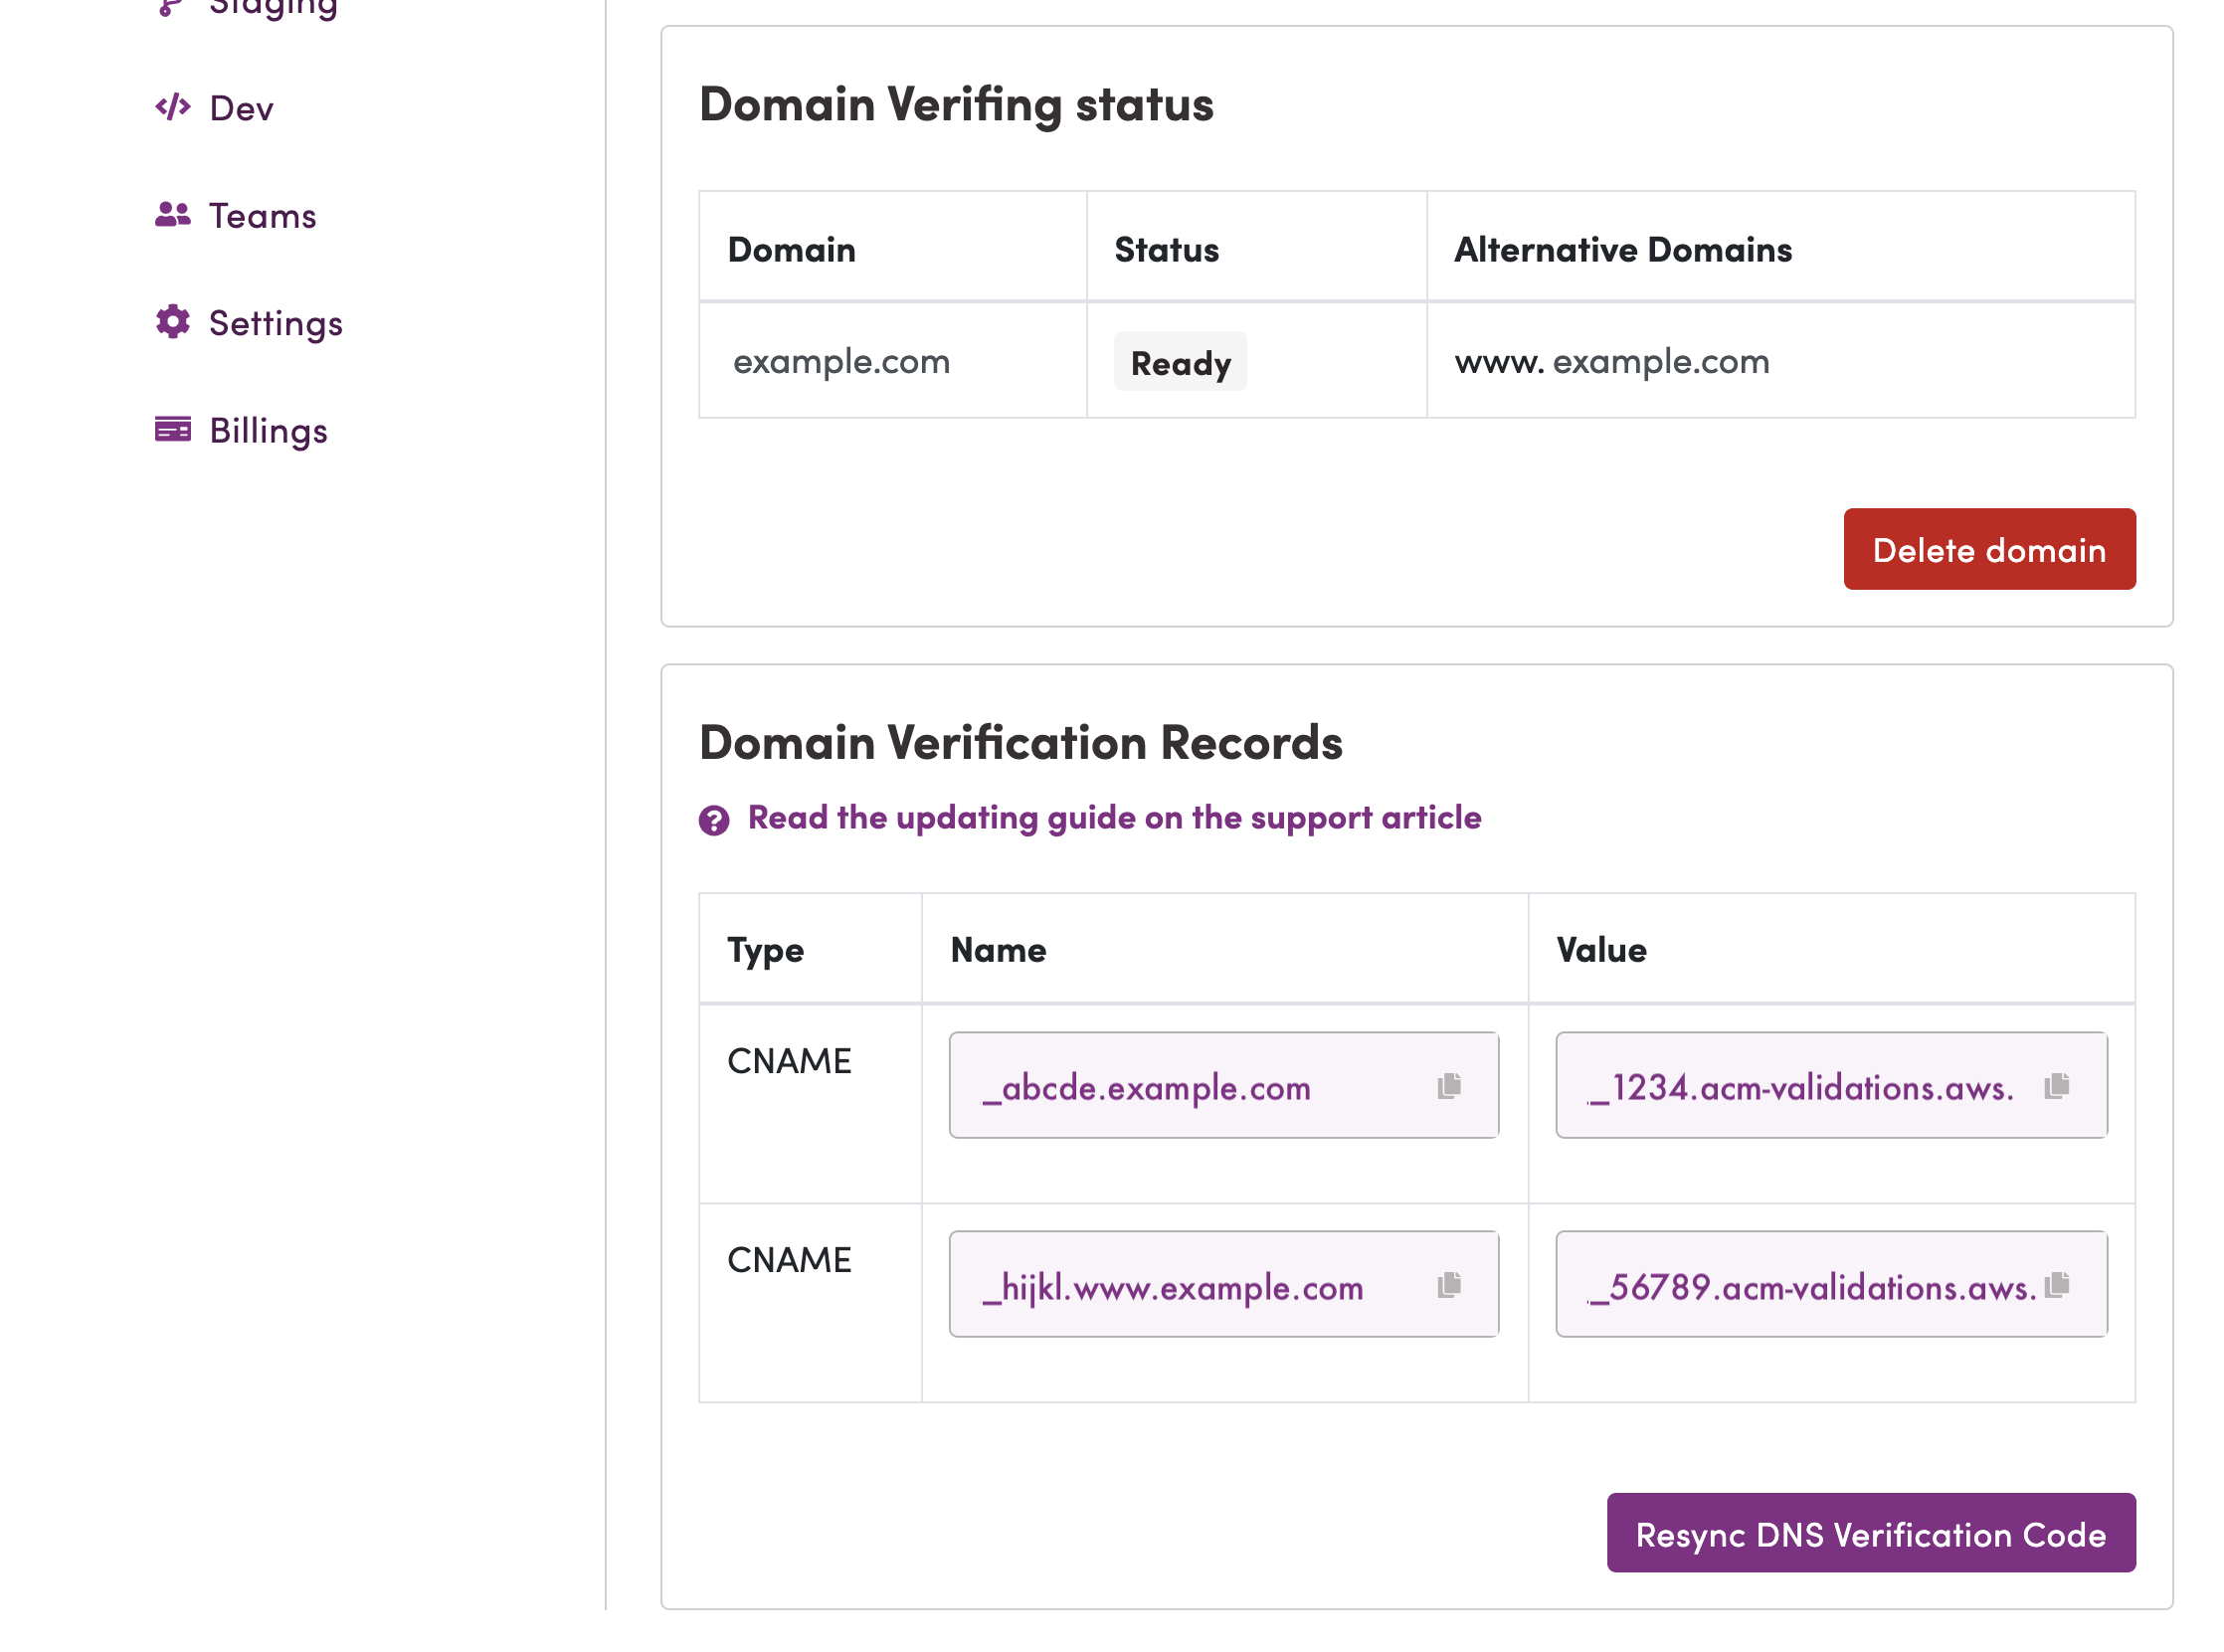
Note: If you fail to validate your domain, make sure the added records to your DNS provider.
As above sample, input record would be _abc123.www, not abc123.www.your-domain.com.
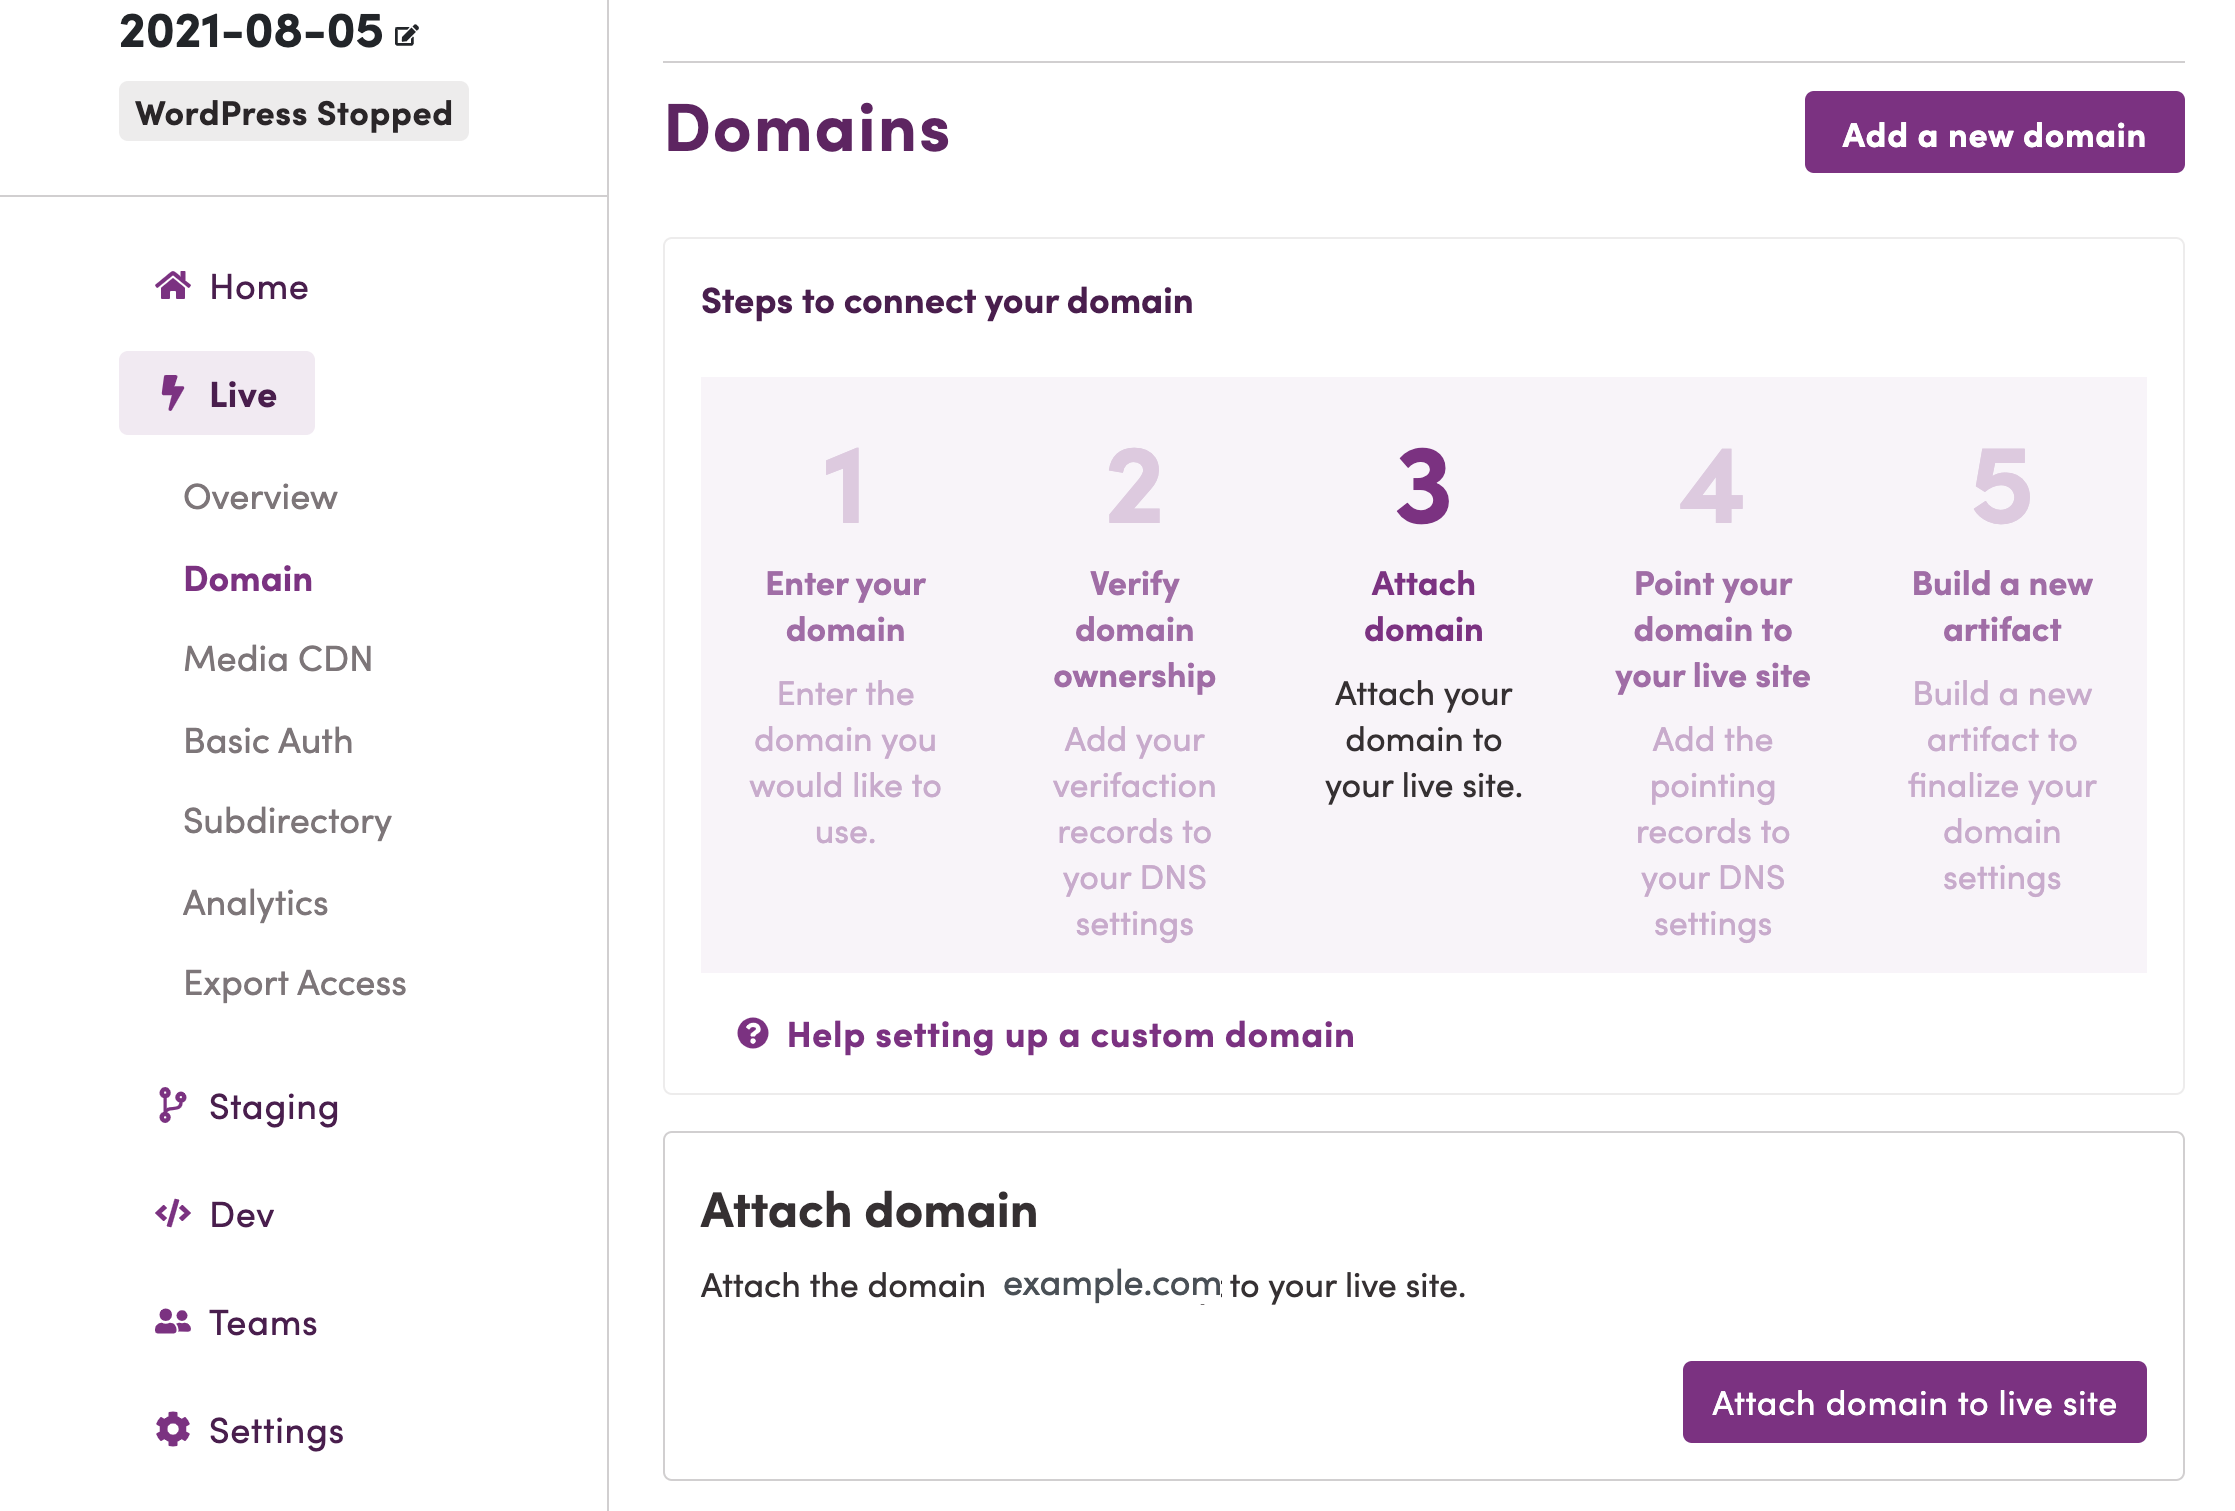
2. Attach your custom domain
Click [Attach domain to live site] button to assign domains to the Site.
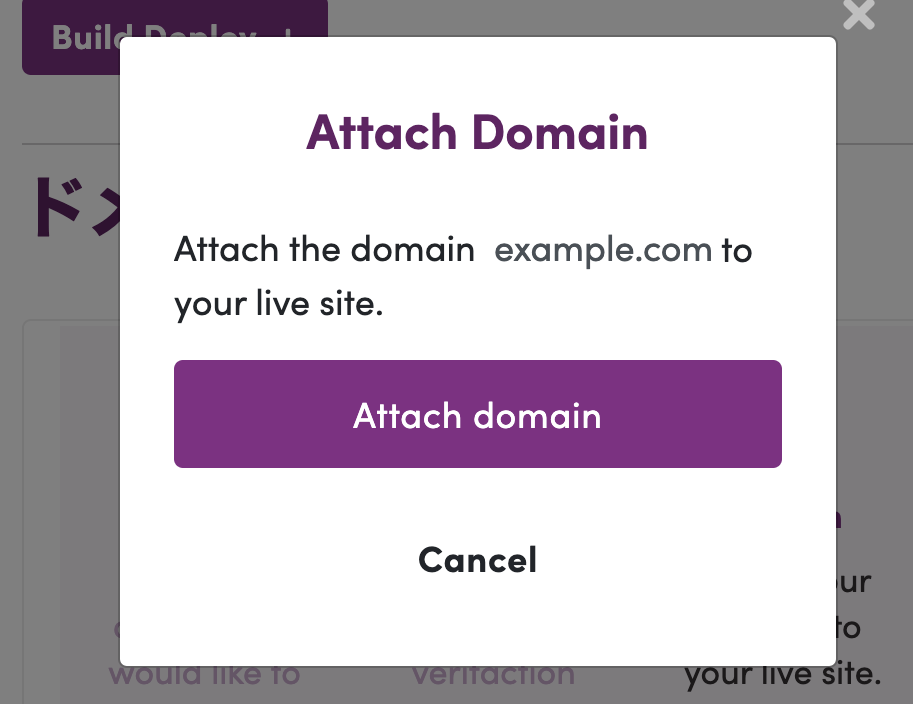
3. Confirm
Click the [Attach domain] button to proceed.
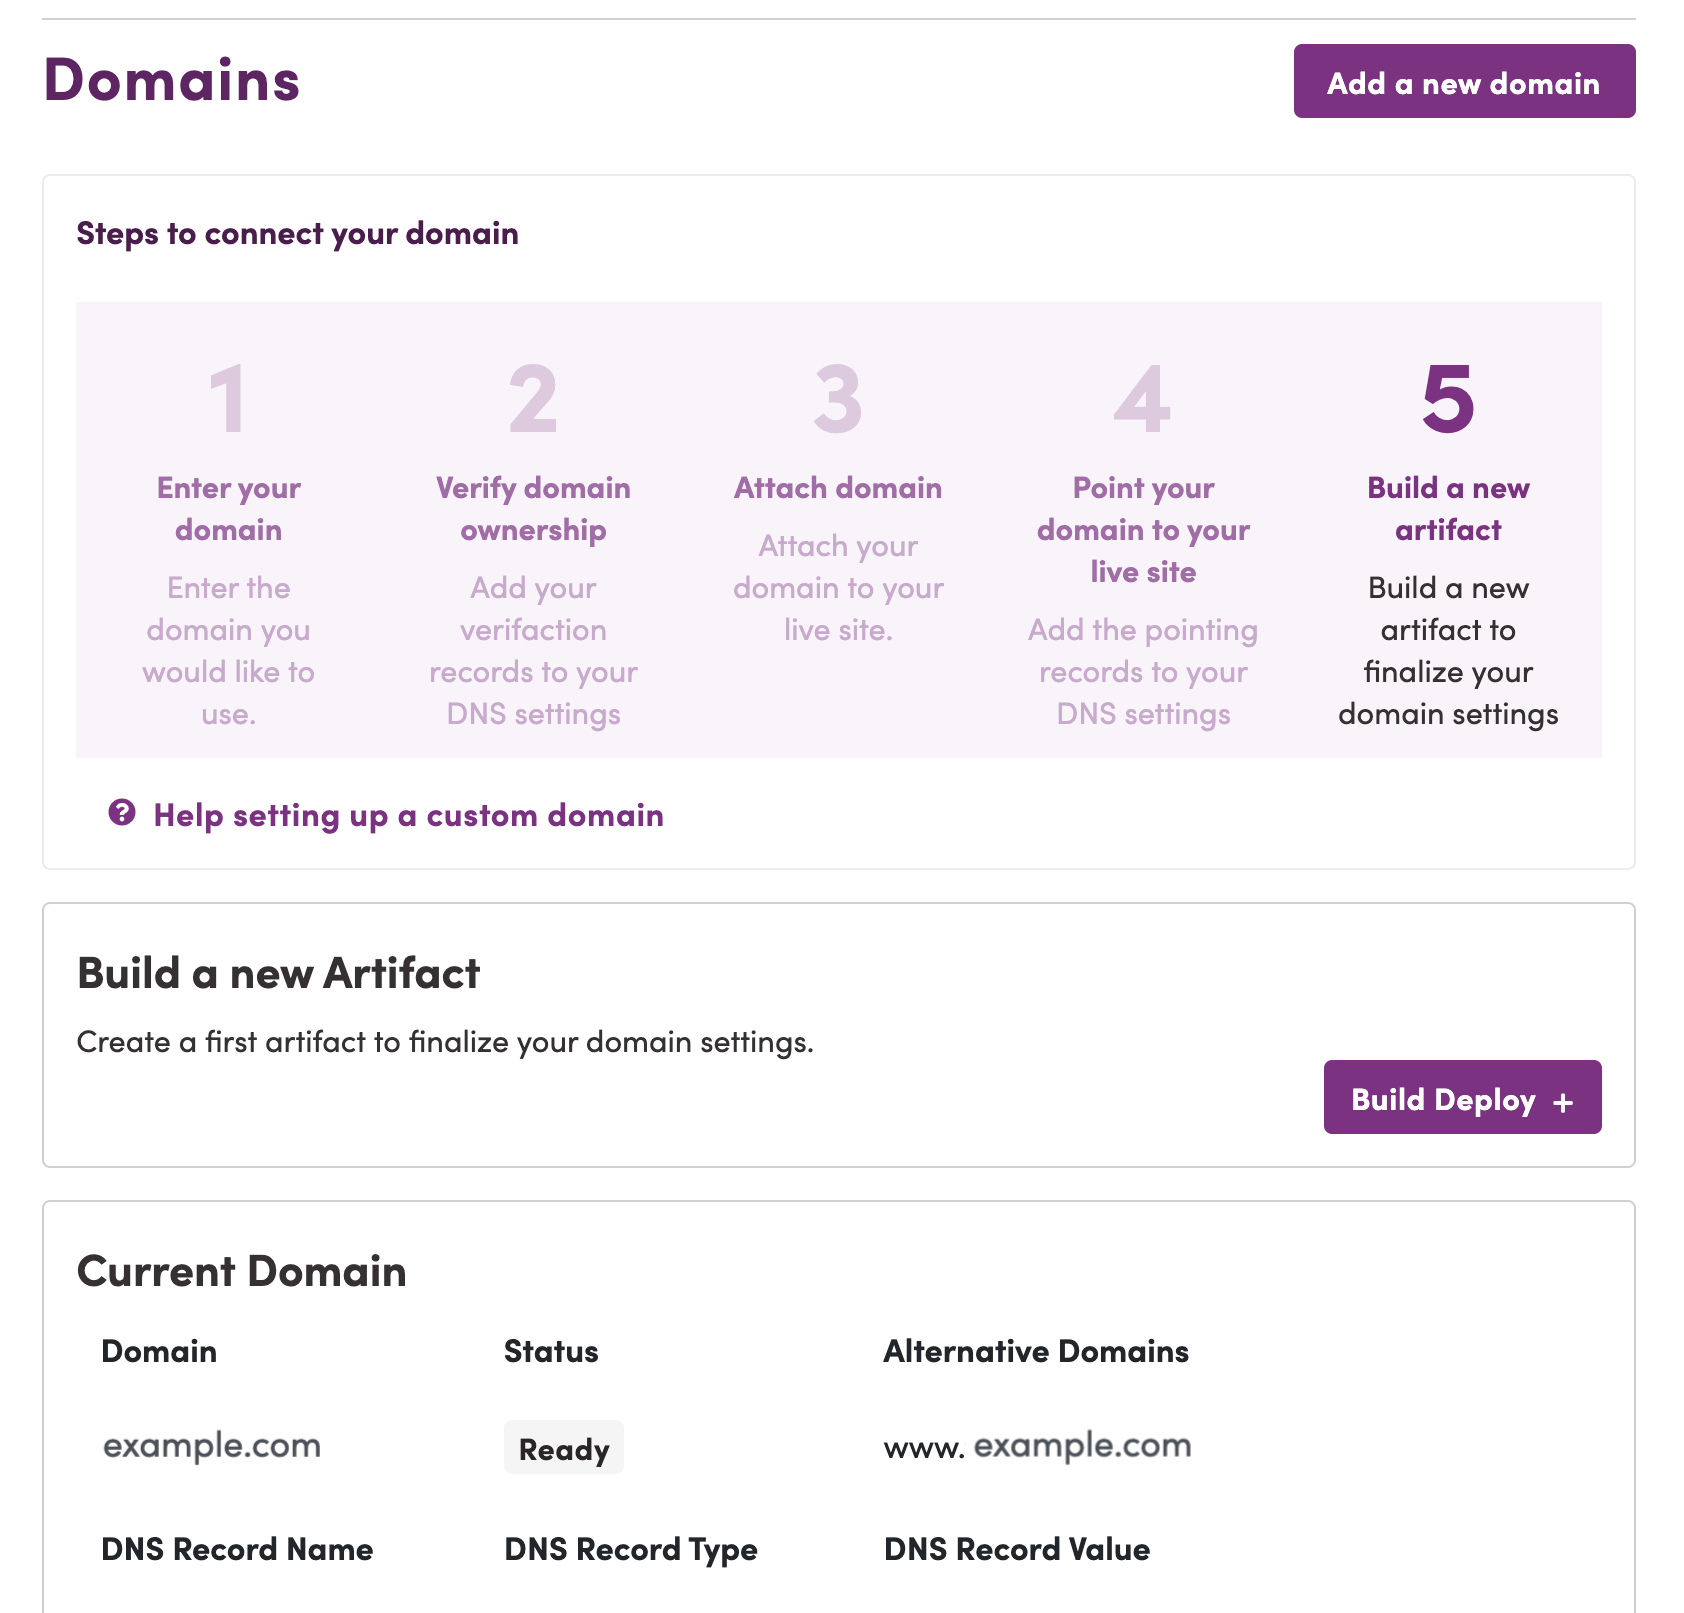
4. Domain name is assigned
5. Copy [Record Value]
Copy [Value] which should be set DNS server as ALIAS and/or CNAME record.

6. Generate domain name applied artifact
Click the [Build Deploy] button to create an artifact.
Next: IV. Add production DNS records to DNS server