
Recently, we’ve been showing you different ways that integrations can be combined with Shifter Headless. We’ve covered some really cool example projects using integrations including Ionic, Microsoft Azure, Frontity, and more. We’ll continue to showcase these integrations by showing you how to create a Jamstack site using Gatsby, AWS Amplify, and Shifter Headless. In this article, we’ll be introducing you to the basics of another integration with Shifter Headless: AWS Amplify. Amplify is a service offered as a part of Amazon Web Services (or AWS) and makes it easy to build secure and scalable modern web applications.
Before you start
We’ll be following along with the official support document for developing Shifter Headless website with Gatsby and deploying to AWS Amplify Console. Be sure to check the doc for full instructions and more details.
Before we begin, take some time to sign up and familiarize yourself with the following services.
For this project, we will be using Gatsby for our front end, Shifter Headless as our headless CMS, and AWS Amplify for Hosting. We’ll use Shifter Headless to import any WordPress site data from the WordPress API. Then, we’ll create a new Gatsby site for and deploy it using AWS Amplify.
Let’s try it out!
Install Gatsby CLI
If you haven’t yet, install Gatsby CLI and its dependencies in your local environment.
$ npm install -g gatsby-cli
Please note that NodeJS is required to install Gatsby.
Start Shifter Headless and Prepare Your Data Source
Choose an existing Shifter Headless site or create a new one. If you need to create a new site, you can find instructions on how to do so by using our official support guide.
Next, log in to the WordPress dashboard and prepare your content. We’ll be using sample data from WordPress theme unit test project.
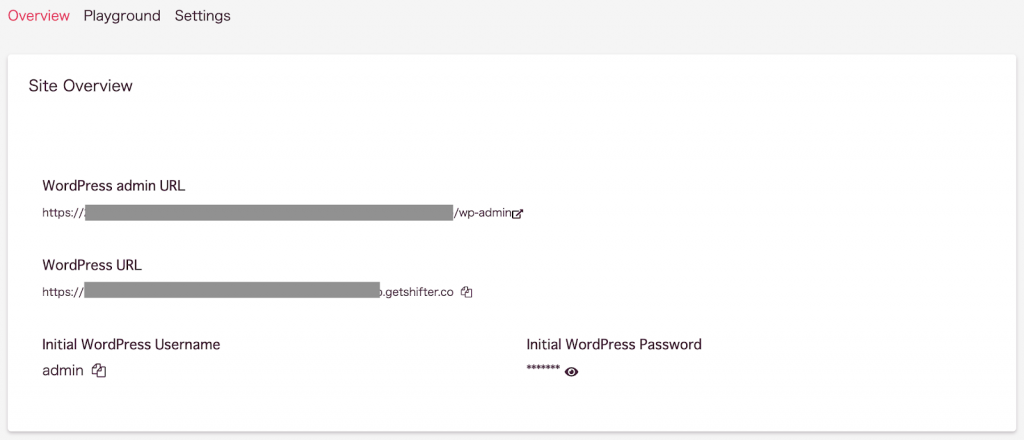
Make note of the admin, WordPress URLs, and credentials for your Shifter Headless site.
Create a new Github repository
You can find full instructions on setting a new Github repository here.
Once you’ve created your new repository, clone our example project with the following command.
$ git clone git@github.com:YOUR-GITHUB-USERNAME/Shifter-Headless-Amazon-Amplify-Console.git ./Shifter-Headless-Amazon-Amplify-Console``
or
$ git clone https://github.com/YOUR-GITHUB-USERNAME/Shifter-Headless_Amazon-Amplify-Console.git
Set Up AWS Amplify Console
Log in to AWS Console by clicking the “Connect App” button.
Once you log in, you’ll be asked which service you would like to connect. We’ll be using Github for this project.
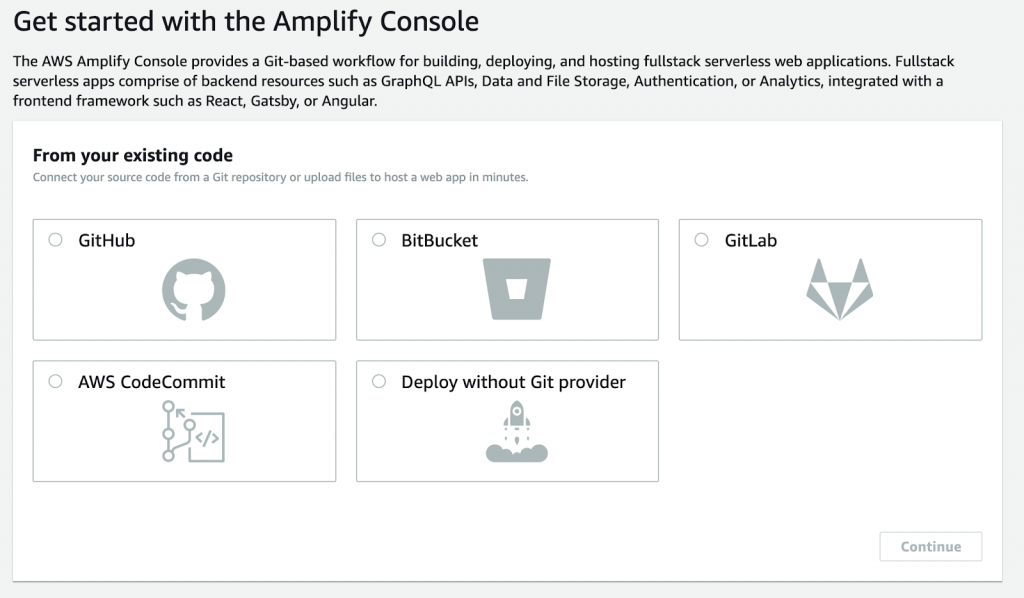
Authorize AWS Amplify to access your Github account if necessary.
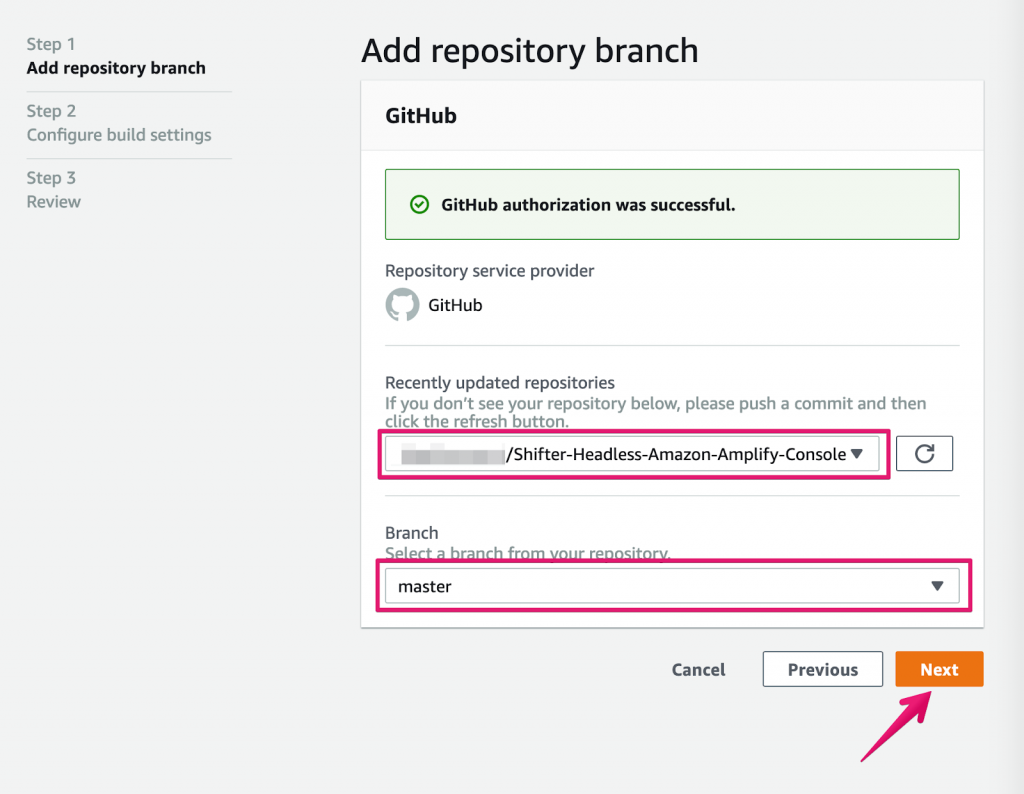
Add your repository branch and click Next.
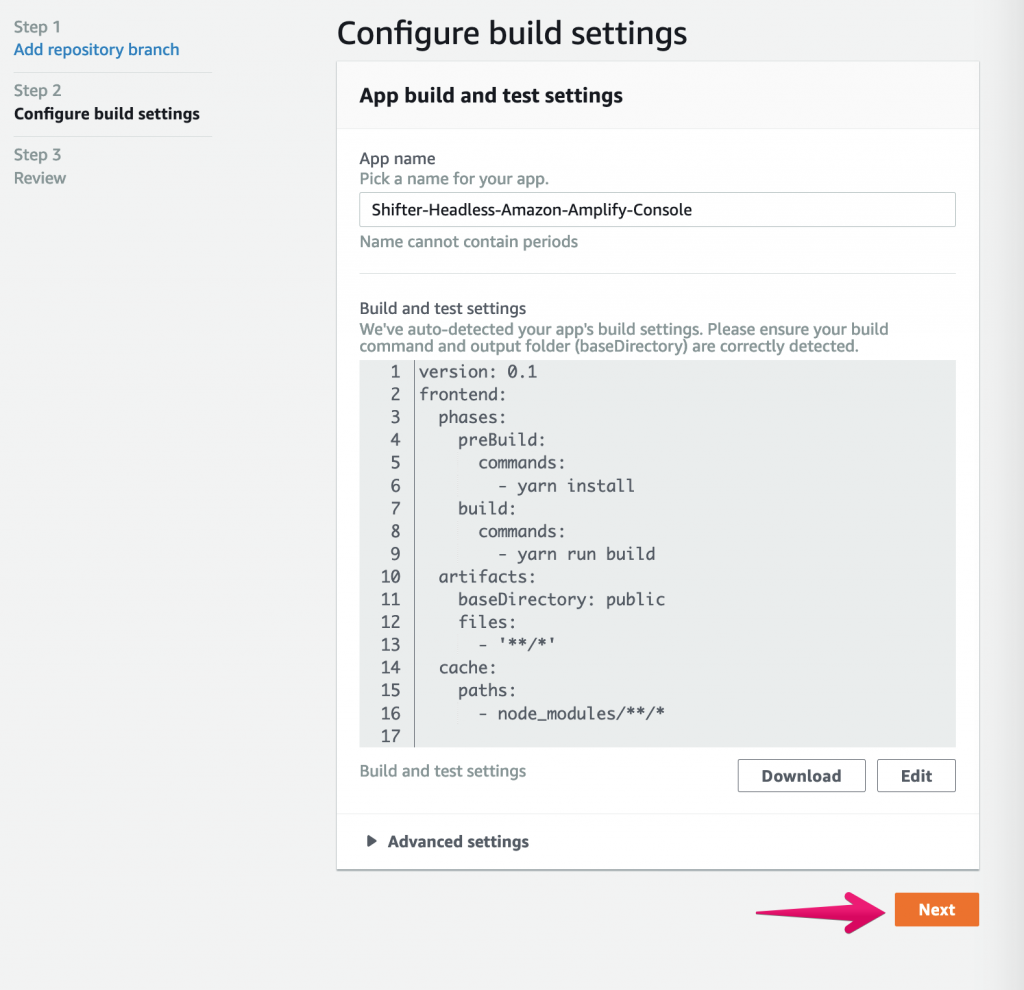
Configure build settings and click Next
Finally, check save and click deploy to complete the first deployment.
Actions have been Installed and the initial build has started
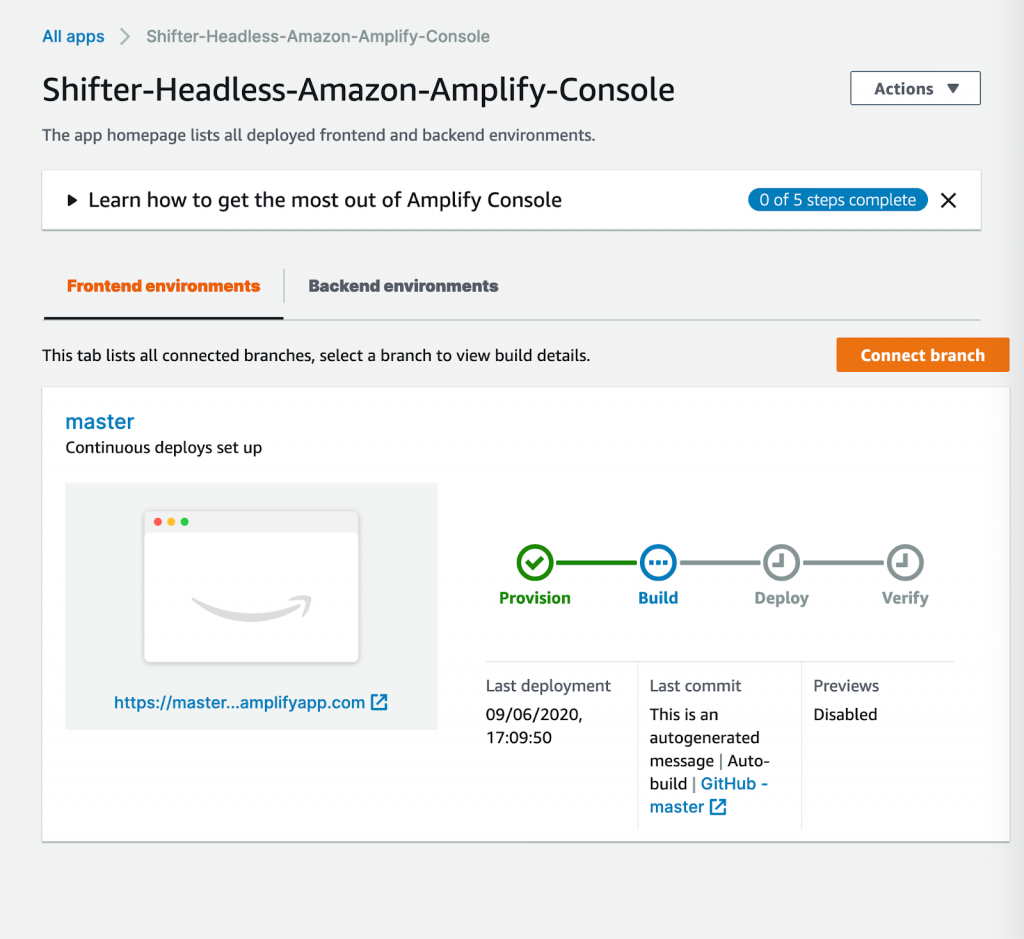
After a while, the build will finish and you will see a confirmation screen.

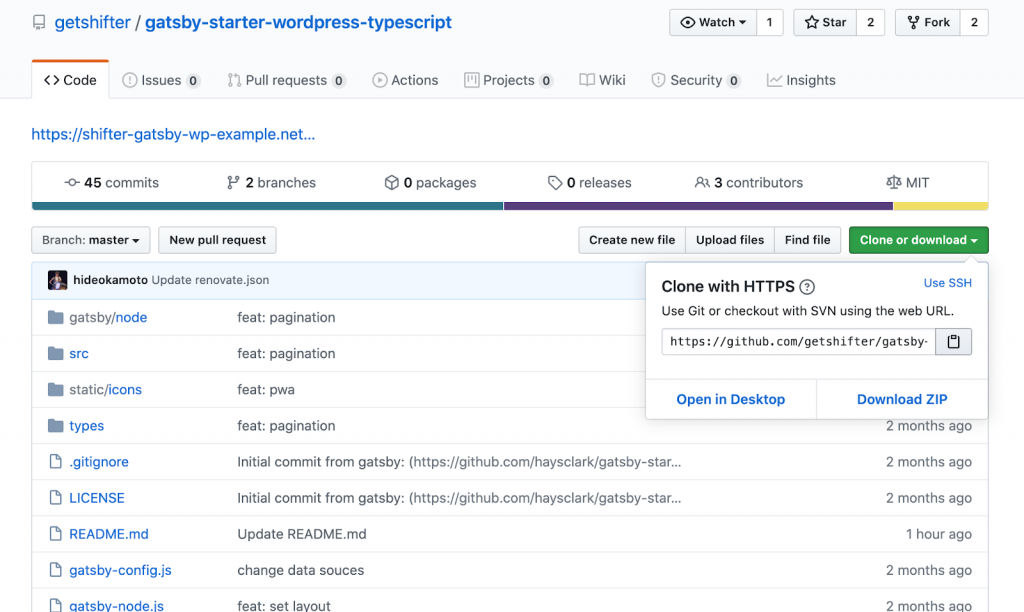
Fork the Gatsby Starter template
We’ve prepared a Gatsby starter template in advance. Go ahead and fork our Gatsby starter template from our Github repository.
Edit Your Gatsby-Config file
In your Gatsby files, you will find a file called gatsby-config.js.
Go ahead and open this file and make the following changes.
First replace the baseURL with your WordPress URL that you copied earlier.
baseURL baseUrl: "YOUR-WORDPRESS-URL.getshifter.co",
Next, update the searchAndReplaceContentUrls section with your WordPress URL
// Search and Replace Urls across WordPress content.
searchAndReplaceContentUrls: {
sourceUrl: "https://YOUR-WORDPRESS-URL.getshifter.co"",
// replacementUrl: "https://localhost:8000",
},
Commit your changes and check them.
$ git add .
$ git commit -m "update gatsby-config.js
"$git push origin / master
Run the following command to start the server
$ gatsby develop
You can now view gatsby-starter-wordpress-typescript at ://localhost:8000/ in your browser.
And, you can explore your site’s data and schema at http://localhost:8000/___graphql
Note that the development build is not optimized for production. To create a production build, check your local version for errors and use Gatsby build to put your site into production.
Prepare your site for deployment
Once you’ve confirmed that your site is running error free, stop your local server by pressing ctrl+C.
Next, create your static files with the following command
$ gatsby build
Add the GitHub URL as a remote URL for your config file:
$ git add remote origin git@github.com:YOUR -GITHUB-USERNAME/Shifter-Headless-Amazon-Amplify-Console.git
or
$ git add remote origin https://github.com/4hiroramos/Shifter-Headless_Amazon-Amplify-Console.git
commit the file and access the repository.
$ git add
$ git commit -m "My first commit”
Deploy your site to AWS Amplify
Back on your AWS console, check to make sure all deploy processes have completed. Then, click View App Settings from the Actions drop down menu.
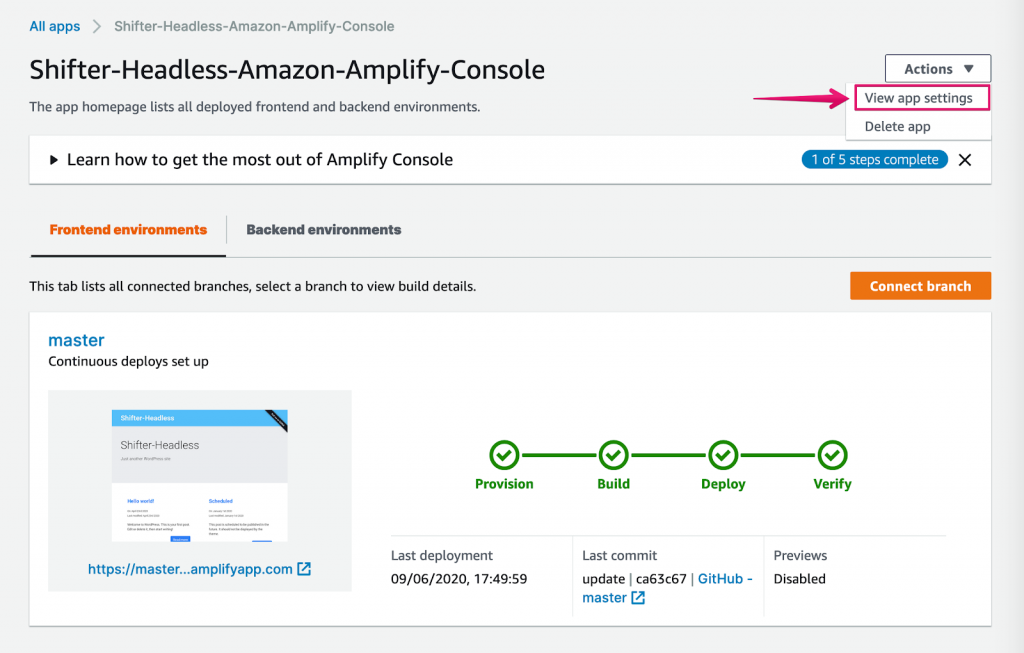
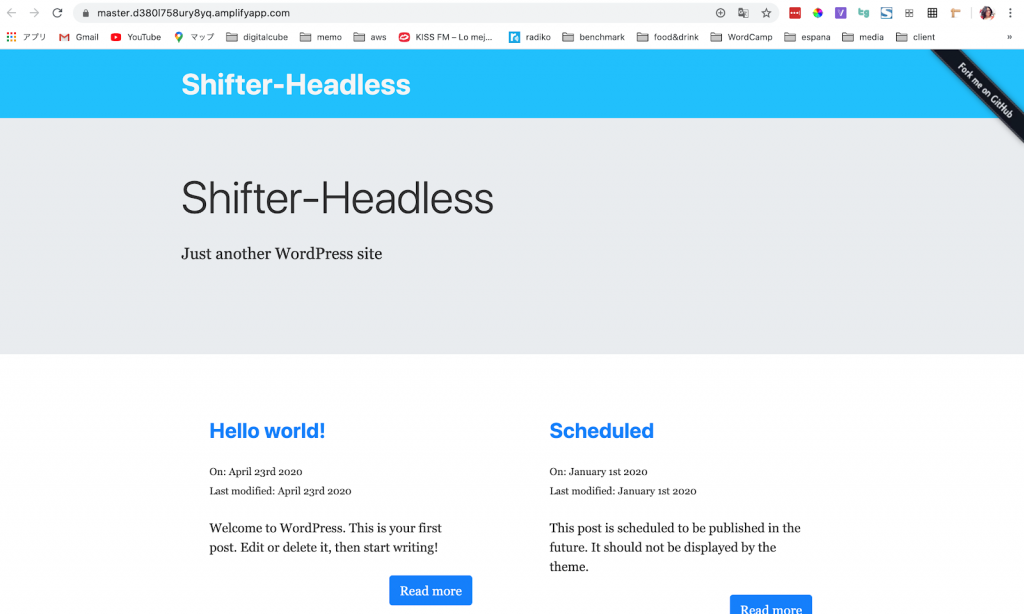
Click Production branch URL to view your build results.
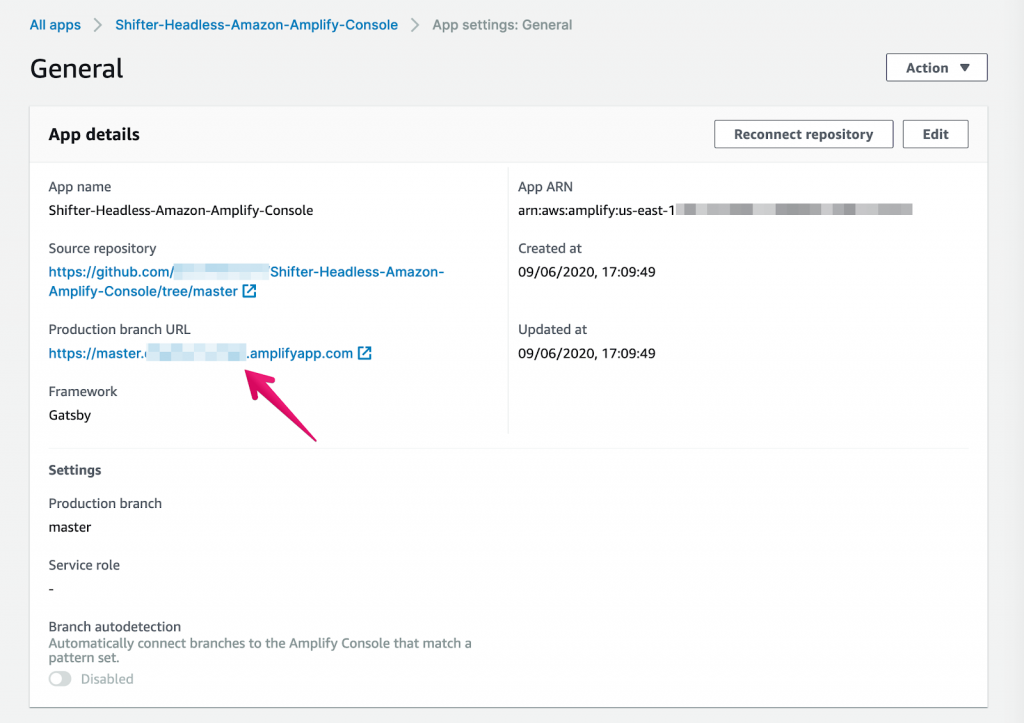
Your production branch URL is now live.
Additional Tips
Add a Deploy to Amplify Console button.
If you’re using AWS Amplify, an easy way to collaborate with a team is by adding a deploy button to your project’s repository.
Once data has been updated using Shifter Headless, your team can click the Deploy button from your project repository, making it easy to trigger new builds on AWS Amplify.
Check out the Options Menu
The AWS Amplify options menu is where you’ll find everything you need to customize your project. From this menu you can do things like attach a custom domain to your site, get notified when builds complete, enable pull request previews, and more.
Wrap up
If you decide to give this tutorial a try, contact us through social media or support chat and let us know how it goes. Your feedback drives our development, so we look forward to hearing from you.
Thanks for using Shifter!
